
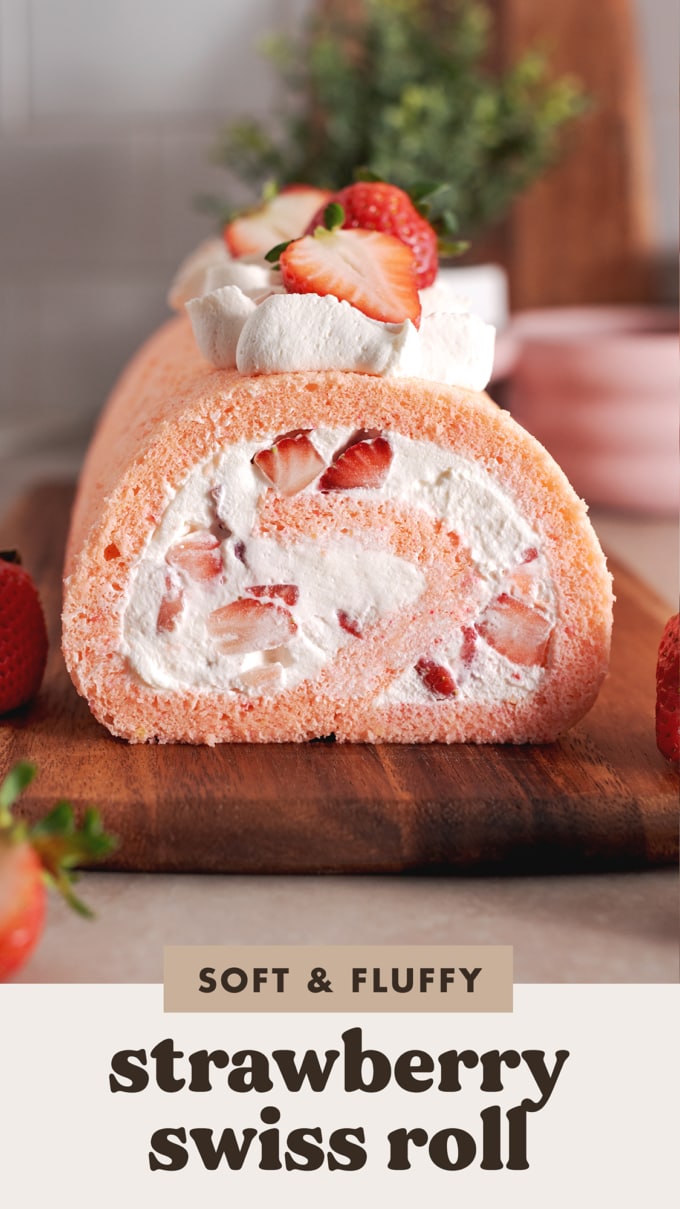
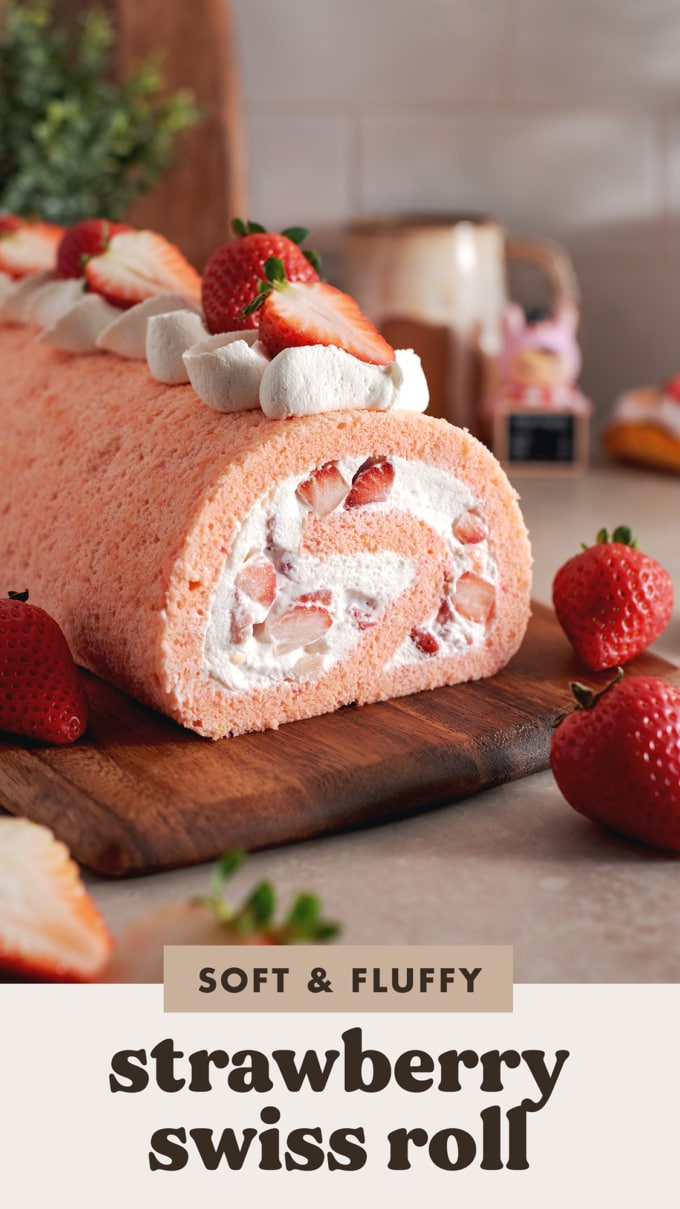
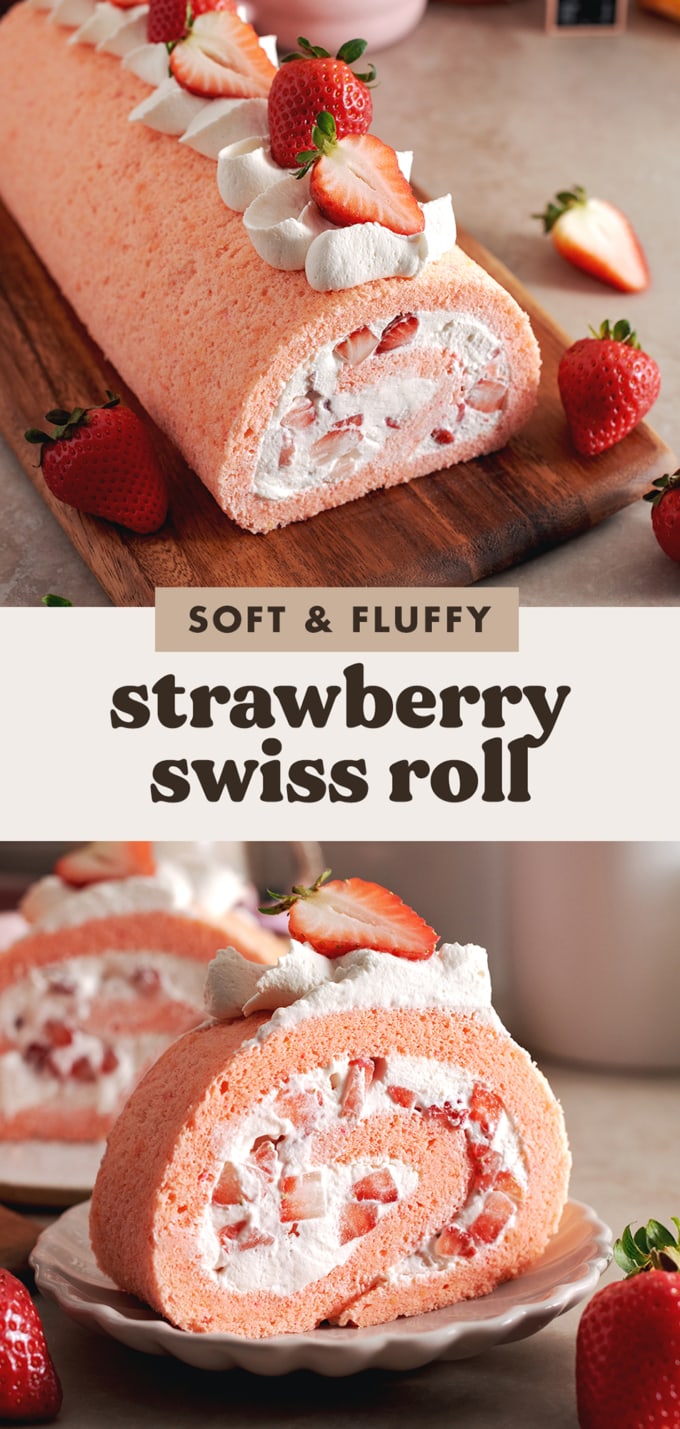
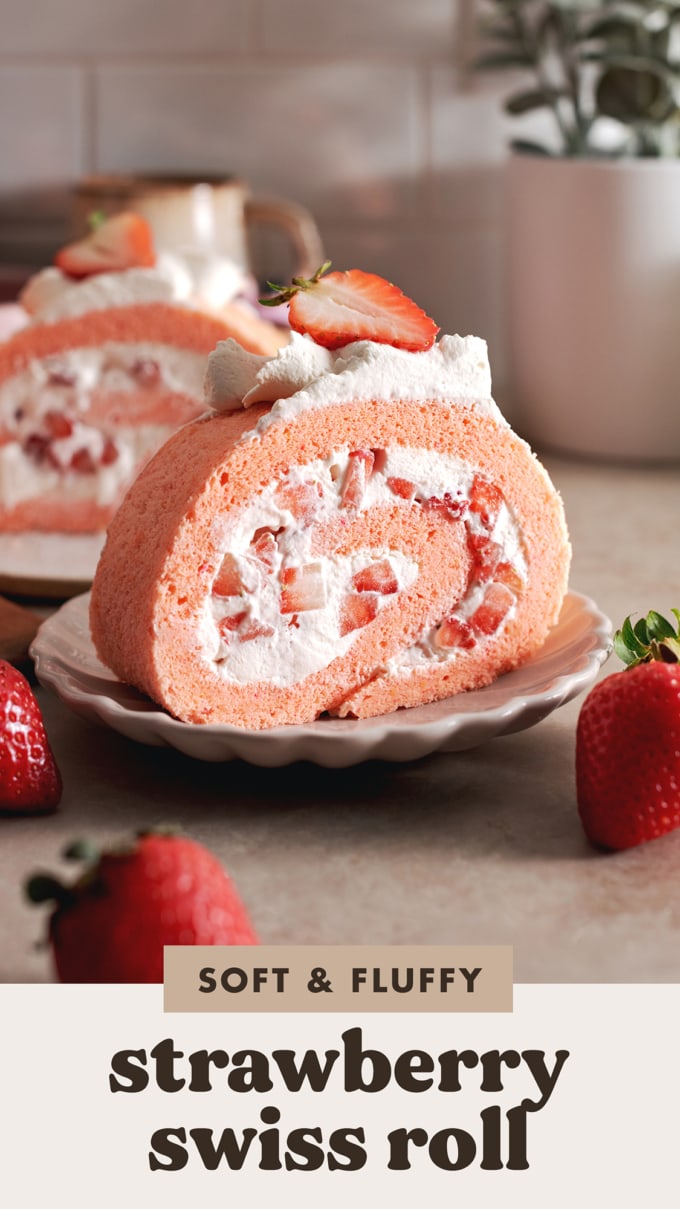
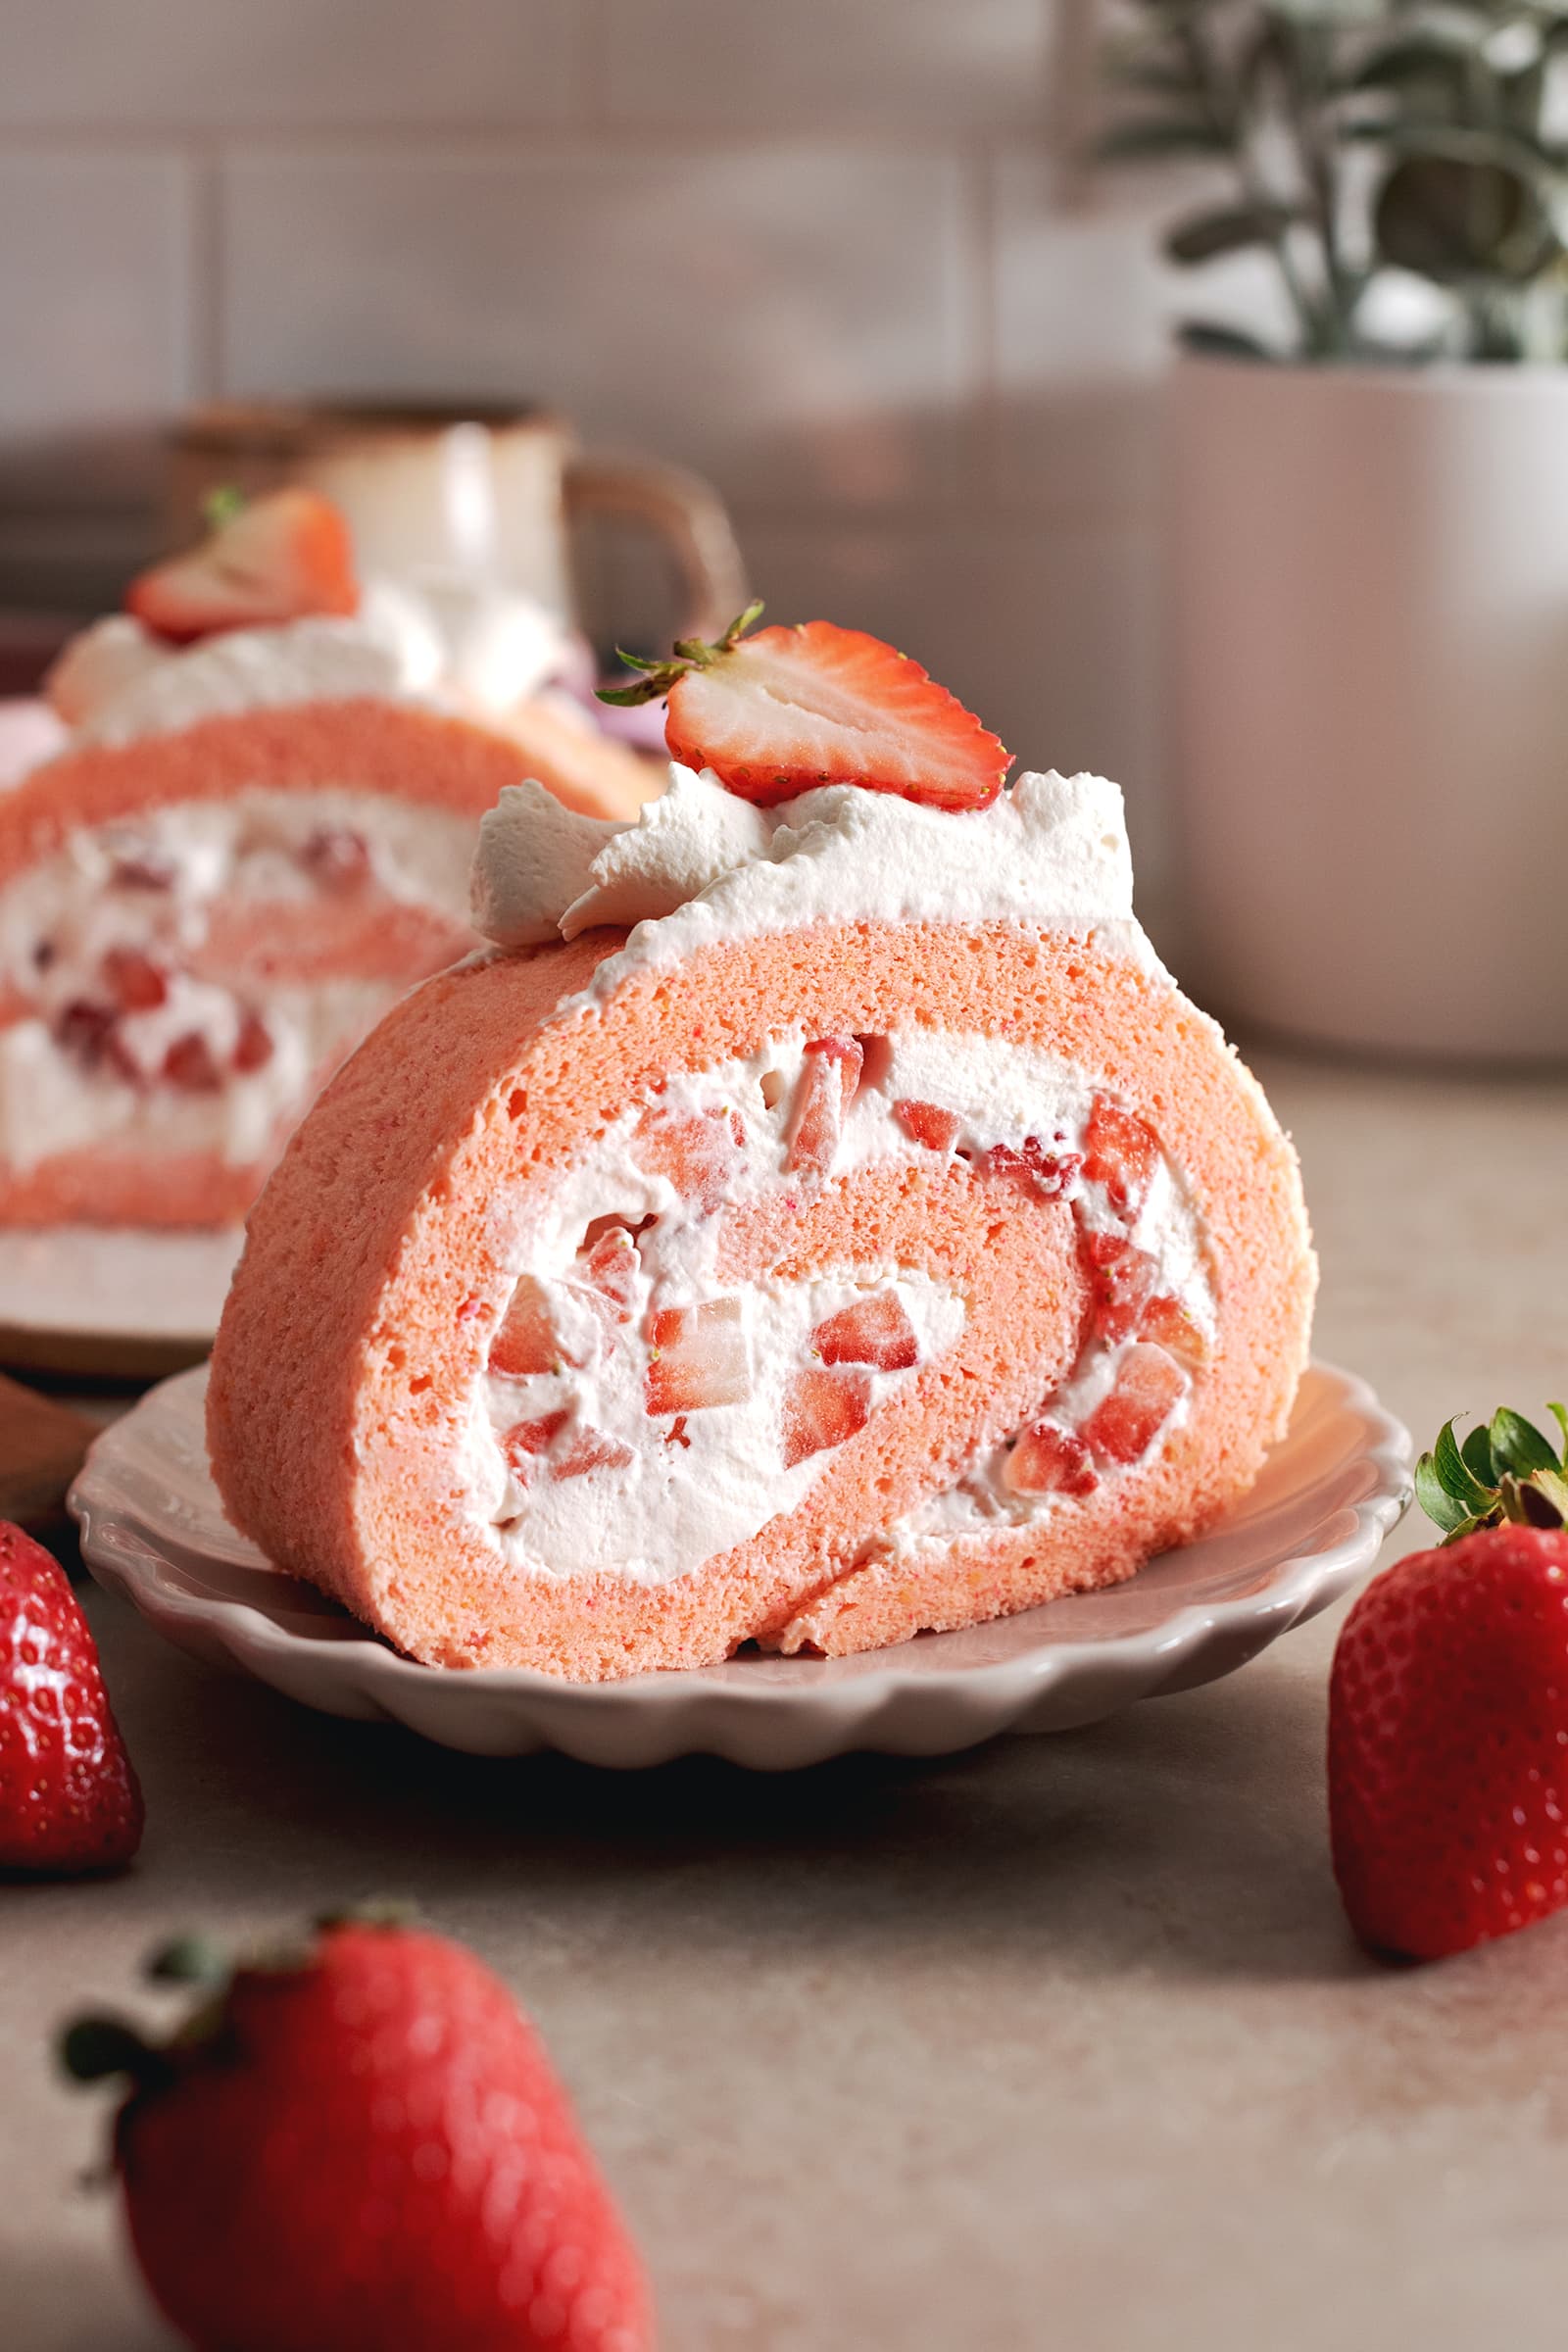
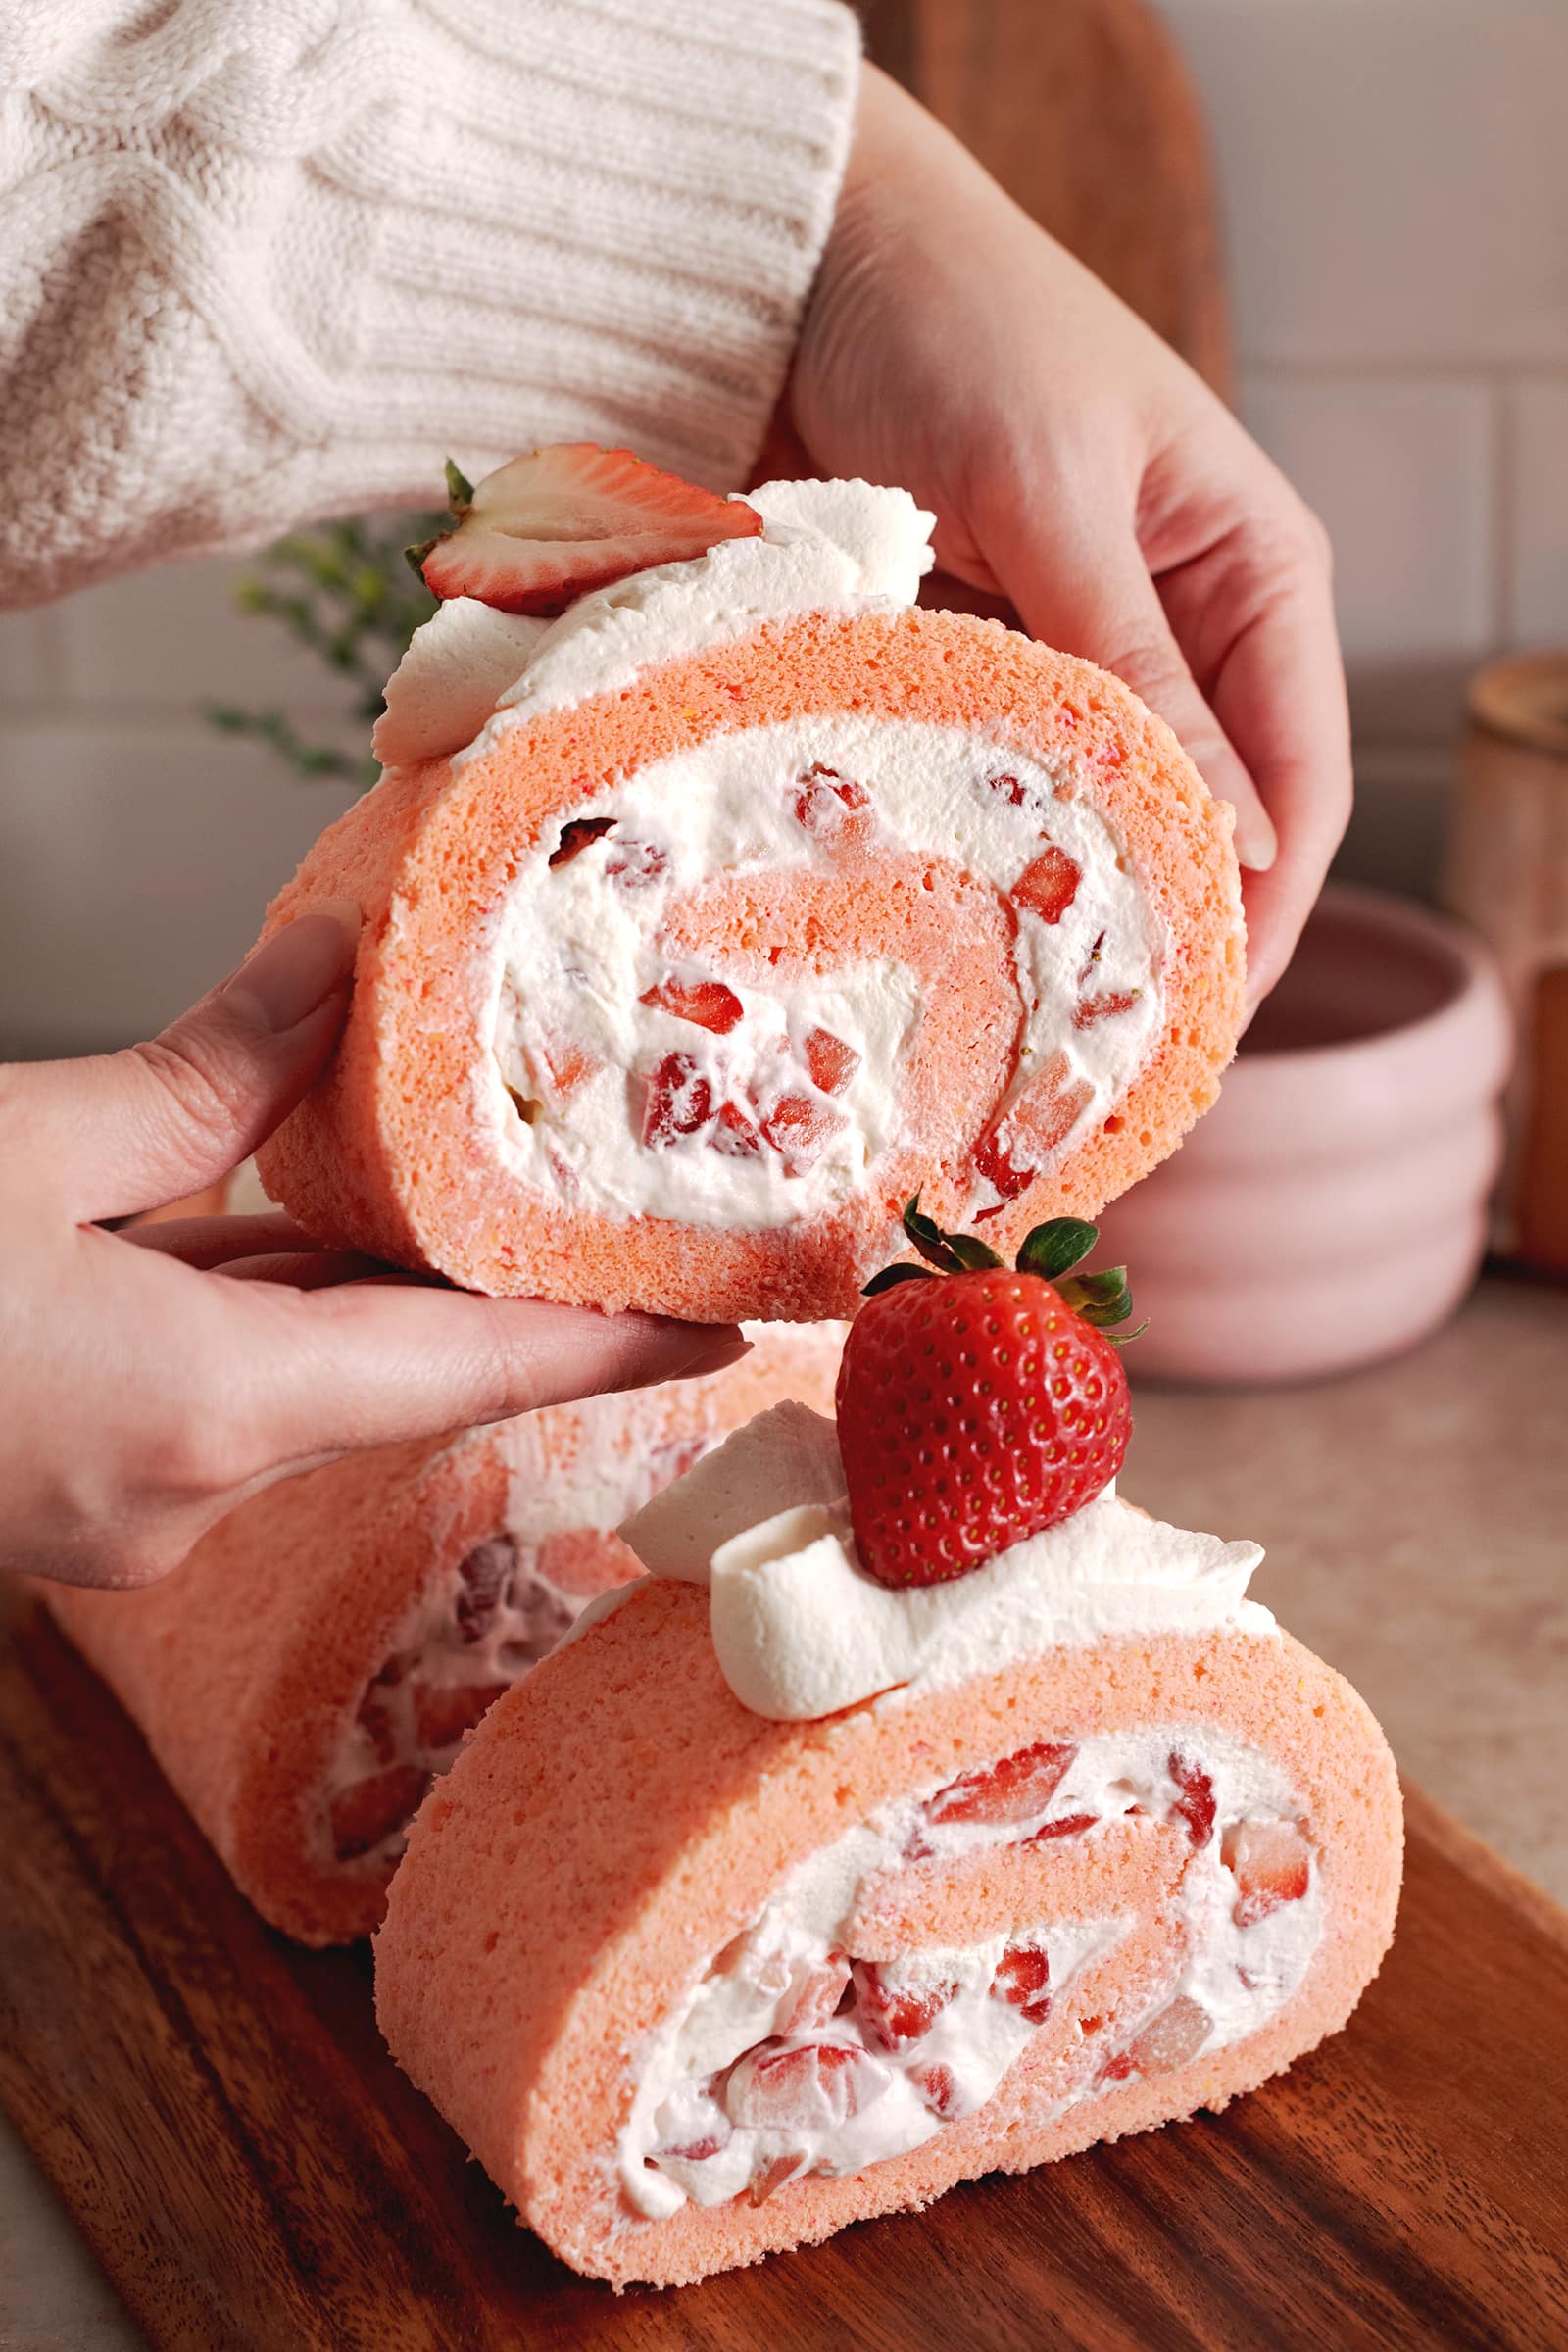
This strawberry swiss roll cake is made with a soft and fluffy chiffon cake wrapped around airy whipped cream and fresh strawberries. It's a pretty pink cake that tastes like you're eating a cloud!
Why you'll love this recipe
- Soft and fluffy chiffon cake. This strawberry swiss roll is made with the quintessential soft and spongey chiffon cake that I love and make all the time.
- Light and airy whipped cream. The chiffon cake + whipped cream + strawberries combo is hard to beat. Whipped cream adds just the right amount of moisture to chiffon cakes and is light as air.
- Fresh strawberry filling. This cake is perfect for strawberry season, Valentine's Day, or when you just want a cake that lets juicy and ripe strawberries shine.
- Not too sweet. This strawberry swiss roll is completely bakery-worthy. It's the perfect amount of sweetness and there's nothing too heavy or rich about it.
Tools
- Electric hand mixer - A hand mixer or stand mixer is essential for whipping egg white meringue to stiff peaks. You can do it by hand with a whisk but it will be an arm workout and it'll take forever - would not recommend it. If you bake often, I'd highly recommend picking up a hand mixer (they're not as expensive as stand mixers) to make your life easier.
- 12x17" baking tray - This cake sheet is baked in a 12x17" jelly roll pan or baking tray that has walls that are at least 1" tall.
- Piping bag (optional) - If you want to pipe a design with whipped cream on top of the swiss roll, you'll need a piping bag. This cake is also pretty without any decoration on top so it's up to you!
- Piping tip (optional) - With the piping bag, you'll need a piping tip of your choice. I used a Wilton #125 petal piping tip for this cake.
Ingredients
As always, the full recipe card with ingredient amounts and instructions is at the bottom of this post! Keep reading for more details on each ingredient or skip ahead to the recipe.
- Eggs - You'll need to separate your eggs into separate bowls of egg whites and egg yolks, making sure not to get any of the yolk in the egg whites. Chiffon cake is made by whipping the egg whites into a meringue and then folding it into the egg yolks to create the spongey and fluffy texture.
- Cream of tartar - This is an acidic powder that stabilizes the egg whites so that the meringue holds the air bubbles that you've whipped into them better.
- Granulated sugar
- Milk - You can use any dairy or non-dairy milk. I usually use oat milk because it's what I have on hand and it works great.
- Oil - Use any light-tasting oil like canola oil, avocado oil, or grapeseed oil.
- Vanilla extract
- Red or pink gel food colouring - Make sure you use GEL food colouring. Water or oil-based food colouring will ruin the consistency of the meringue and it will become very difficult to achieve stiff peaks if it gets there at all. If you're going for a true pink colour, try to use a blue-toned pink or red food colouring or add a bit of purple to neutralize the yellow colour of the egg yolk mixture otherwise the colour will turn out more peachy-orange.
- Cake flour - Cake flour contains less gluten than all-purpose to further help achieve a soft cake texture.
- Baking powder
- Whipping cream - You can use whipping cream or heavy cream for a richer texture.
- Powdered sugar
- Strawberries - Use fresh and ripe strawberries. Finely dice them for the filling and use whole or halved strawberries for decoration on top of the cake roll.
How to make a strawberry swiss roll
Skip ahead to the recipe card for ingredient amounts and instructions.
For the chiffon cake
Prep - Preheat oven to 350°F. Line a 12x17" baking tray with parchment paper on the bottom only and set aside.
Separate eggs - Separate the egg whites and egg yolks into two separate large mixing bowls. Set the bowl of egg yolks aside.
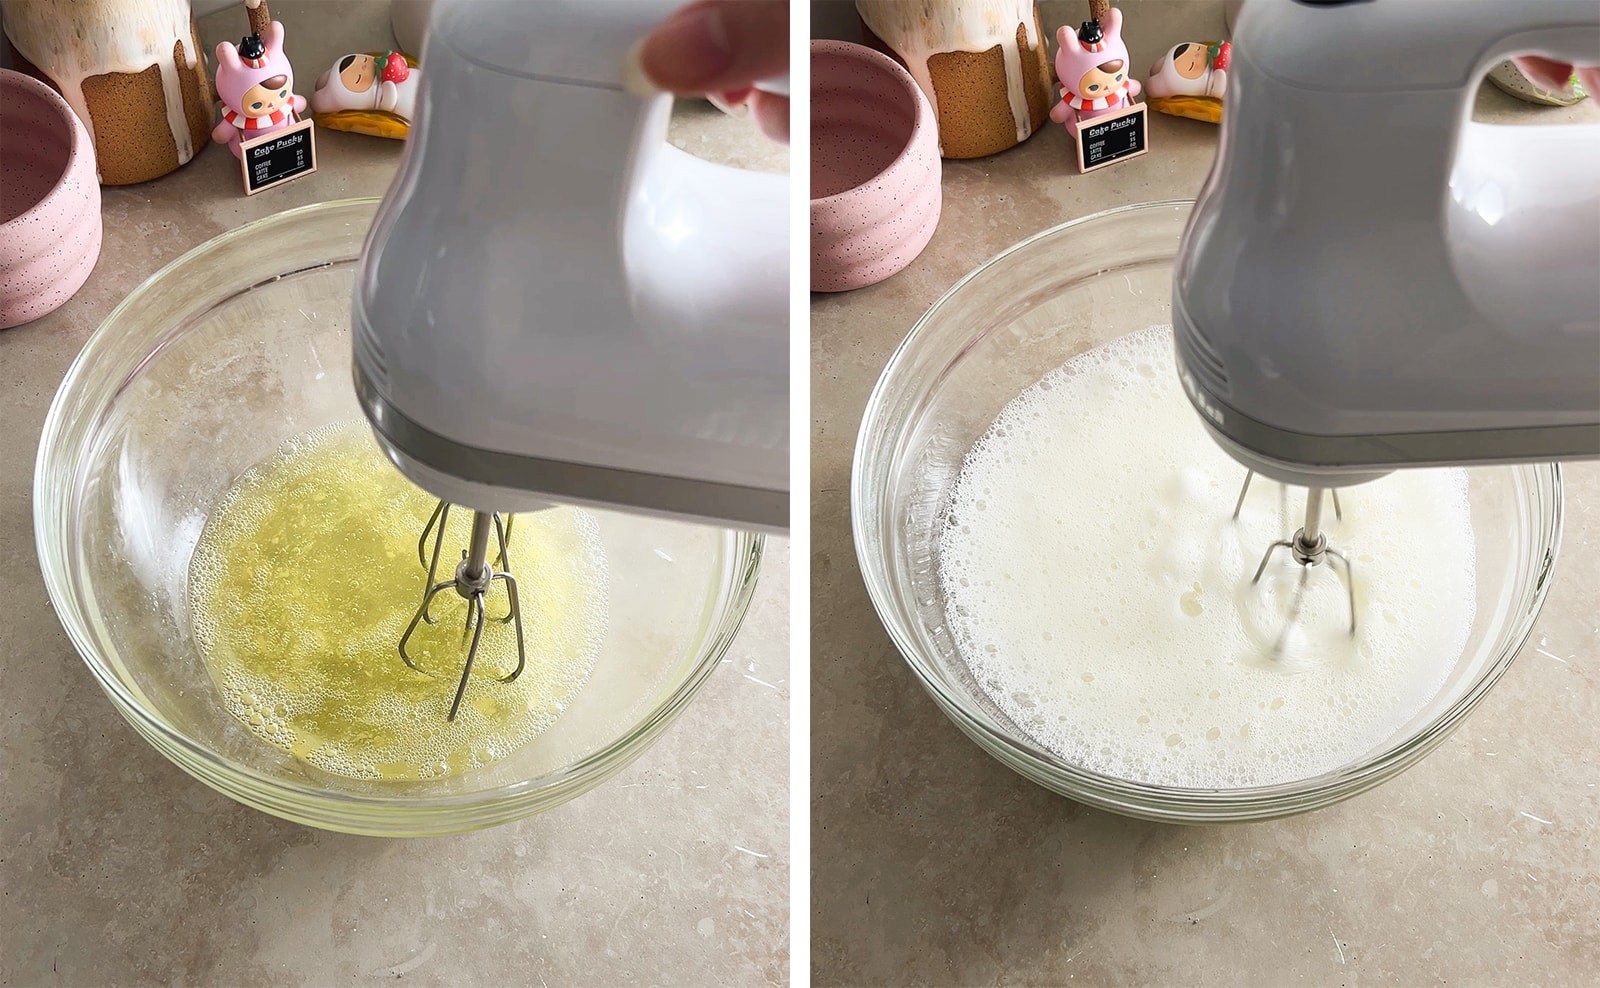
Beat egg whites - To the egg whites, add cream of tartar. Use an electric hand mixer fitted with a whisk attachment to beat the egg whites until they become frothy like cappuccino foam.
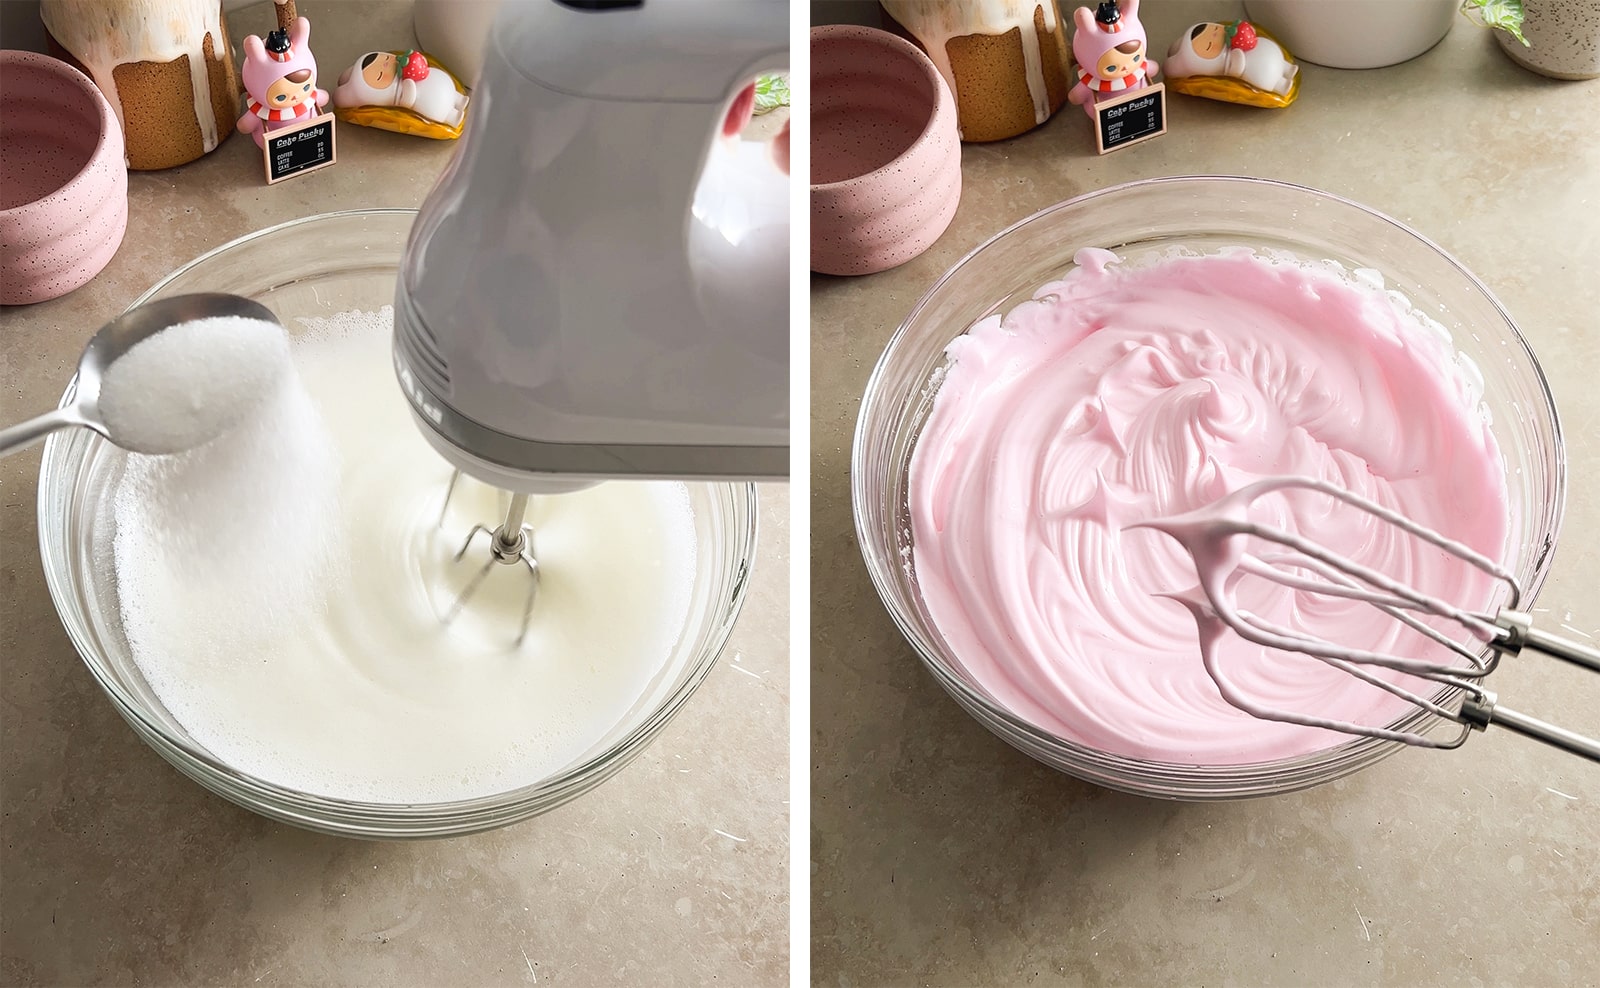
Add sugar - Sprinkle in 100g of sugar, one spoonful at a time, mixing well in between each addition. After all the sugar has been added, add 1-2 drops of pink gel food colouring and continue beating the egg whites until they become stiff peaks. Set aside.
Mix egg yolk mixture - To the egg yolks, add the remaining 50g of sugar and use the same hand mixer to mix until combined. Add milk, oil, and vanilla extract. Mix again until combined.

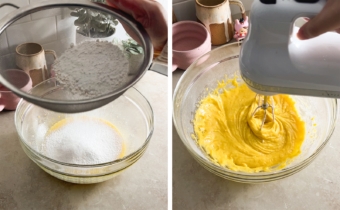
Sift in dry ingredients - Use a fine mesh sieve to sift the flour and baking powder into the egg yolk mixture. Mix on low speed until combined and smooth.

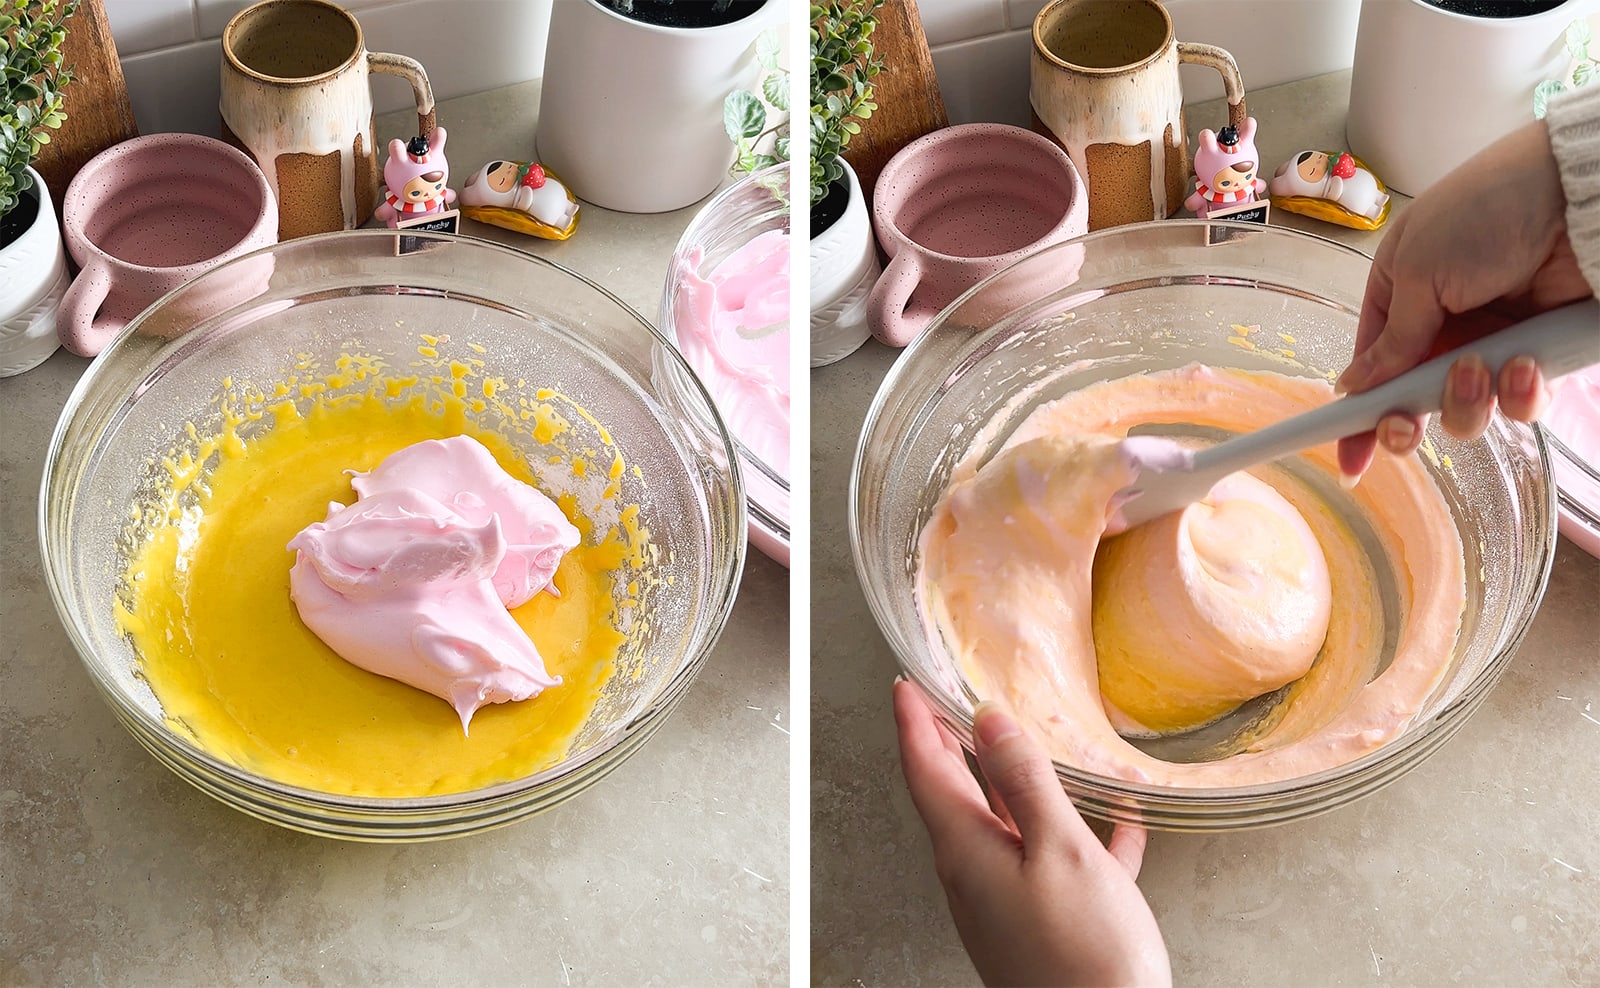
Fold meringue into egg yolk mixture - Add ⅓ of the meringue to the egg yolk mixture. Use a silicone spatula to gently fold them together until just combined to create a looser consistency. Add the rest of the meringue and fold until no streaks remain and the batter is fluffy and airy. Be sure to scrape the bottom of the bowl where the egg yolk batter tends to settle.
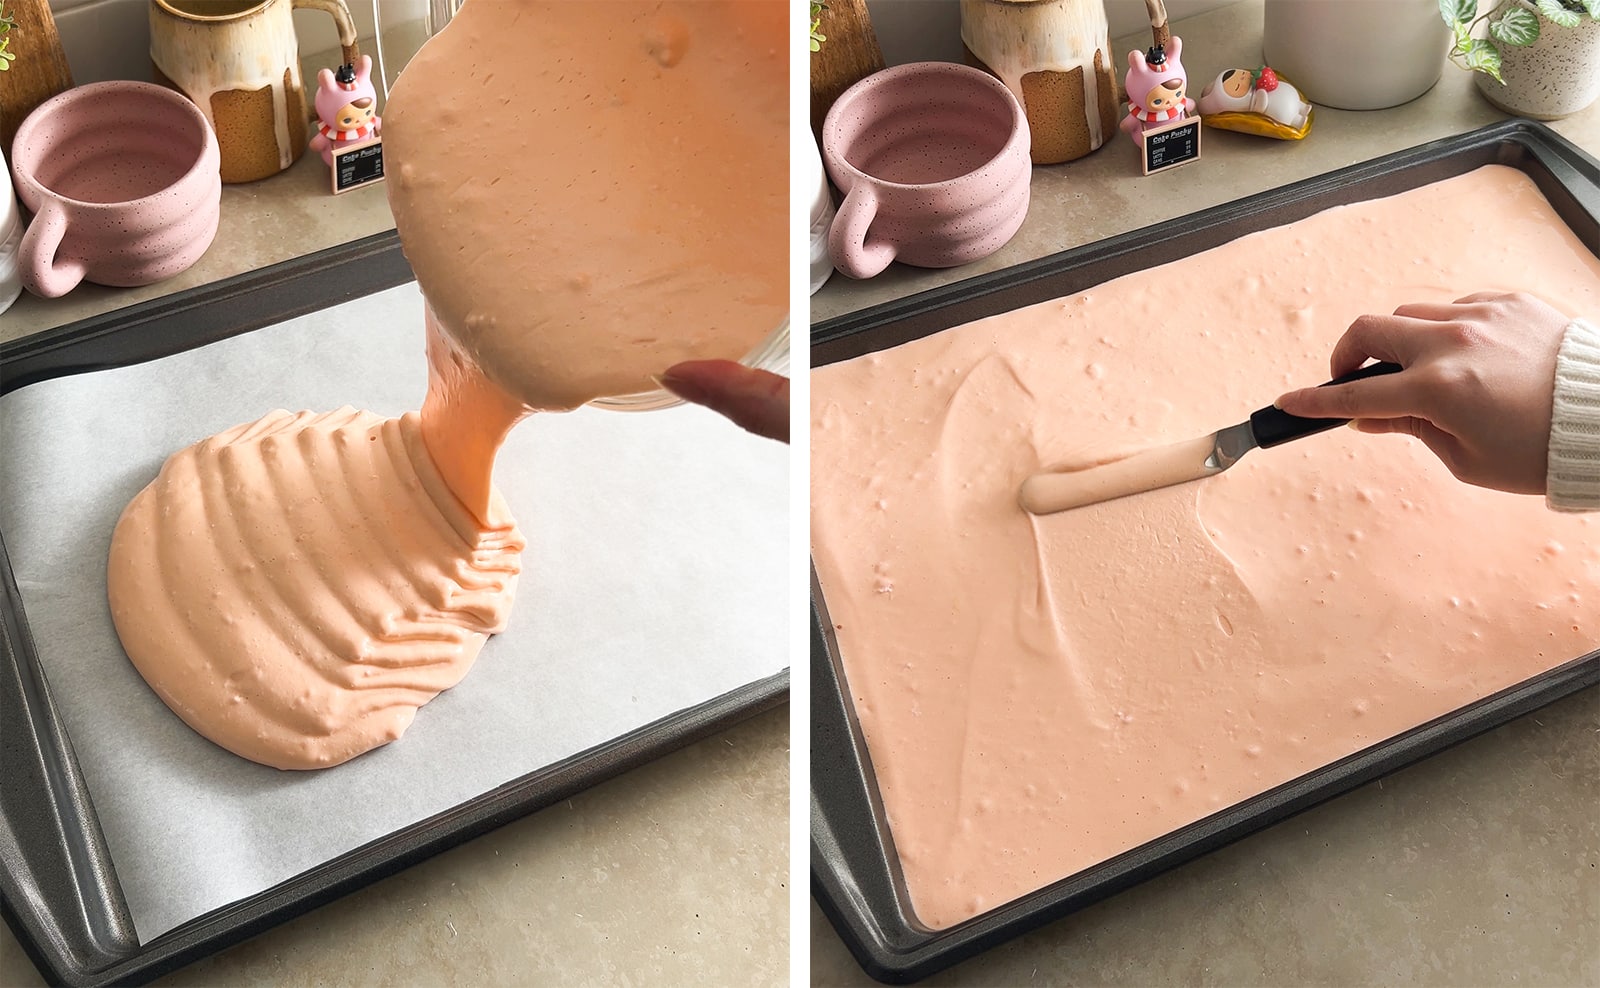
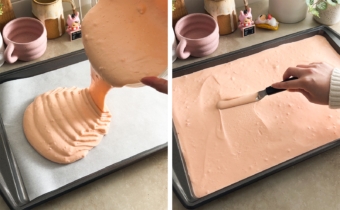
Fill pan - Pour the batter into your lined baking tray. Use an offset spatula to spread the batter into the corners of the tray and smooth it into a flat, even layer.
Bake - Bake for 12-13 minutes or until the edges of the cake are lightly golden brown.
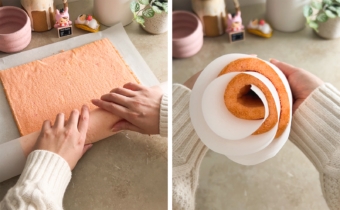
Release the cake sheet - Let the cake cool for just a few minutes before immediately running an offset spatula around the edges of the cake to release the sides from the pan. Flip the cake out of the pan onto a wire rack and peel the parchment paper off. Place a new sheet of parchment paper on top and flip the cake sheet back onto the parchment so that the side that was originally on top is back on top.
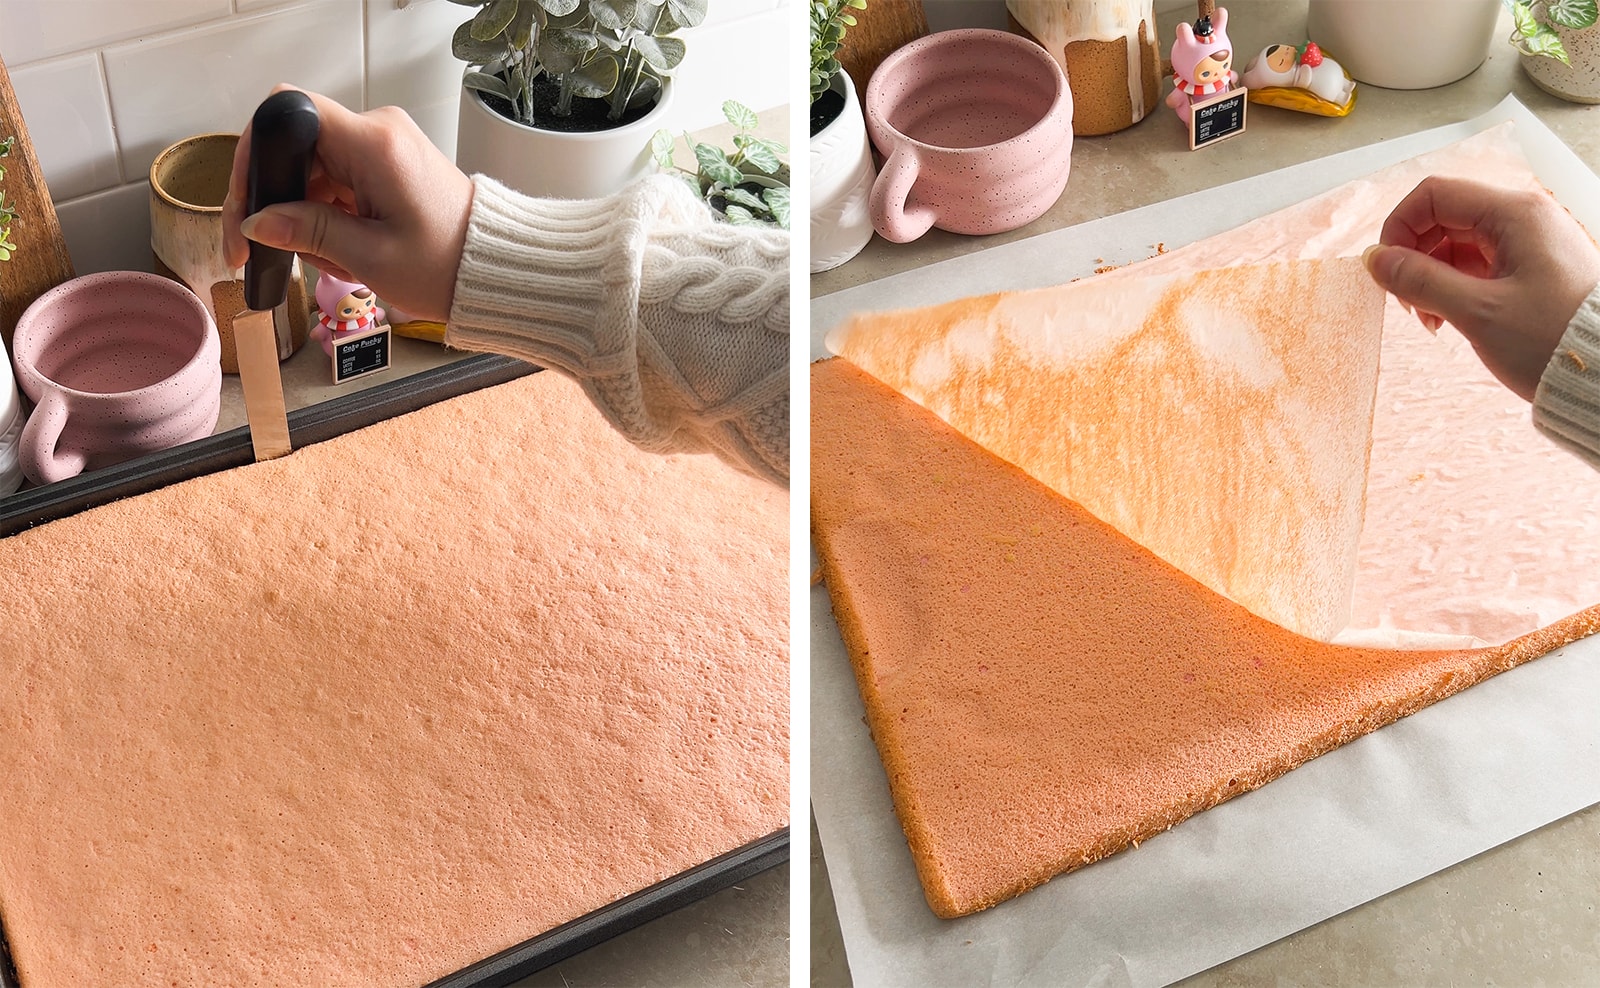
Roll up cake sheet - Use a knife to cut off the brown edges on the two short ends of the cake sheet. Starting at one of the short ends, roll up the cake sheet with the parchment paper and set aside to let it cool completely resting in this rolled-up log shape.

For the whipped cream
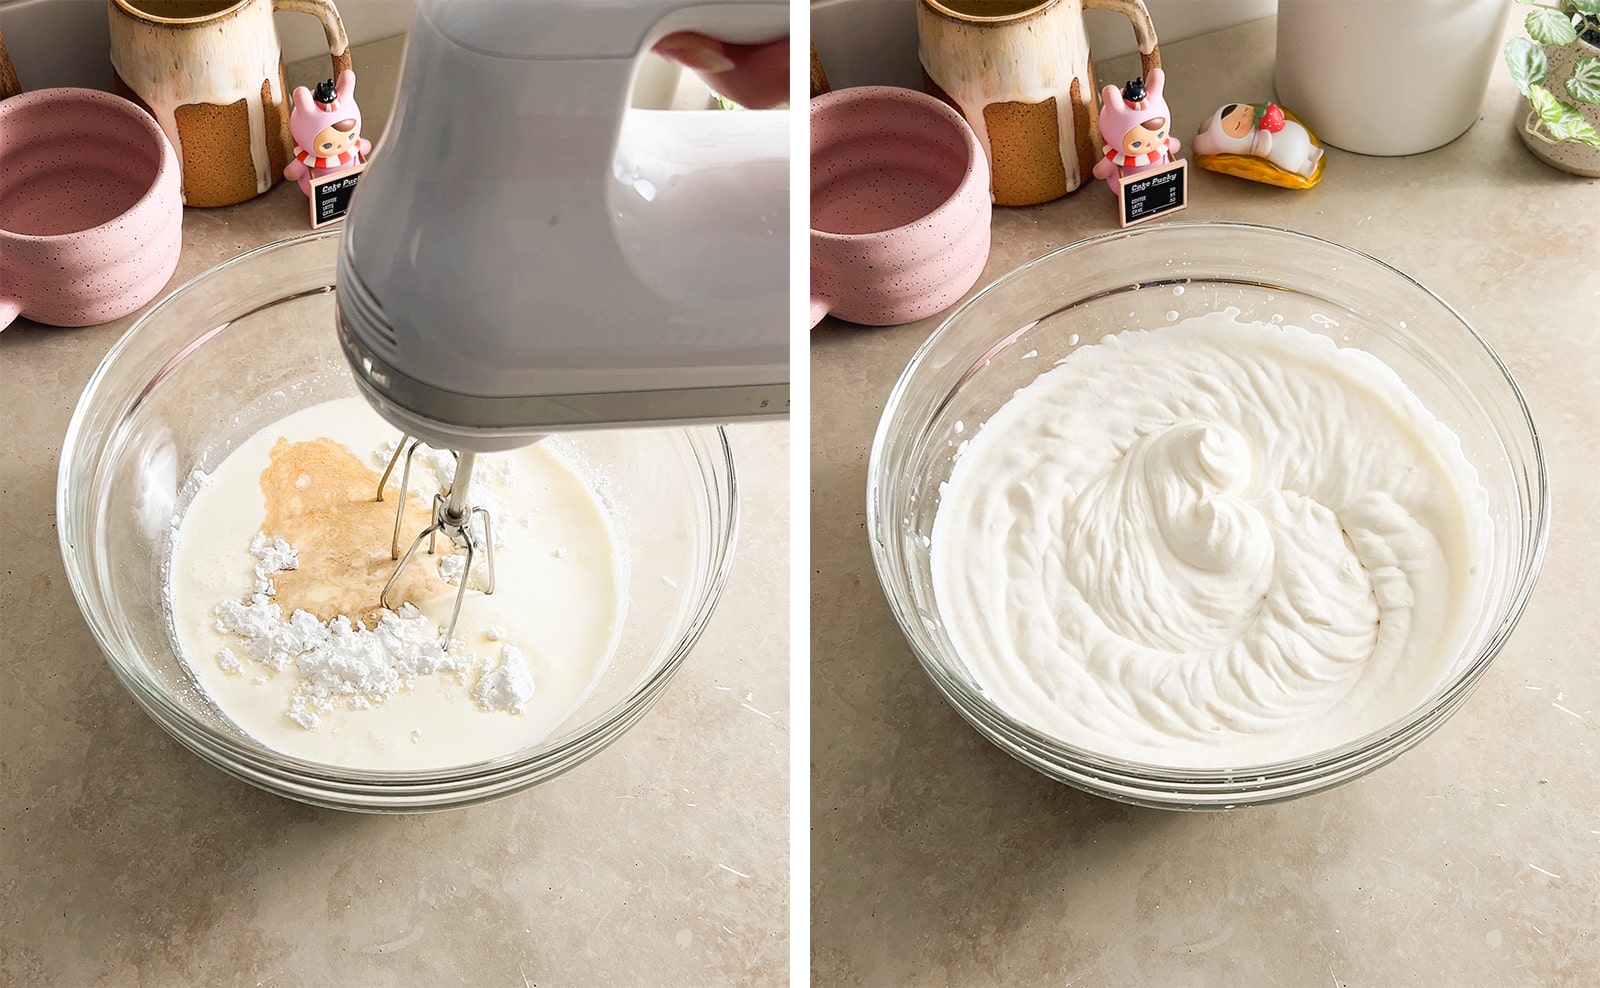
Whip cream - In a large mixing bowl, add whipping cream, powdered sugar, and vanilla extract. Use an electric hand mixer fitted with a whisk attachment to whip the cream until it becomes firm peaks.
Assemble the swiss roll
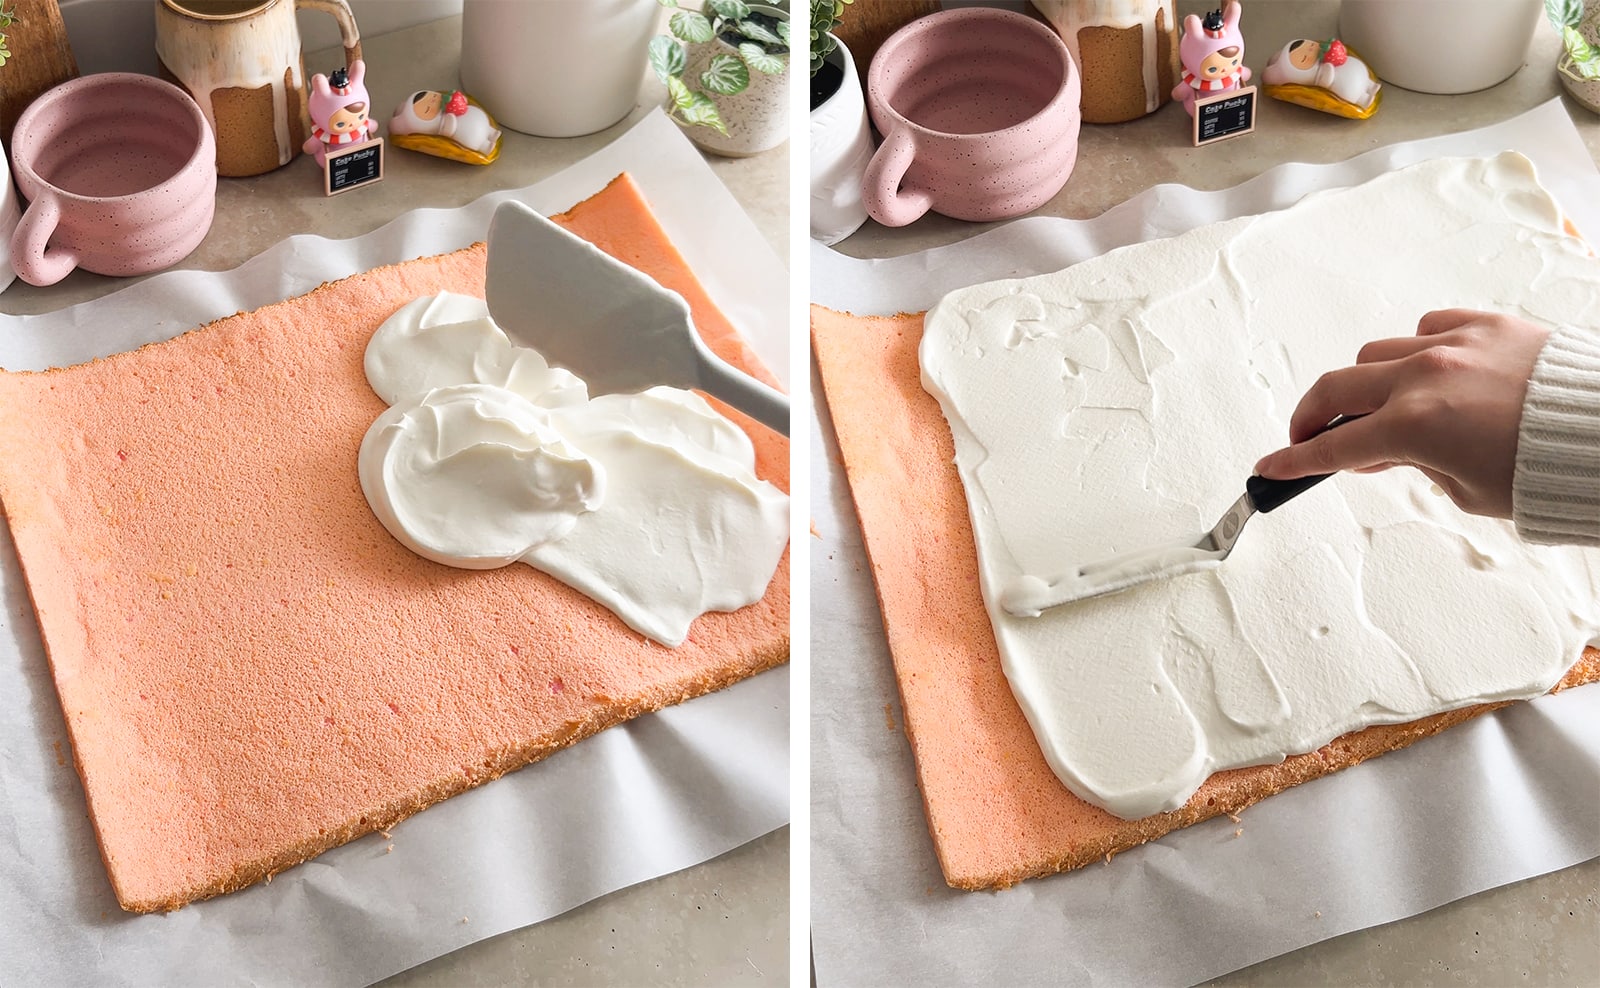
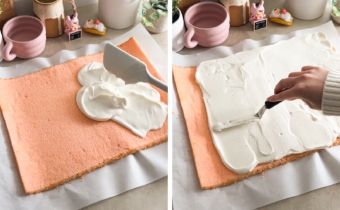
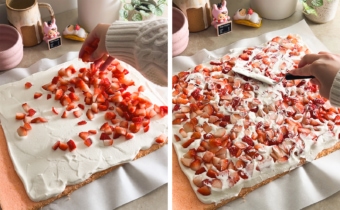
Spread whipped cream - Unroll the cooled cake sheet. Use an offset spatula to spread a generous and even layer of whipped cream on top of the cake sheet, leaving about 2" at one end empty. Reserve a small amount of whipped cream to decorate the top of the swiss roll the next day (optional).
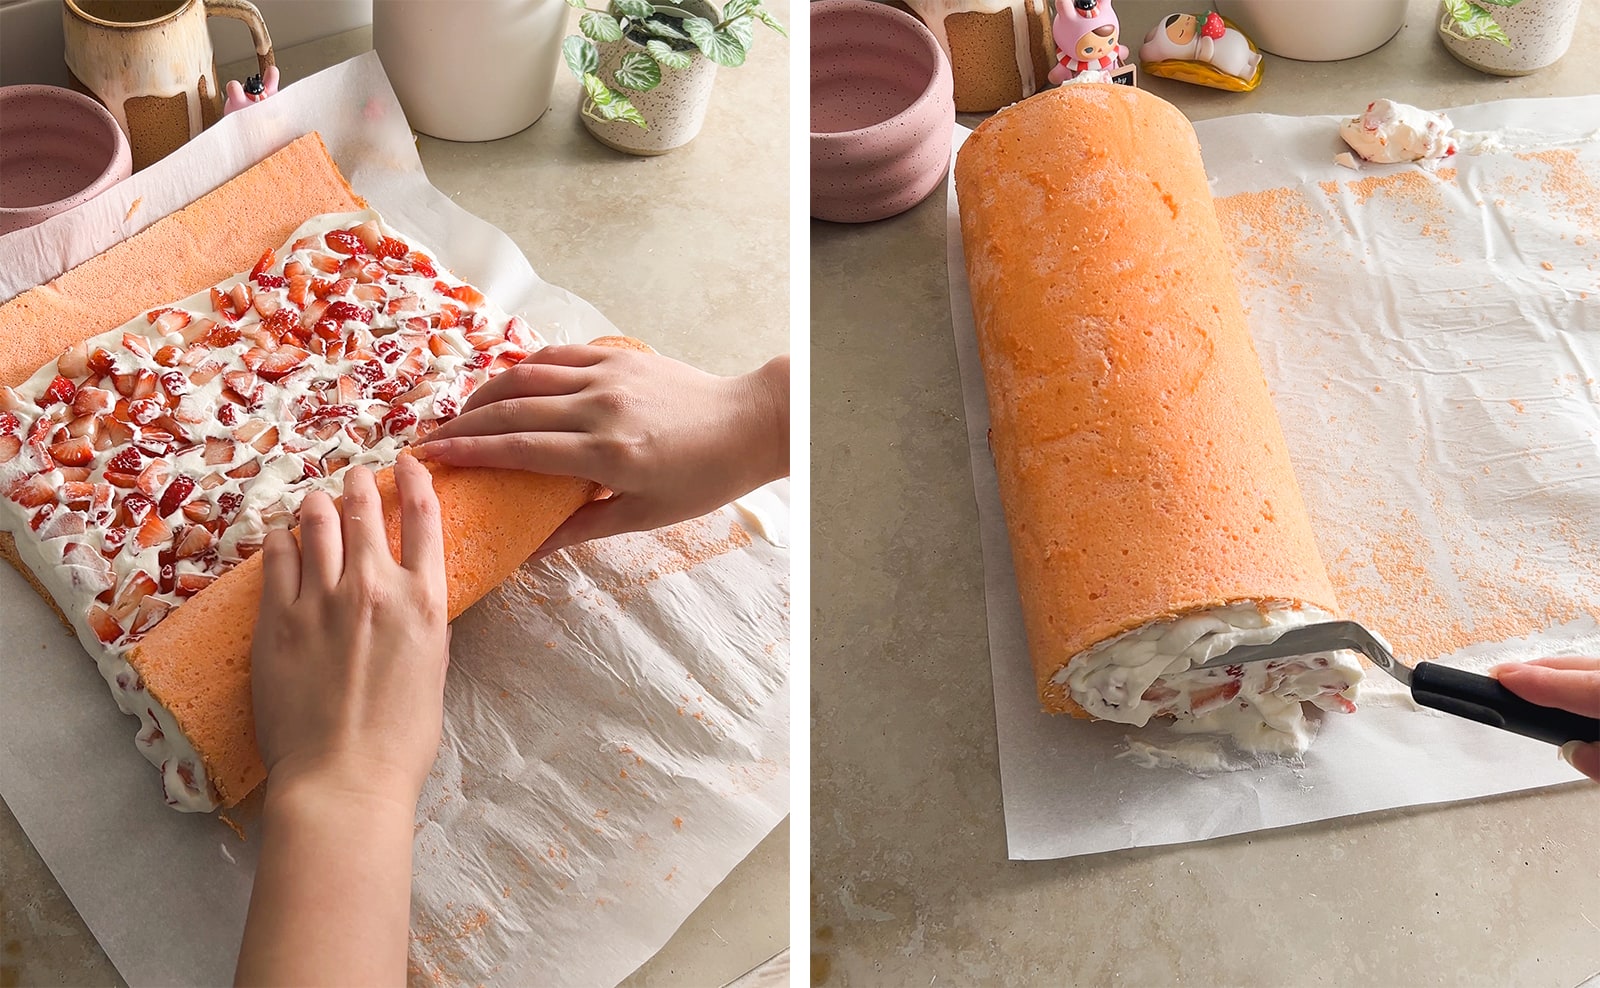
Add strawberries - Evenly distribute the diced strawberries across the whipped cream layer, pressing them down into the cream to help them stick.

Roll up cake - Roll up the cake in the same way it was rolled before. When you get to the end, use an offset spatula to scrape away any filling that squishes out before letting the cake roll rest with the seam of the roll on the bottom. Any filling that squishes out of the two ends of the roll can also be pushed back in.
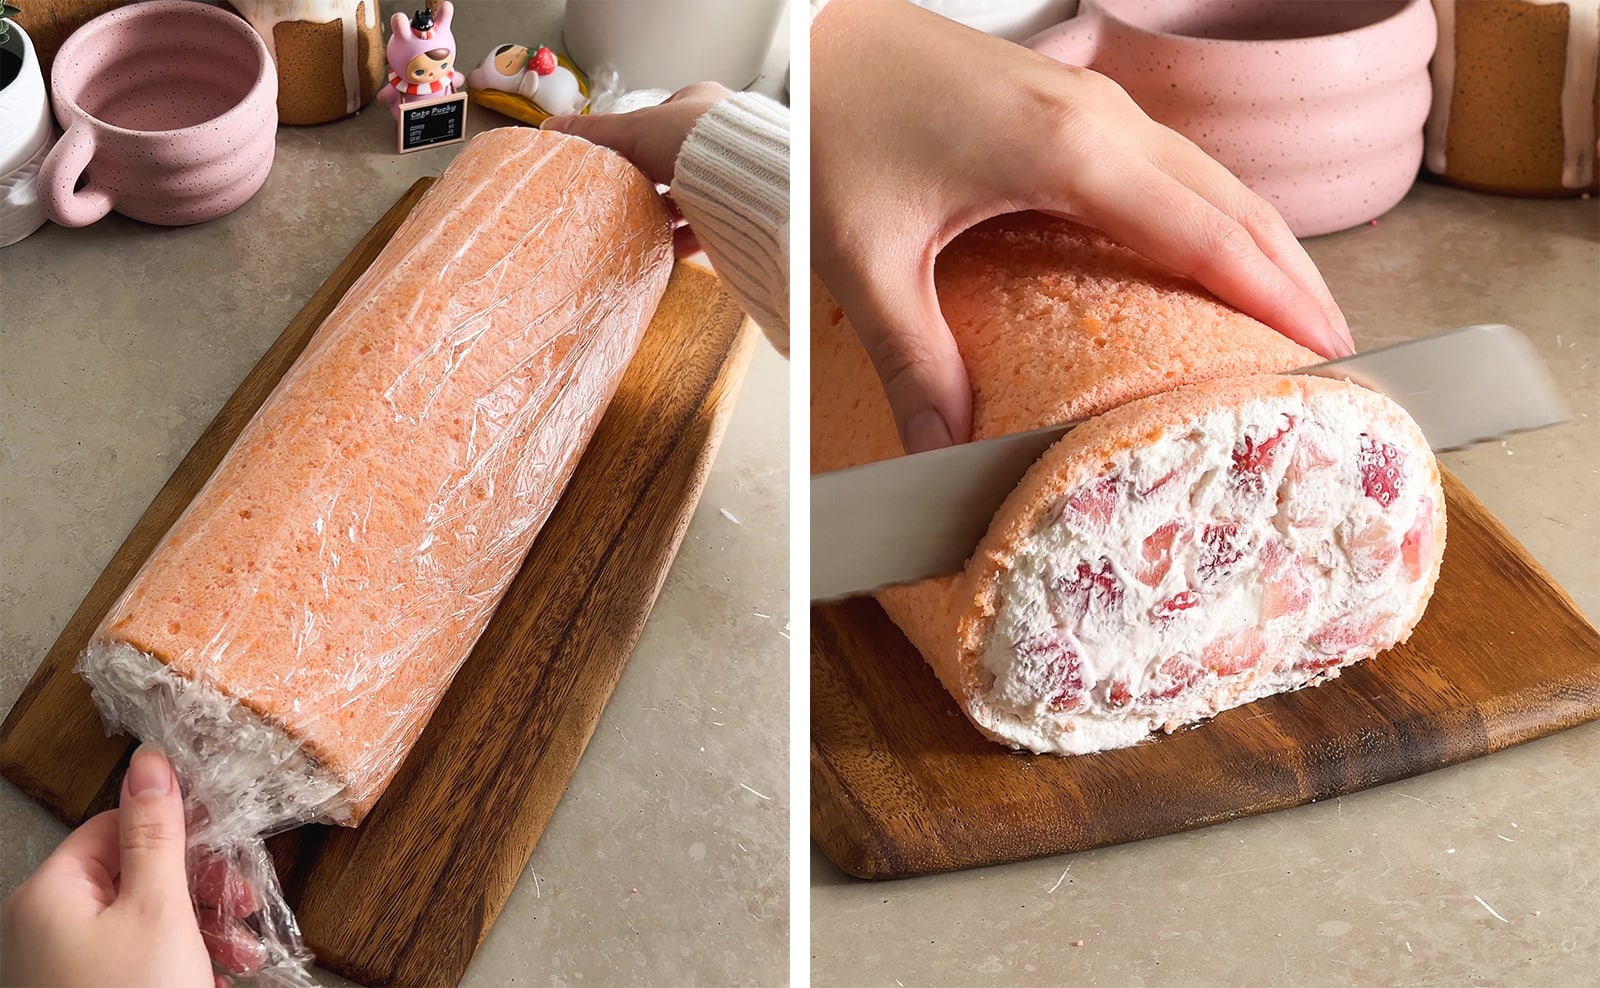
Chill - Wrap the roll in plastic wrap, reshape the roll with your hands if needed, and let it chill in the fridge for at least 6 hours or preferably overnight to let the filling set.
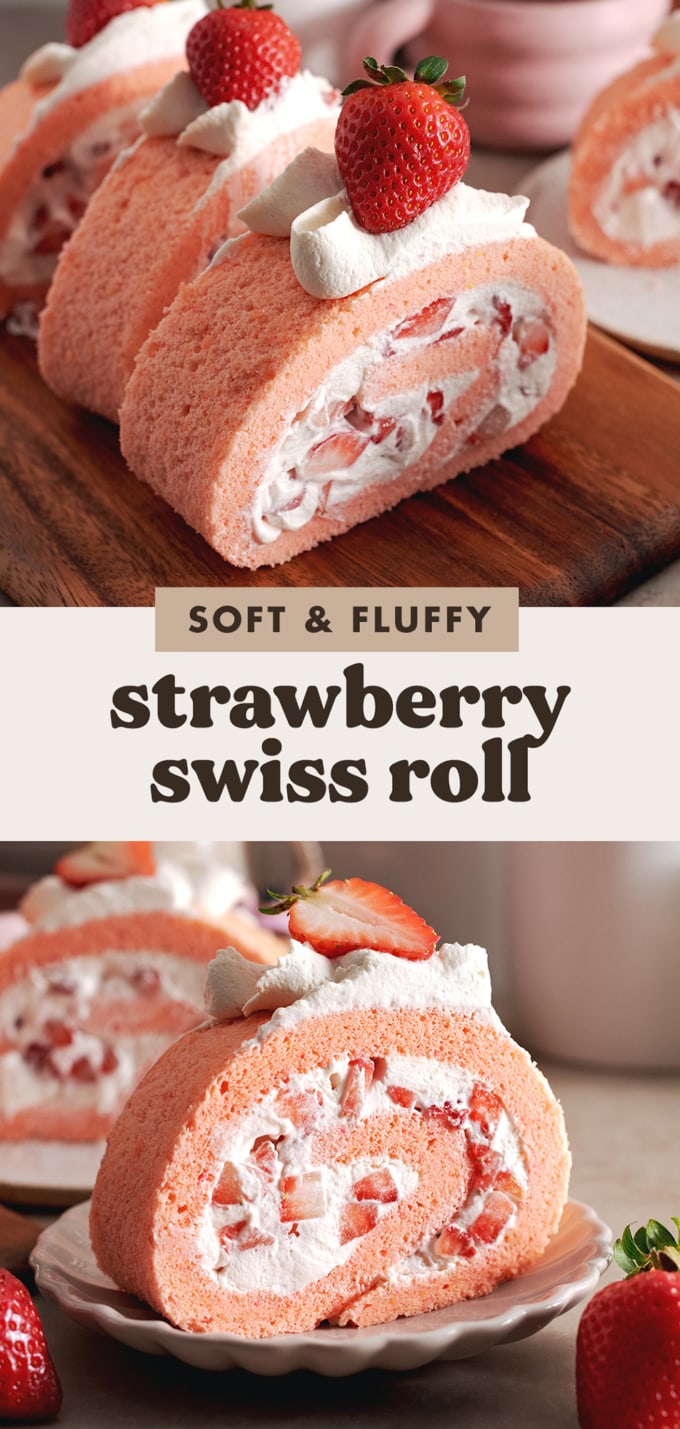
Cut off ends - Once chilled, unwrap the cake. Slice about ½" off the two ends of the roll to reveal the swirl design.
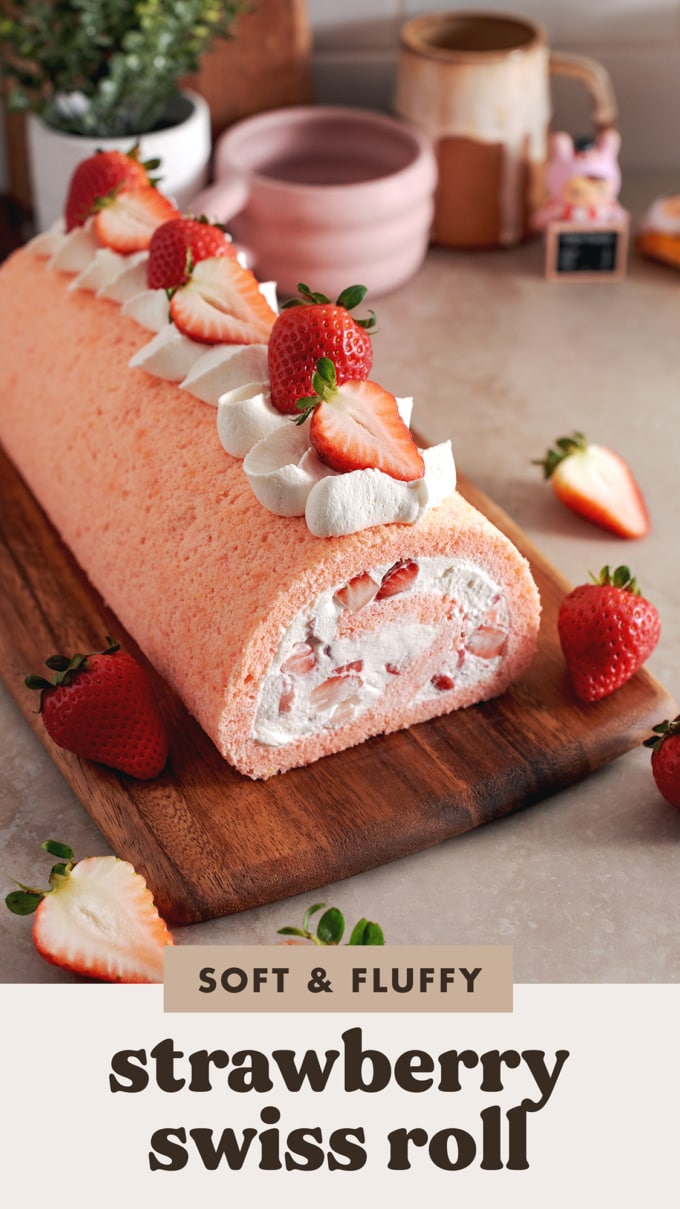
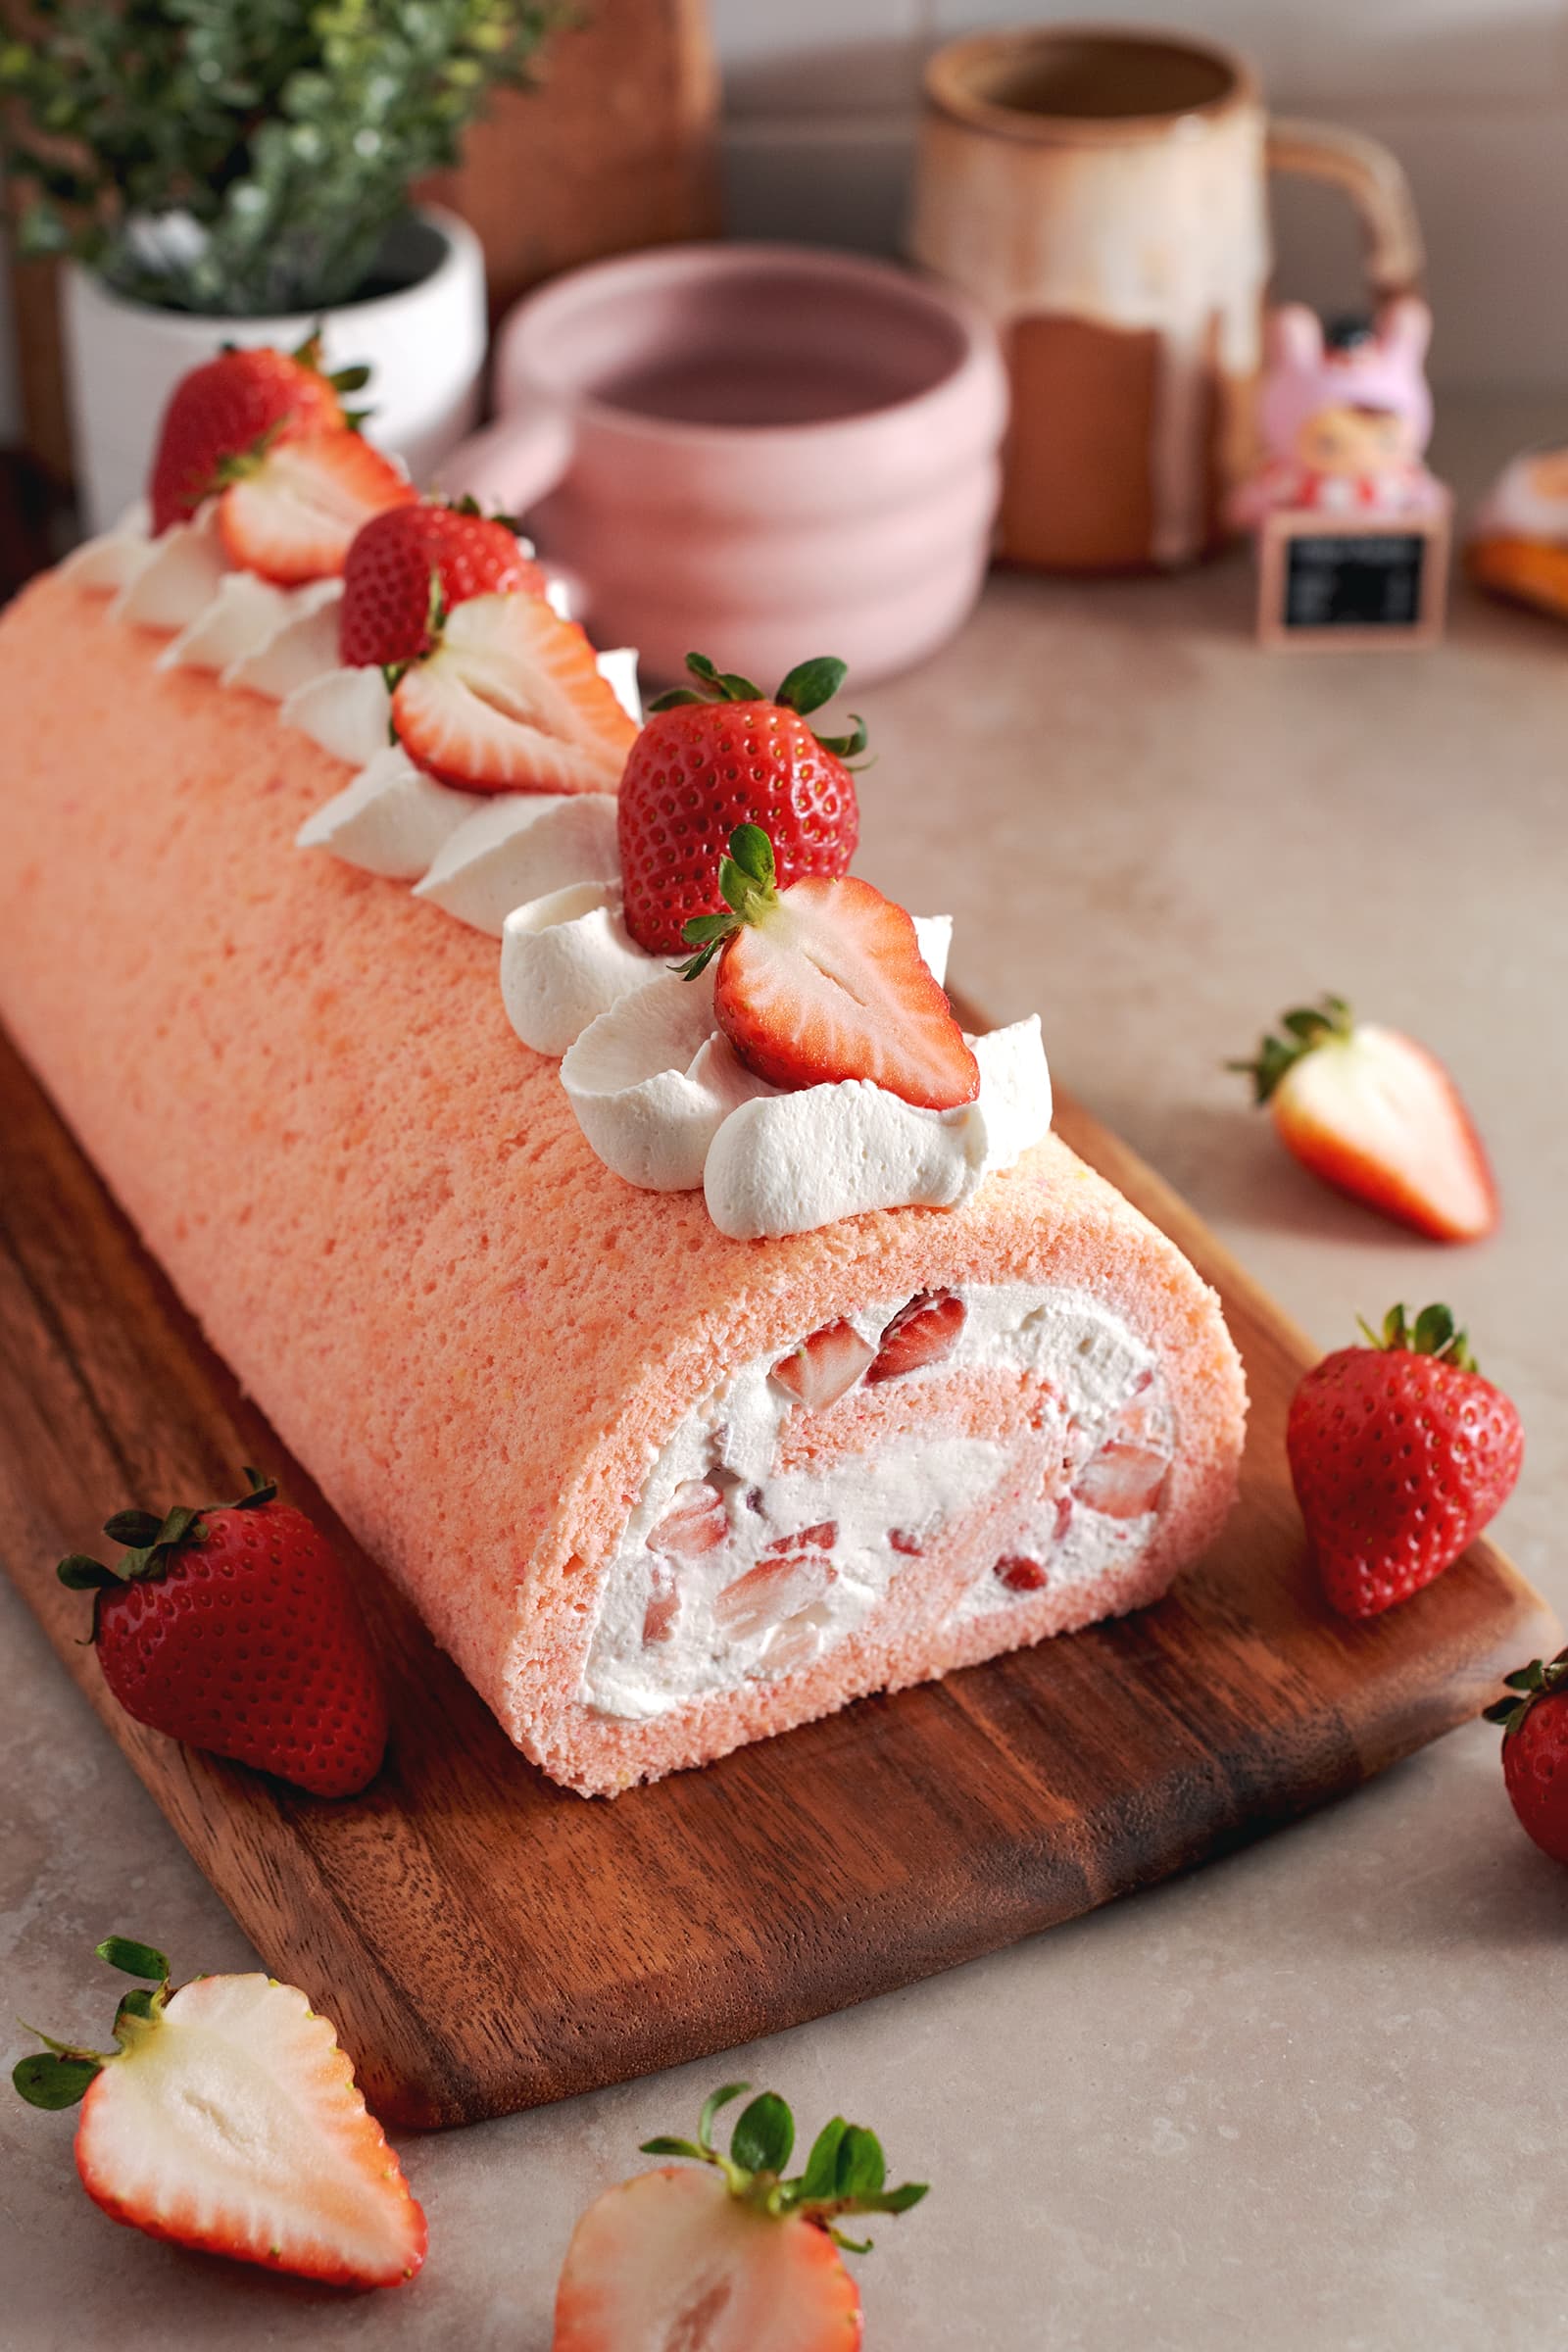
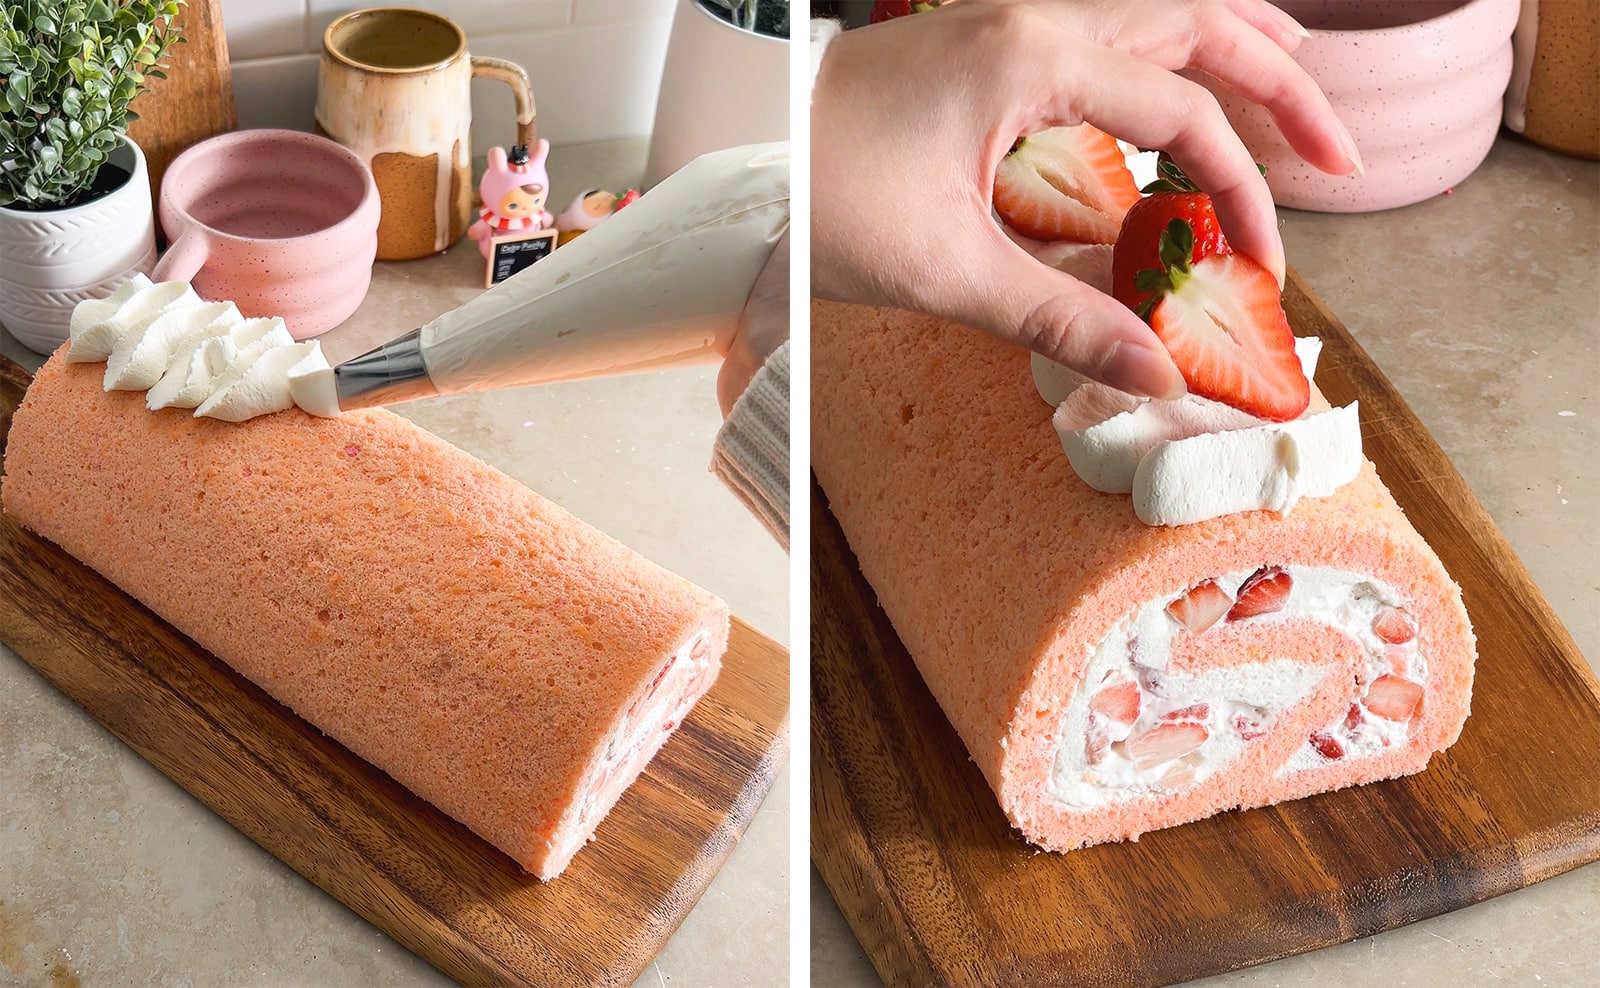
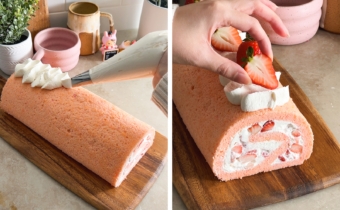
Decorate - Transfer the whipped cream you saved to a piping bag fitted with a piping tip of your choice. Pipe the cream on top of the cake and garnish with whole or halved strawberries.
Slice - Slice the strawberry swiss roll into 6-8 slices before serving.
Storage
This strawberry swiss roll can be stored in an airtight container or wrapped in plastic wrap in the fridge for up to 5 days.
Leftovers can be frozen by wrapping them in plastic wrap and freezing for up to 1 month. Thaw in the fridge overnight before eating.
Tips for success
- Whip meringue to stiff peaks. Chiffon cake relies on aerating the meringue to produce lots of tiny bubbles in the batter. When you pull the mixer out of the meringue, it should leave pointy peaks that flop over slightly at the tips and it shouldn't budge when you turn the bowl upside down.
- Use gel food colouring. Water-based or oil-based food colouring ruins the consistency of meringue. Only use gel food colouring!
- Gently fold the batter together. You want to combine the meringue and egg yolk mixture well enough so that there aren't any streaks of either remaining in the batter but you also don't want to overmix and deflate the batter.
- Don't underbake the cake. Underbaked chiffon cake tends to deflate and sink once it's taken out of the oven because it doesn't have enough structure. You should bake it until the edges are lightly golden brown and the top is just barely starting to brown.
- Pre-roll the cake. Rolling the cake sheet while it's still warm and letting it cool completely while rolled up helps to "train" the cake to stay in that rolled-up shape and prevent cracking when you roll the cake later on.
- Chill the swiss roll. Don't try to slice the swiss roll right away. The whipped cream filling needs time to set and firm up otherwise the cake will just fall apart. I recommend chilling it overnight, which makes it a great cake to make 1-2 days in advance.
More swiss roll recipes to try
Recipe
Strawberry Swiss Roll
Equipment
- 1 piping bag, optional
- 1 piping tip, optional
Ingredients
Chiffon Cake
- 6 large eggs
- ½ teaspoon cream of tartar
- 150 g granulated sugar, divided into 100g + 50g
- 50 g milk, dairy or non-dairy
- 50 g light-tasting oil
- 1 teaspoon vanilla extract
- 2 drops red or pink gel food colouring
- 120 g cake flour
- ½ teaspoon baking powder
Filling
- 350 g whipping cream
- 35 g powdered sugar
- 1 teaspoon vanilla extract
- 500 g fresh strawberries, finely diced, plus more for topping
Instructions
Chiffon Cake
- Prep: Preheat oven to 350°F. Line a 12x17" baking tray with parchment paper on the bottom only and set aside.
- Separate eggs: Separate the egg whites and egg yolks into two separate large mixing bowls. Set the bowl of egg yolks aside.
- Beat egg whites: To the egg whites, add cream of tartar. Use an electric hand mixer fitted with a whisk attachment to beat the egg whites until they become frothy like cappuccino foam.

- Add sugar: Sprinkle in 100g of sugar, one spoonful at a time, mixing well in between each addition. After all the sugar has been added, add 1-2 drops of pink gel food colouring and continue beating the egg whites until they become stiff peaks. Set aside.
- Mix egg yolk mixture: To the egg yolks, add the remaining 50g of sugar and use the same hand mixer to mix until combined. Add milk, oil, and vanilla extract. Mix again until combined.
- Sift in dry ingredients: Use a fine mesh sieve to sift the flour and baking powder into the egg yolk mixture. Mix on low speed until combined and smooth.
- Fold meringue into egg yolk mixture: Add ⅓ of the meringue to the egg yolk mixture. Use a silicone spatula to gently fold them together until just combined to create a looser consistency. Add the rest of the meringue and fold until no streaks remain and the batter is fluffy and airy. Be sure to scrape the bottom of the bowl where the egg yolk batter tends to settle.
- Fill pan: Pour the batter into your lined baking tray. Use an offset spatula to spread the batter into the corners of the tray and smooth it into a flat, even layer.
- Bake: Bake for 12-13 minutes or until the edges of the cake are lightly golden brown.
- Release the cake sheet: Let the cake cool for just a few minutes before immediately running an offset spatula around the edges of the cake to release the sides from the pan. Flip the cake out of the pan onto a wire rack and peel the parchment paper off. Place a new sheet of parchment paper on top and flip the cake sheet back onto the parchment so that the side that was originally on top is back on top.
- Roll up cake sheet: Use a knife to cut off the brown edges on the two short ends of the cake sheet. Starting at one of the short ends, roll up the cake sheet with the parchment paper and set aside to let it cool completely resting in this rolled-up log shape.


Whipped Cream
- Whip cream: In a large mixing bowl, add whipping cream, powdered sugar, and vanilla extract. Use an electric hand mixer fitted with a whisk attachment to whip the cream until it becomes firm peaks.
- Spread whipped cream: Unroll the cooled cake sheet. Use an offset spatula to spread a generous and even layer of whipped cream on top of the cake sheet, leaving about 2" at one end empty. Reserve a small amount of whipped cream to decorate the top of the swiss roll the next day (optional).
- Add strawberries: Evenly distribute the diced strawberries across the whipped cream layer, pressing them down into the cream to help them stick.
- Roll up cake: Roll up the cake in the same way it was rolled before. When you get to the end, use an offset spatula to scrape away any filling that squishes out before letting the cake roll rest with the seam of the roll on the bottom. Any filling that squishes out of the two ends of the roll can also be pushed back in.
- Chill: Wrap the roll in plastic wrap, reshape the roll with your hands if needed, and let it chill in the fridge for at least 6 hours or preferably overnight to let the filling set.
- Cut off ends: Once chilled, unwrap the cake. Slice about ½" off the two ends of the roll to reveal the swirl design.
- Decorate: Transfer the whipped cream you saved to a piping bag fitted with a piping tip of your choice. Pipe the cream on top of the cake and garnish with whole or halved strawberries.
- Slice: Slice the swiss roll into 6-8 slices before serving.


Raine says
Can we have a recipe with measuring cups conversion please?
Emily says
Question: Can we use vegetable oil?
Lidia says
I tried this recipe and it turned out so good. I'm a beginner baker and it was easy to make it just took a while. In the end it turned out so good. I would recommend this and would try it again.
Annie says
Loved this recipe! Cake came out beautifully and delicious. The only change I made was to omit the food coloring. Thanks for a great recipe!
Kelsey says
Perfect summer dessert! It’s not too sweet and very refreshing and light. Had family over to have a slice and everyone loved it.