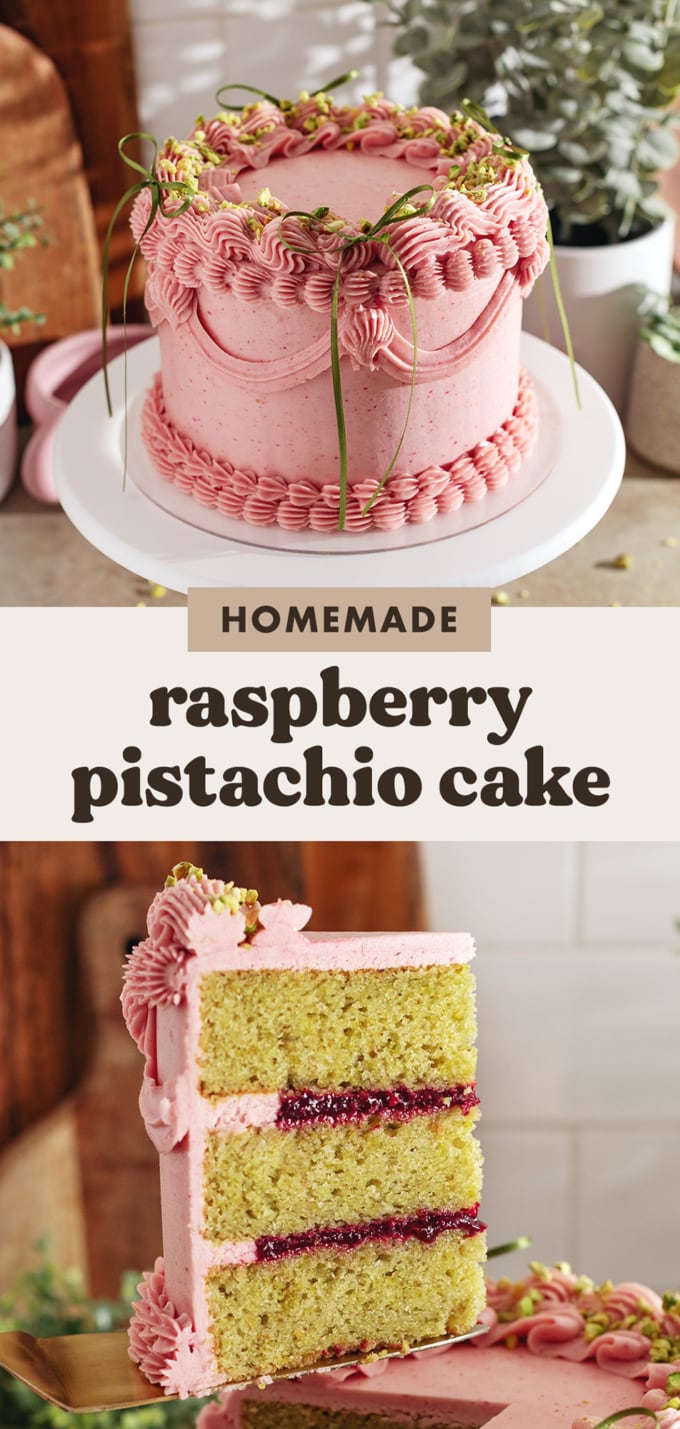
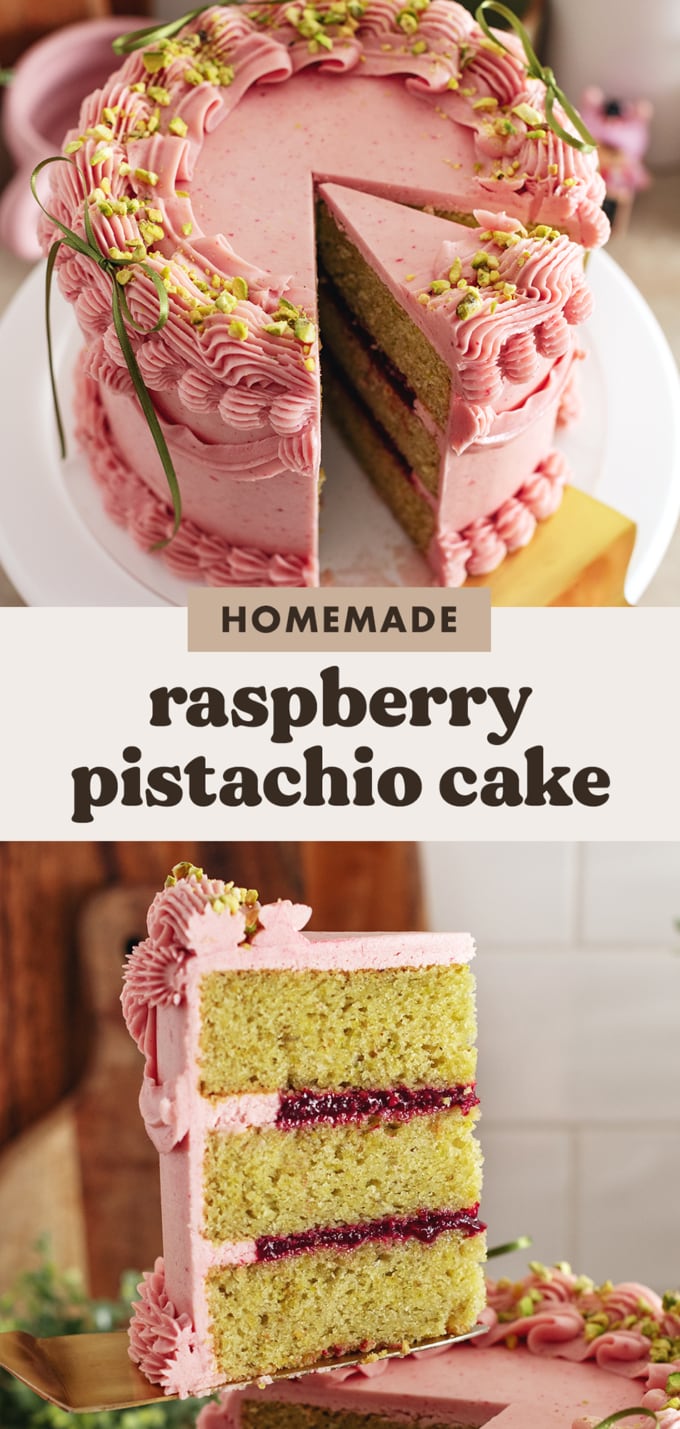
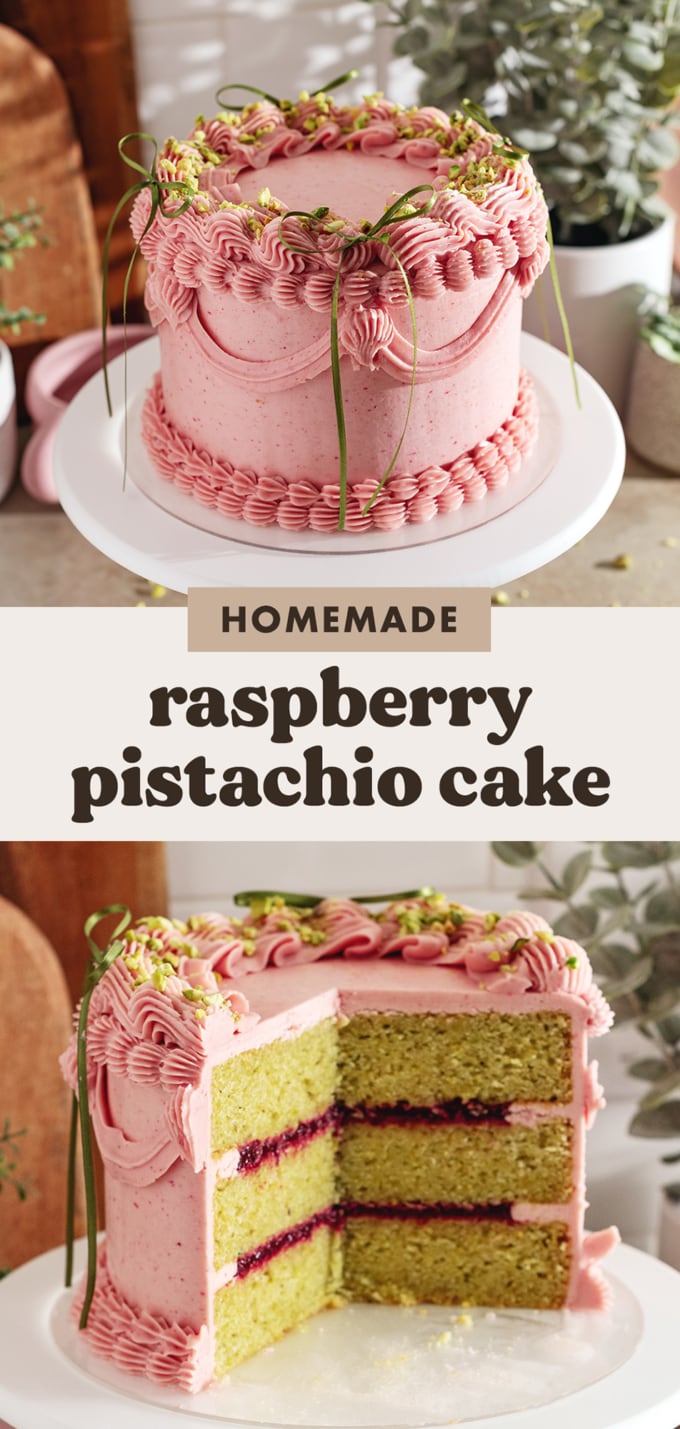
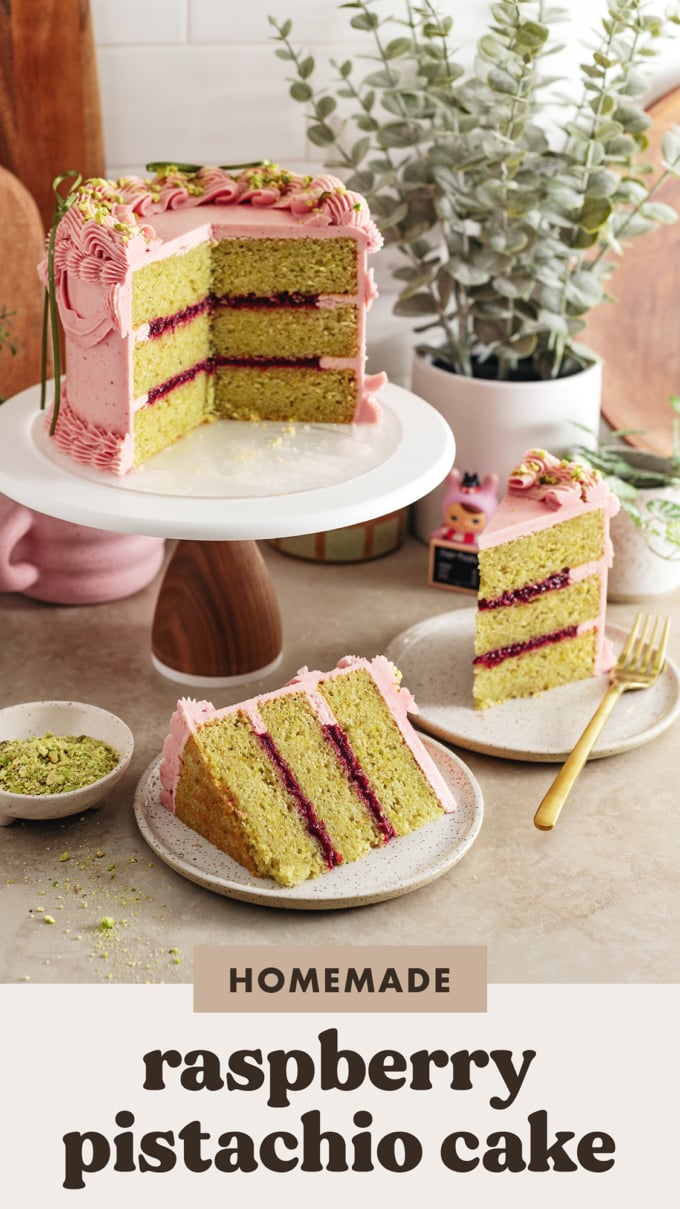
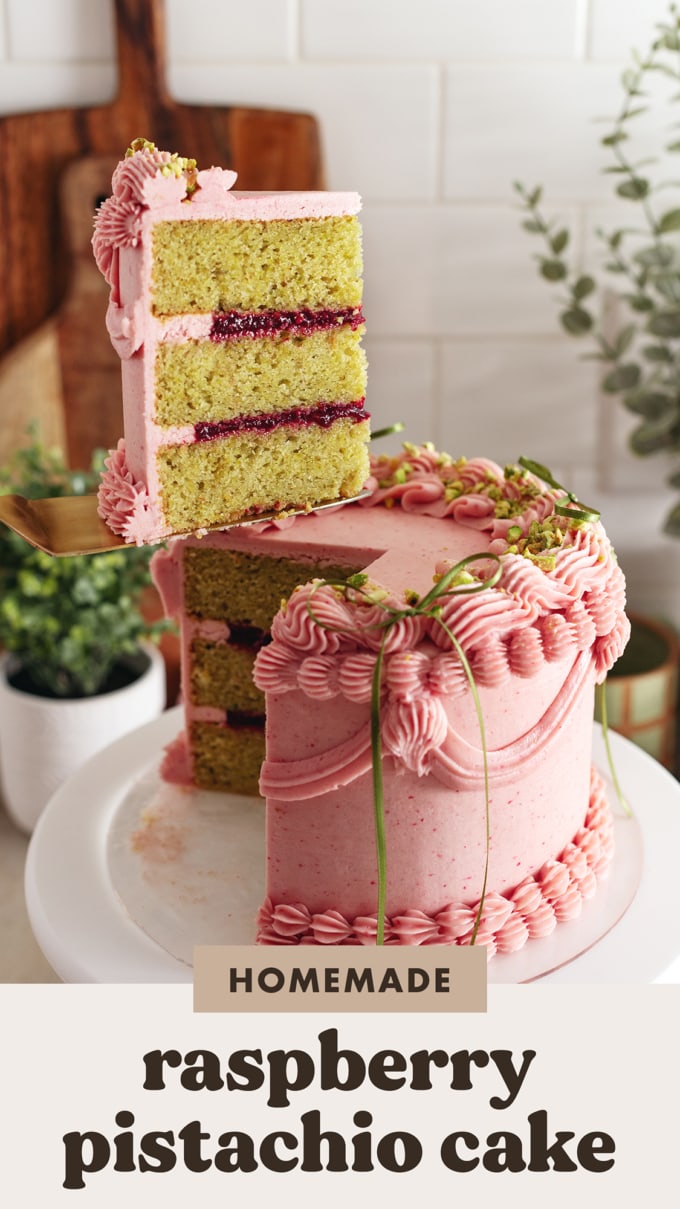
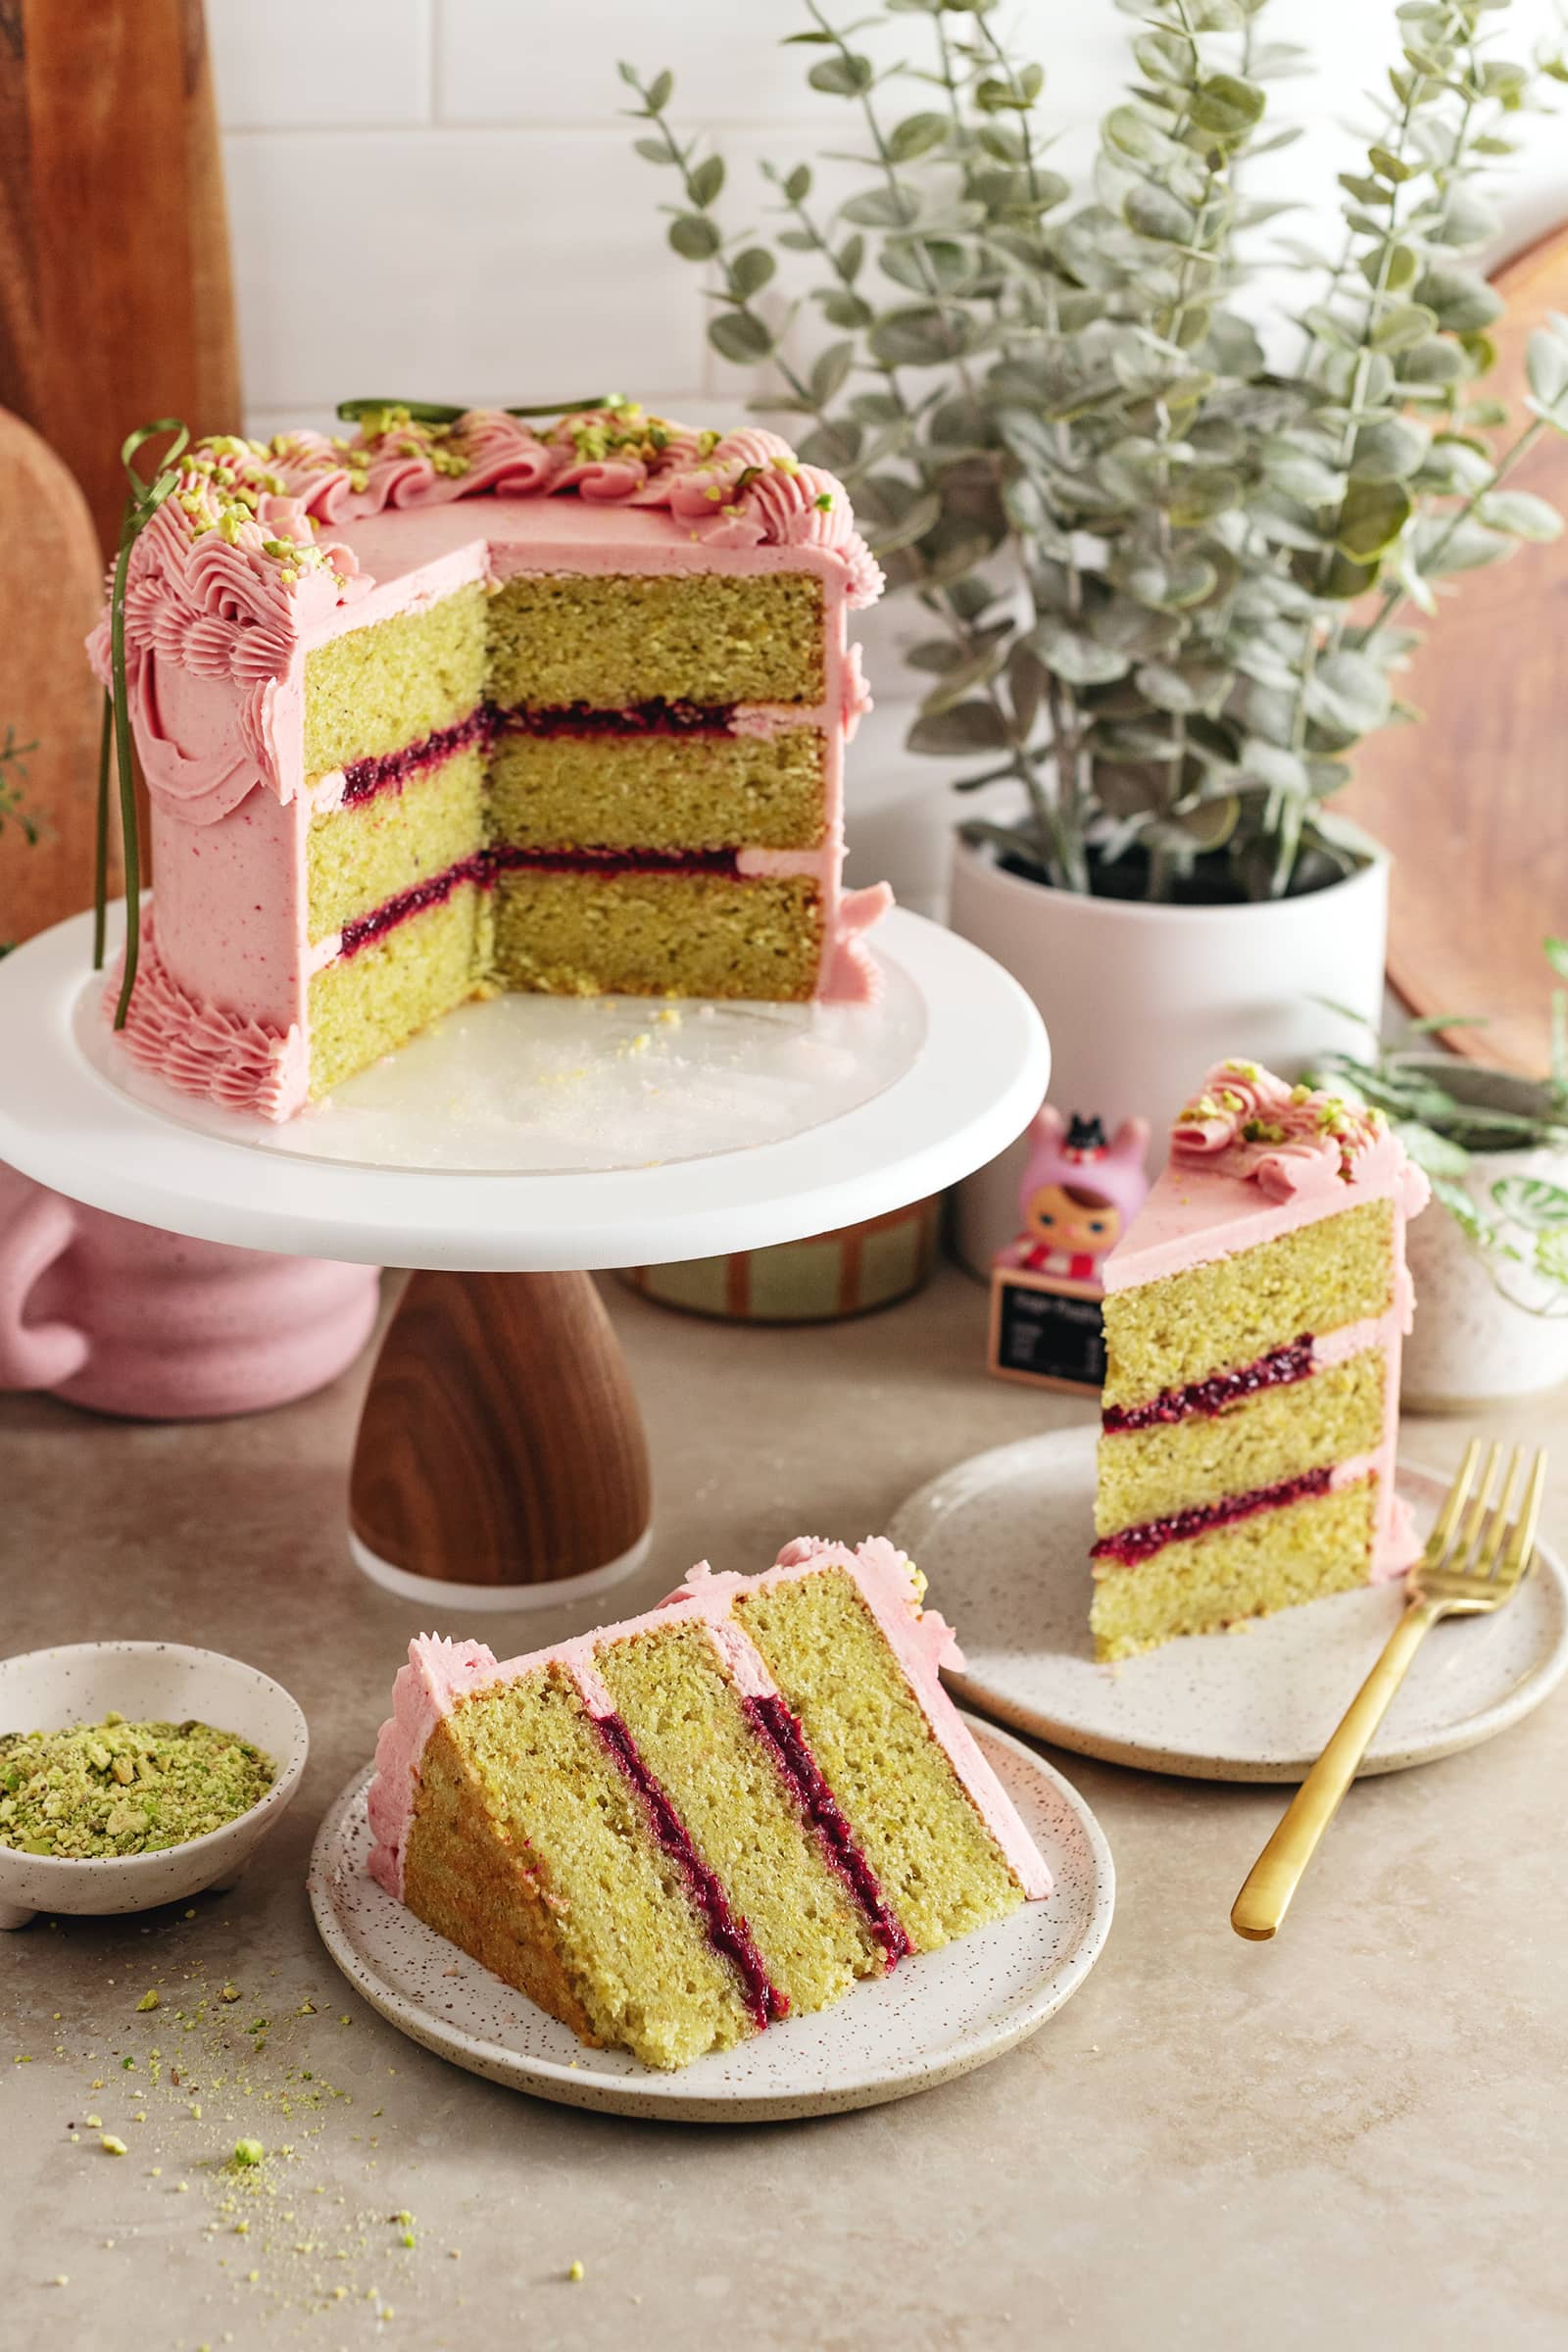
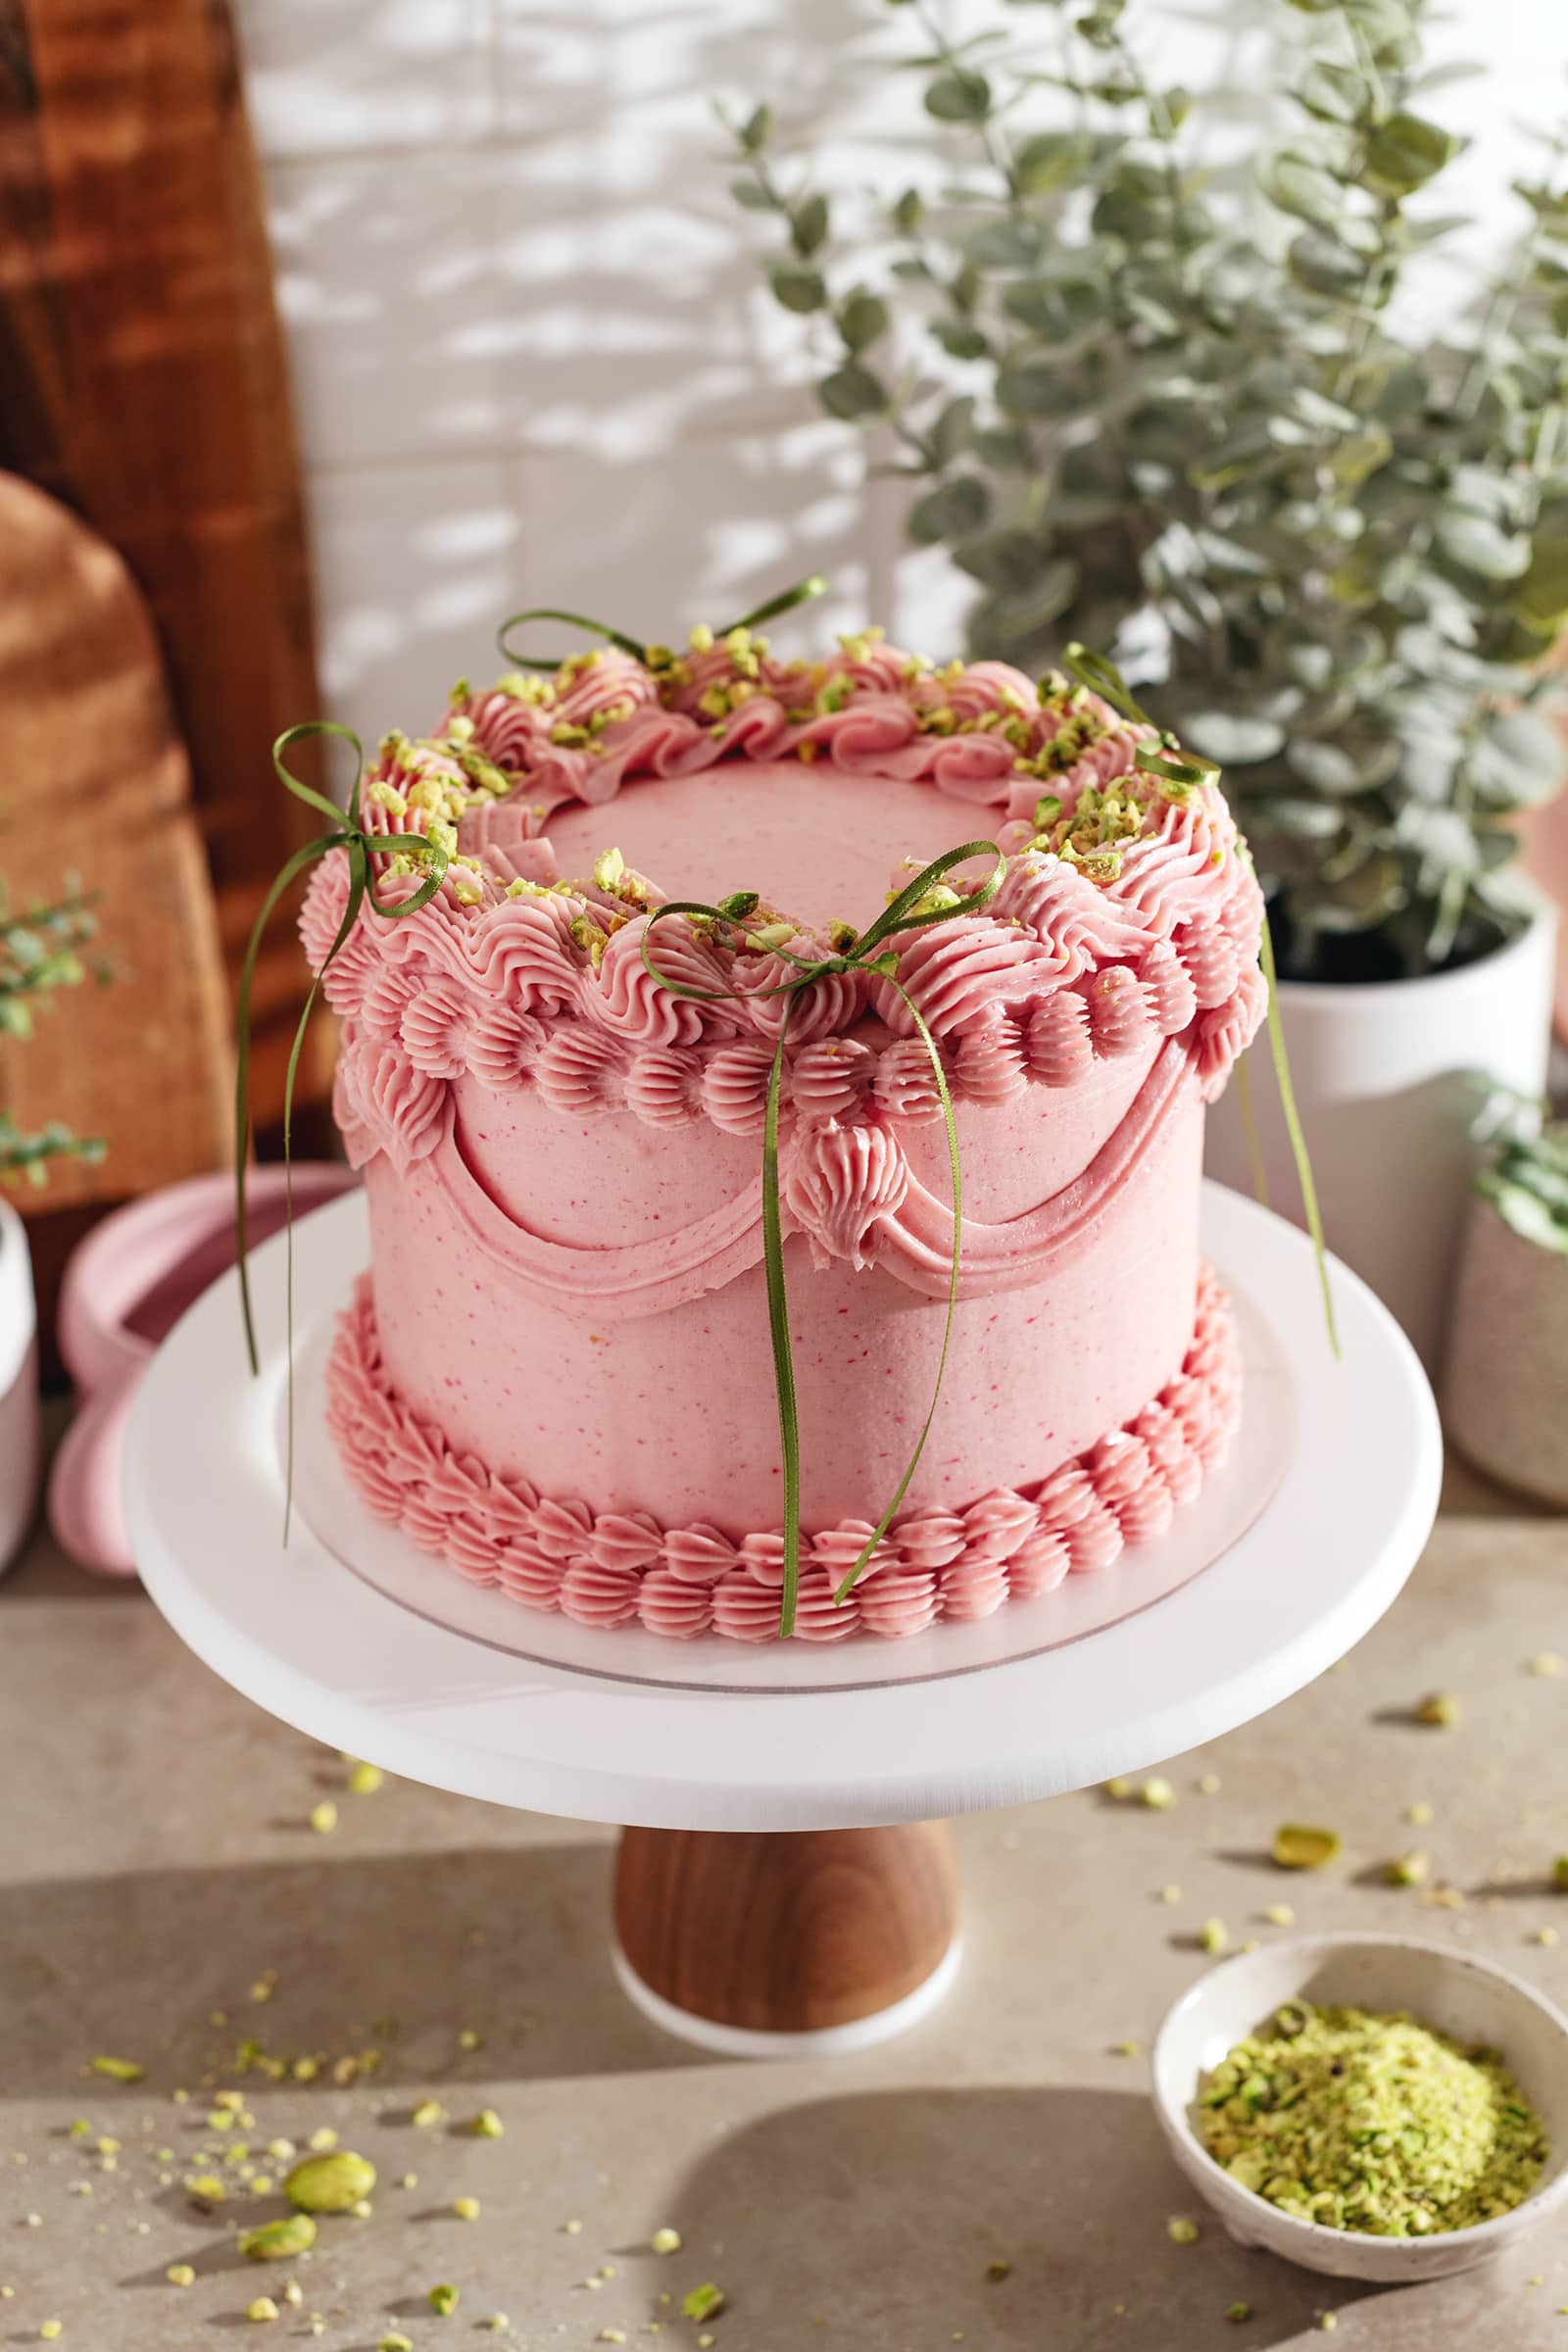
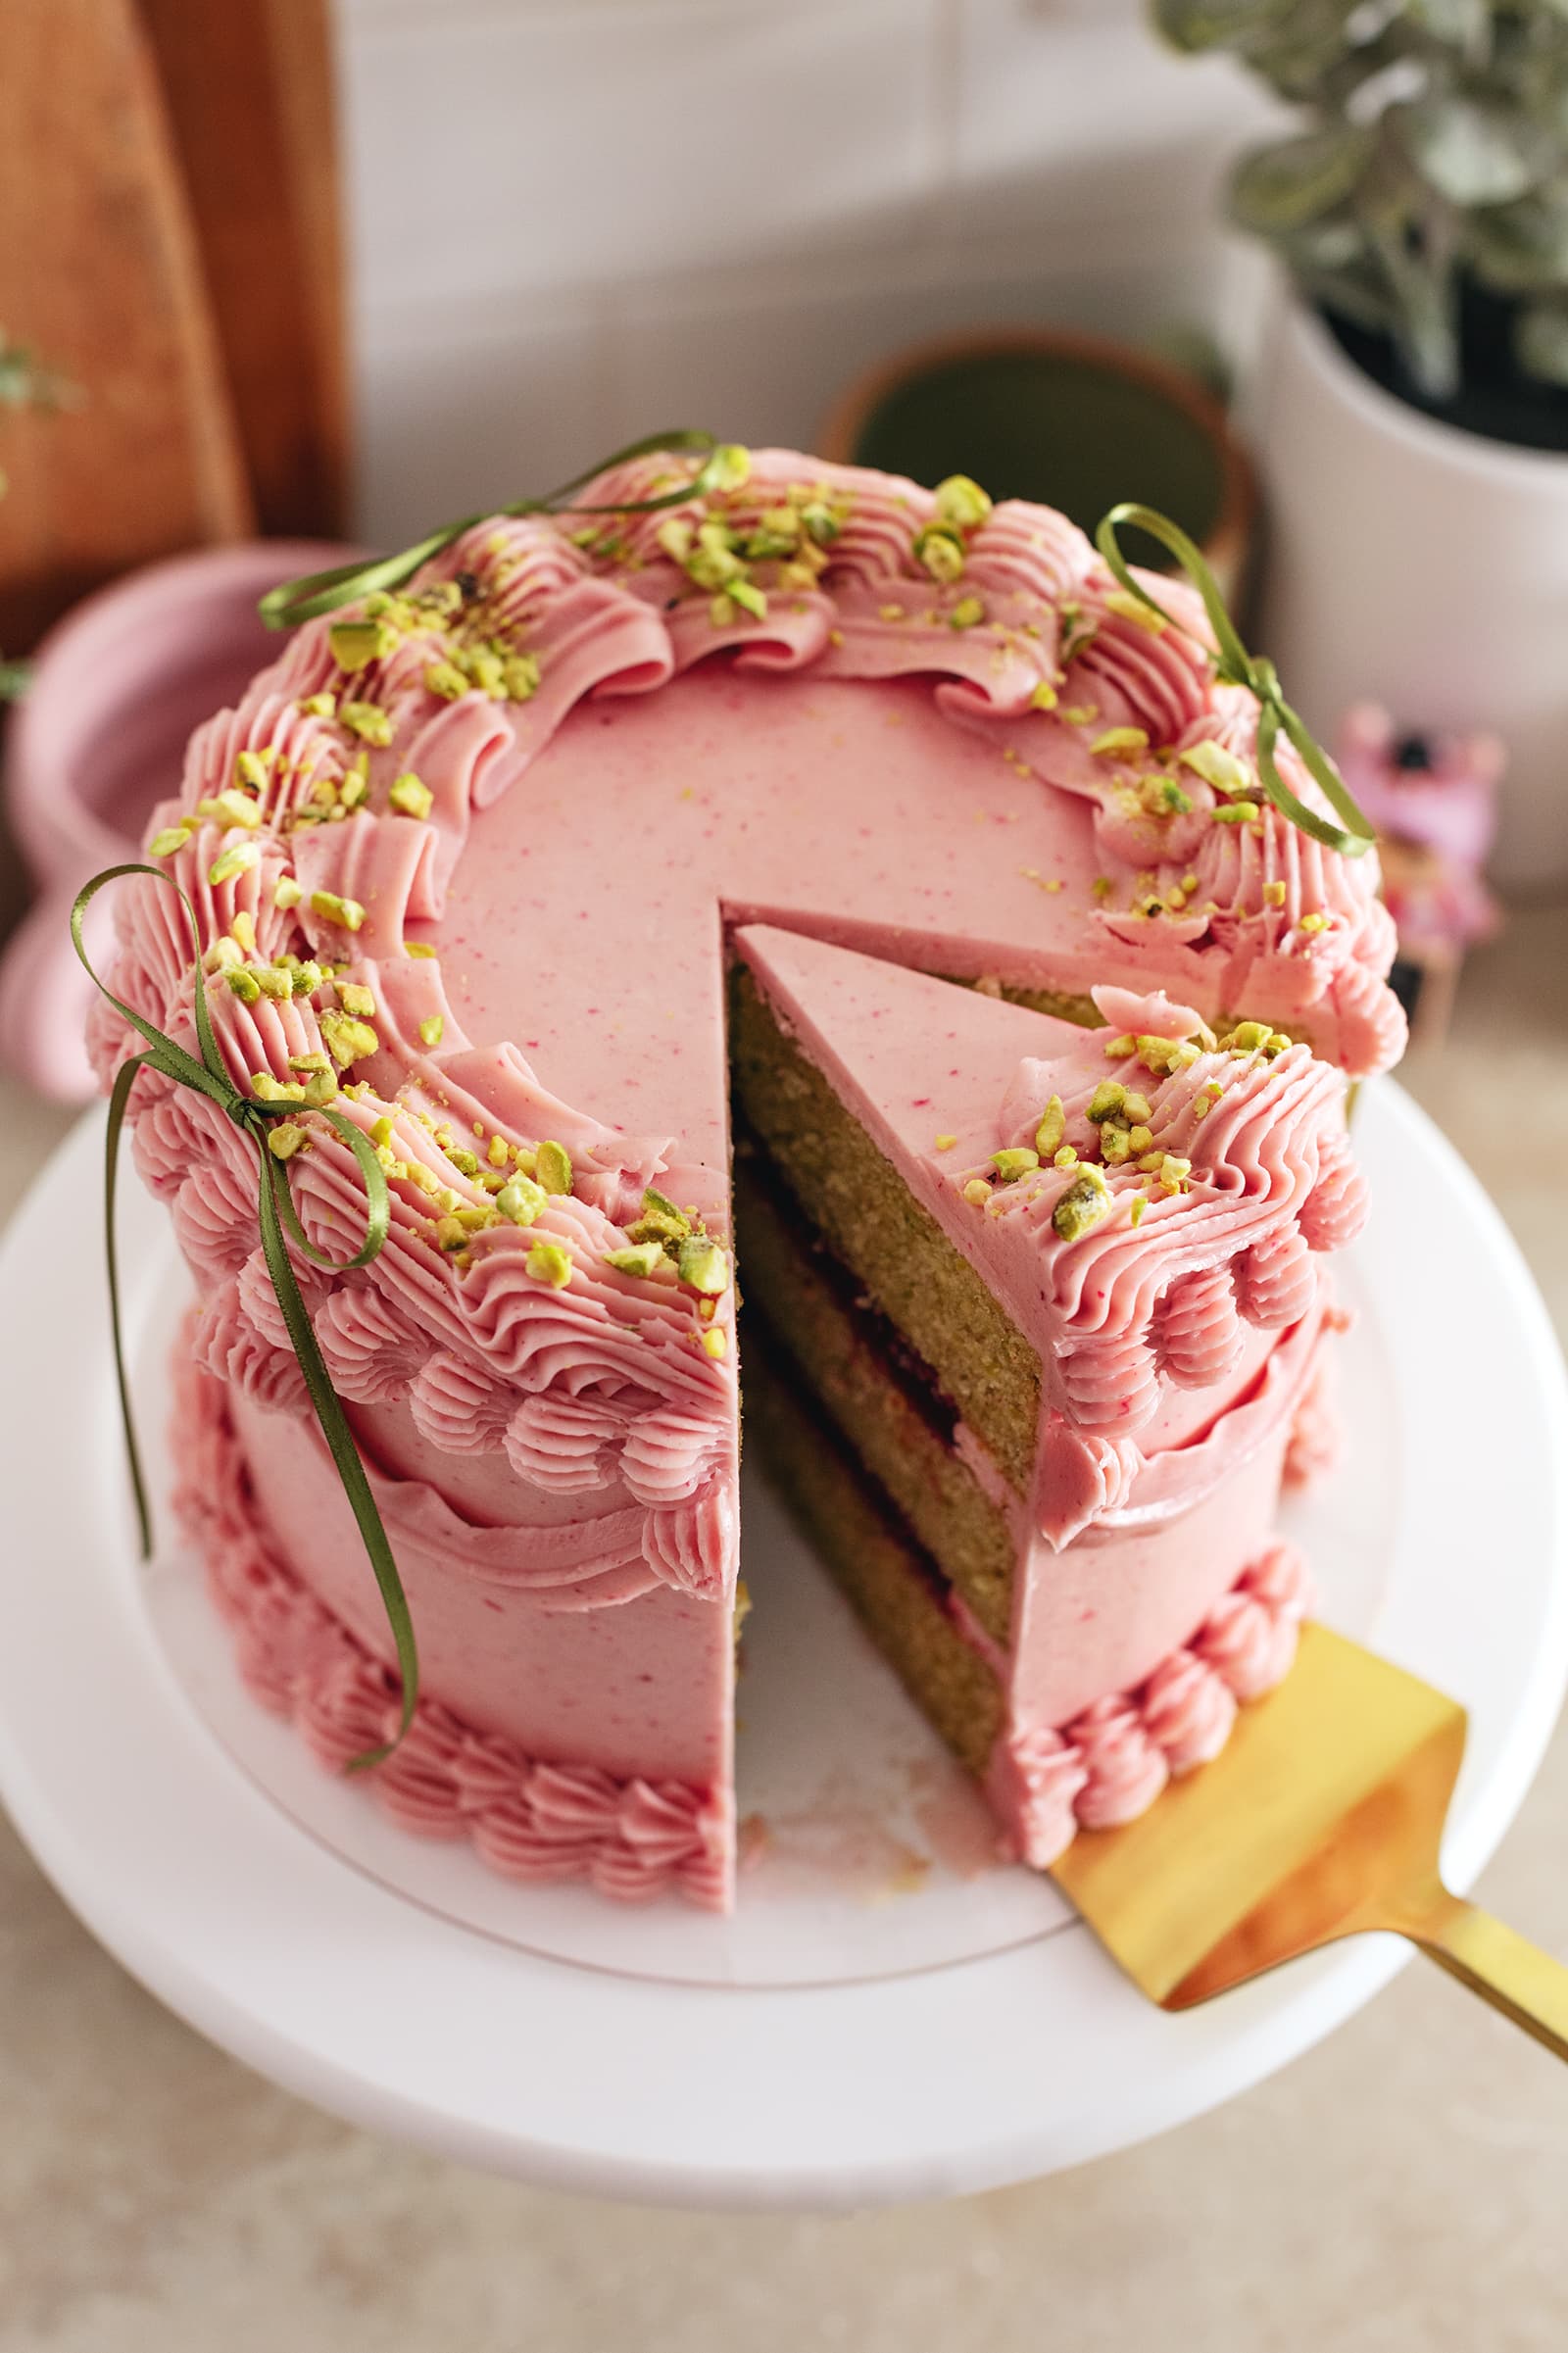
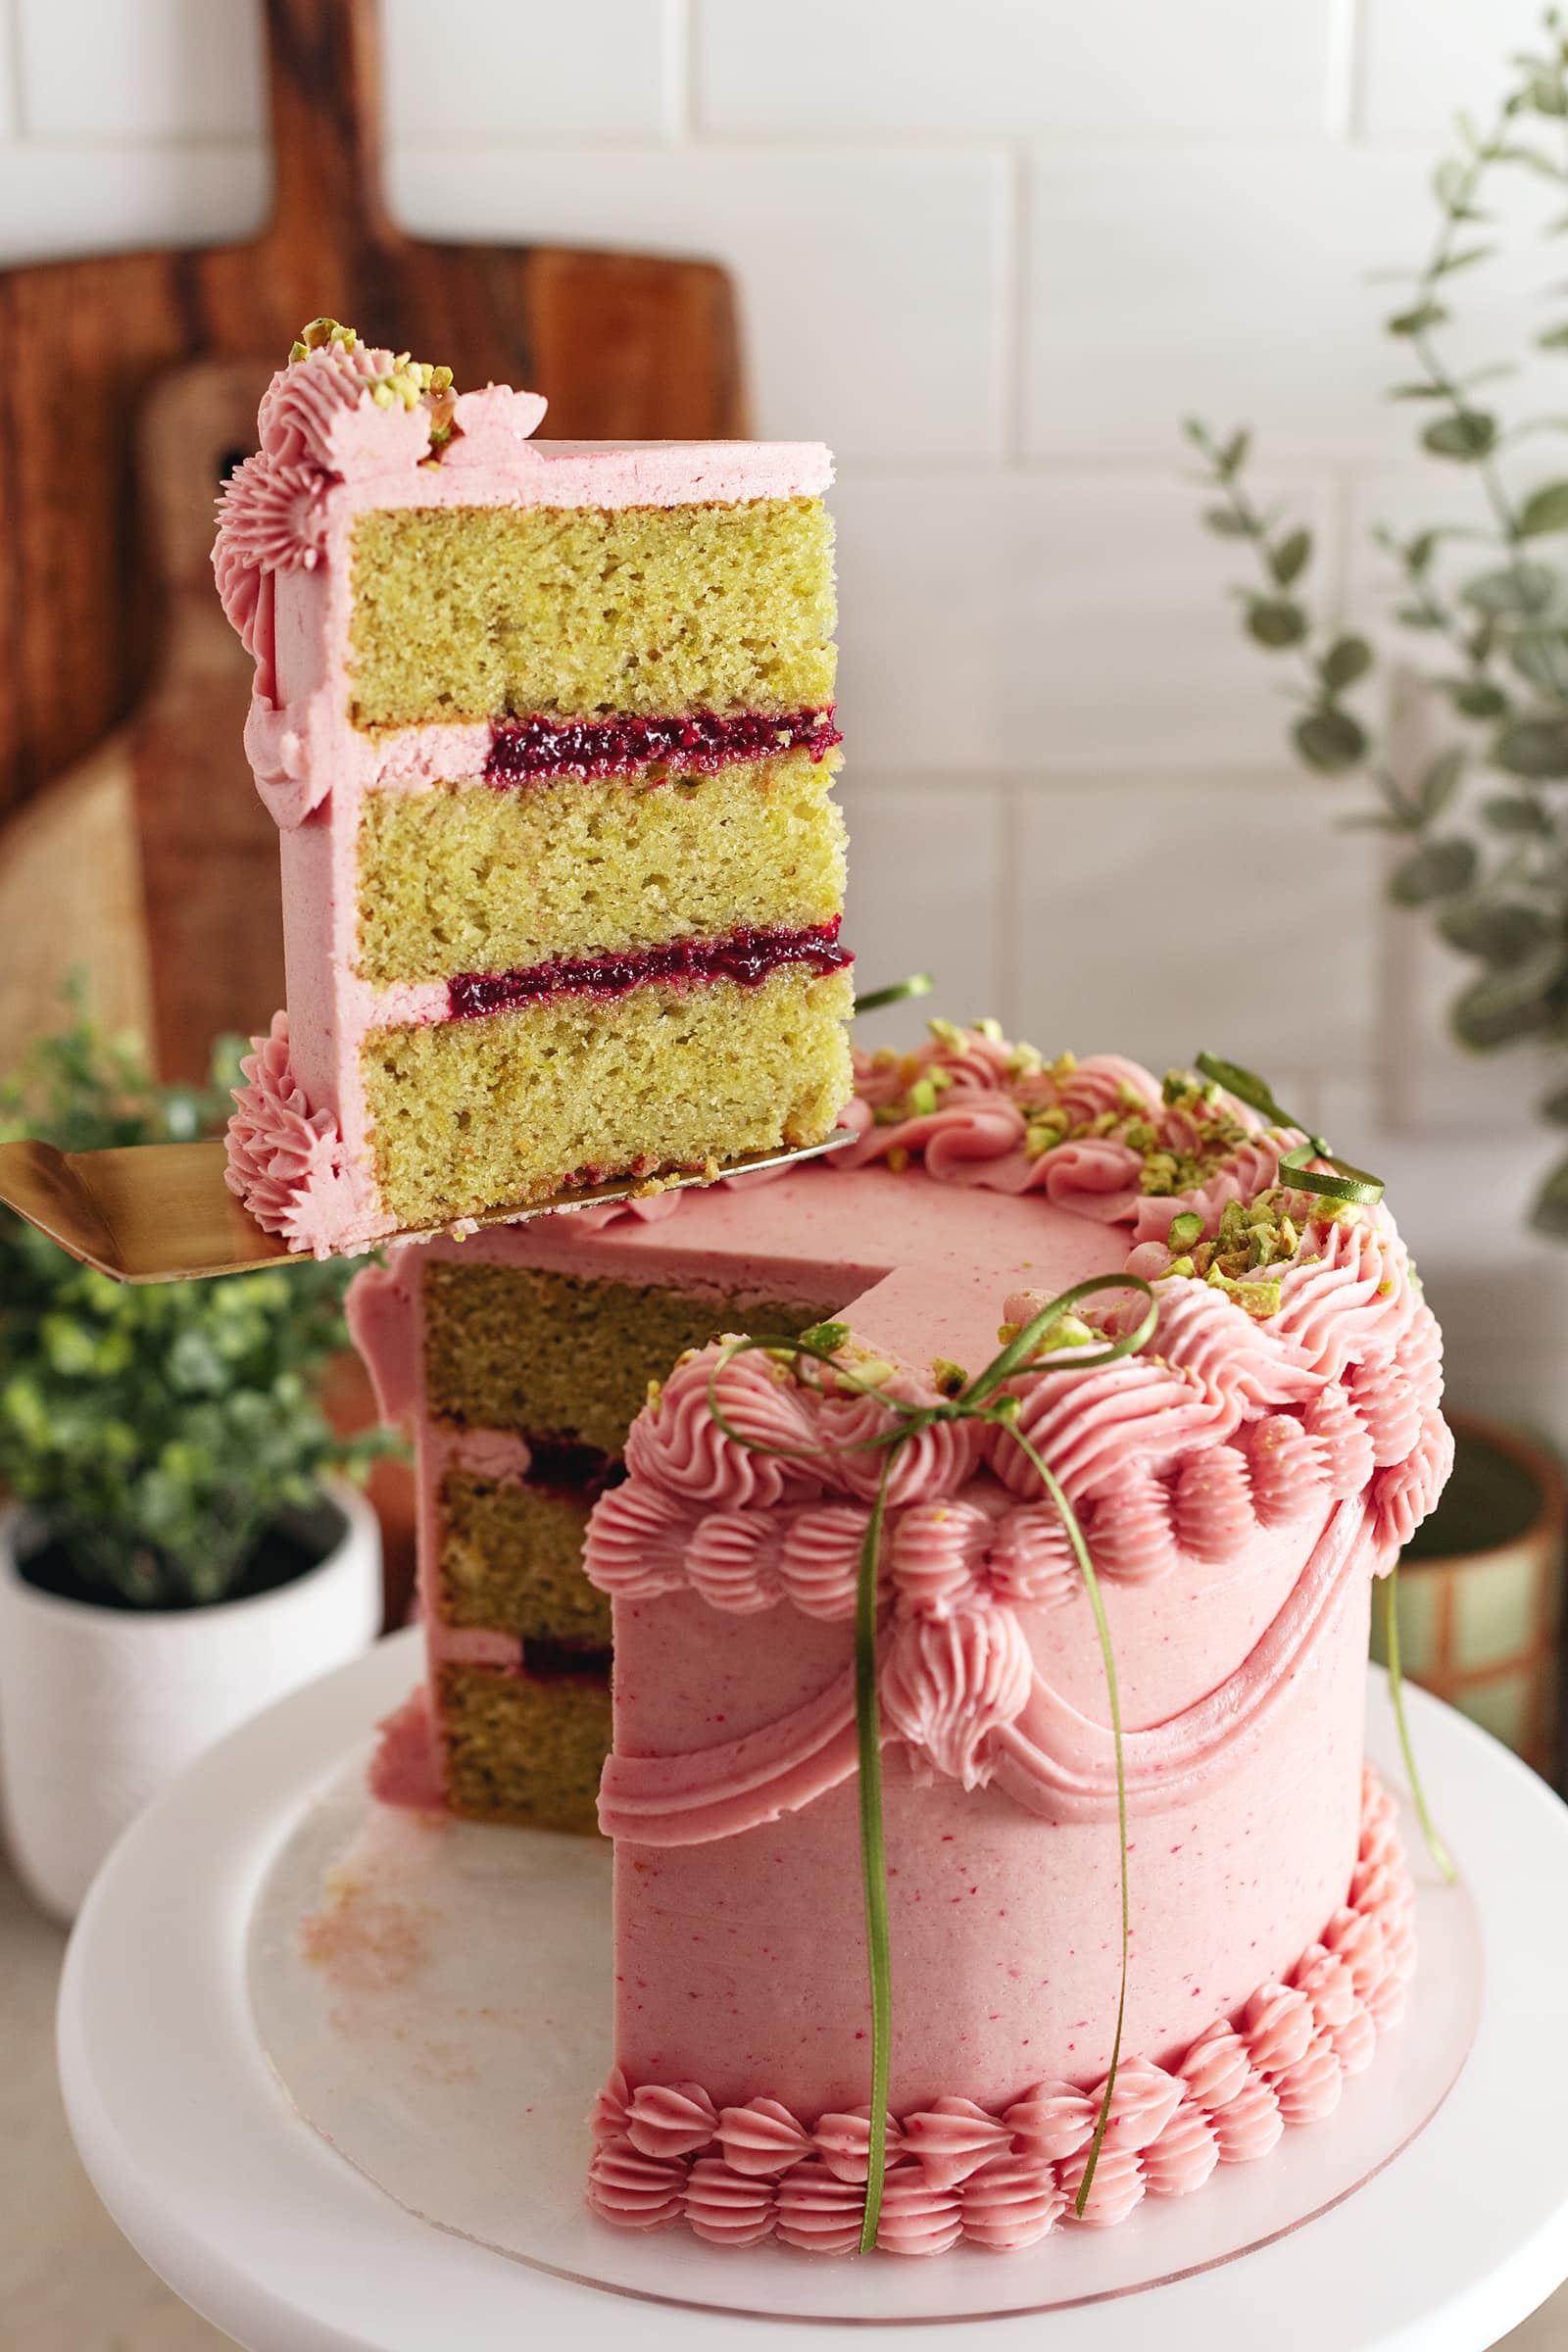
This raspberry pistachio cake is made with soft pistachio cake layers sandwiching homemade raspberry jam and all covered with raspberry buttercream. It's a delicious flavour combination with all natural colouring!
Why you'll love this recipe
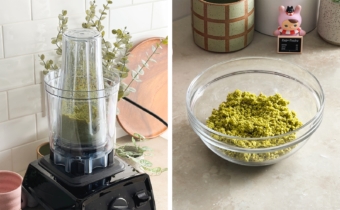
- Pistachio cake layers. These soft cake layers are made with finely ground pistachios for the perfect amount of nutty, pistachio flavour and fresh green colour.
- Homemade raspberry jam filling. You could use store-bought jam but this homemade jam is so easy to make (and seedless!). This filling gives the cake more moisture and makes it a little more exciting.
- Raspberry buttercream. This cake is covered with an easy American buttercream that's easy to whip up.
- Naturally coloured. This entire cake is naturally coloured by the pistachios and raspberries! No food colouring needed.
Tools
- 6" cake pans - This recipe is scaled for three 6" cake layers. Use any light-coloured aluminum cake pans that are 2" or 3" in height (taller cake pans tend to help cakes bake flatter but it doesn't matter which you use). Try not to mix pans from different brands as they can bake slightly differently.
- Blender or food processor - You'll need this to grind your pistachios finely. If you're able to find pistachio flour or already ground pistachios, you can skip this step. If you have the patience, you can also use a mortar and pestle or thoroughly whack the pistachios in a ziploc bag with a rolling pin until they're a finely ground flour consistency.
- Stand mixer - You'll need a stand mixer or hand mixer to mix the cake batter and especially for the buttercream frosting. I usually opt for a stand mixer when making buttercream because I can leave it running for over 10 minutes.
- Fine mesh sieve - The pistachio flour tends to clump up because of the oils that are released from the nuts. We'll need a sieve to break up the clumps but any larger pieces that are sifted out can be added back to the batter (don't discard them!).
- Piping bags - You'll need piping bags to pipe a buttercream design on the cake. I like using 18" piping bags because they're roomy enough for various usages.
- Piping tips - You'll need piping tips of your choice depending on the kind of buttercream design you want to create. A piping tip coupler is also handy for switching out piping tips with the same piping bag of frosting.
- Offset spatula - Offset spatulas of two different sizes are useful for spreading the raspberry jam filling on the cake layers and for spreading the frosting around the outside of the cake.
- Cake scraper - Use a tall, metal scraper to smooth the sides and top of your cake. Metal scrapers are great because you can run them under hot water for an extra smooth finish.
Ingredient notes
As always, the full recipe card with ingredient amounts and instructions is at the bottom of this post! Keep reading for more details on each ingredient or skip ahead to the recipe.
- Pistachios - Use unsalted and shelled pistachios. You'll be grinding them down into a finely ground flour consistency with a blender or food processor.
- All-purpose flour
- Baking powder
- Baking soda
- Salt
- Unsalted butter - We're using melted to make this cake easier since there are already a few components to it, as with all cakes. No creaming softened butter needed!
- Granulated sugar
- Eggs - Make sure your eggs are at room temperature so they don't cause the melted butter to solidify on contact.
- Greek yogurt - This should also be at room temperature. Greek yogurt helps make the cake more moist.
- Oil - Using a combination of butter and oil makes cakes more moist and soft than using butter alone since oil doesn't harden when chilled.
- Vanilla extract
- Raspberries - You can use fresh or frozen raspberries for the raspberry jam. Both work perfectly. You can even just use store-bought raspberry jam if you're in a pinch.
- Powdered sugar - This is for the American buttercream. I prefer using a ratio of 2:1 butter to powdered sugar to prevent the buttercream from being too sweet. If your powdered sugar is clumpy, you may want to sift it before using it.
- Heavy cream - This is used to thin out the buttercream to a pipable consistency. Mix it into the buttercream one tablespoon at a time as needed until it reaches your preferred consistency.
How to make a raspberry pistachio cake
Make the pistachio cake
Prep - Preheat oven to 350°F. Line three 6" cake pans with rounds of parchment paper on the bottom and set aside.
Grind pistachios - In a bullet blender or food processor, whiz pistachios for about 30 seconds until they become a coarse flour texture. Transfer this to a medium bowl.
Tip: Once the pistachios are finely ground, don't keep blending/grinding them. They'll eventually release their oils and turn into pistachio butter. Delicious but not what we want.

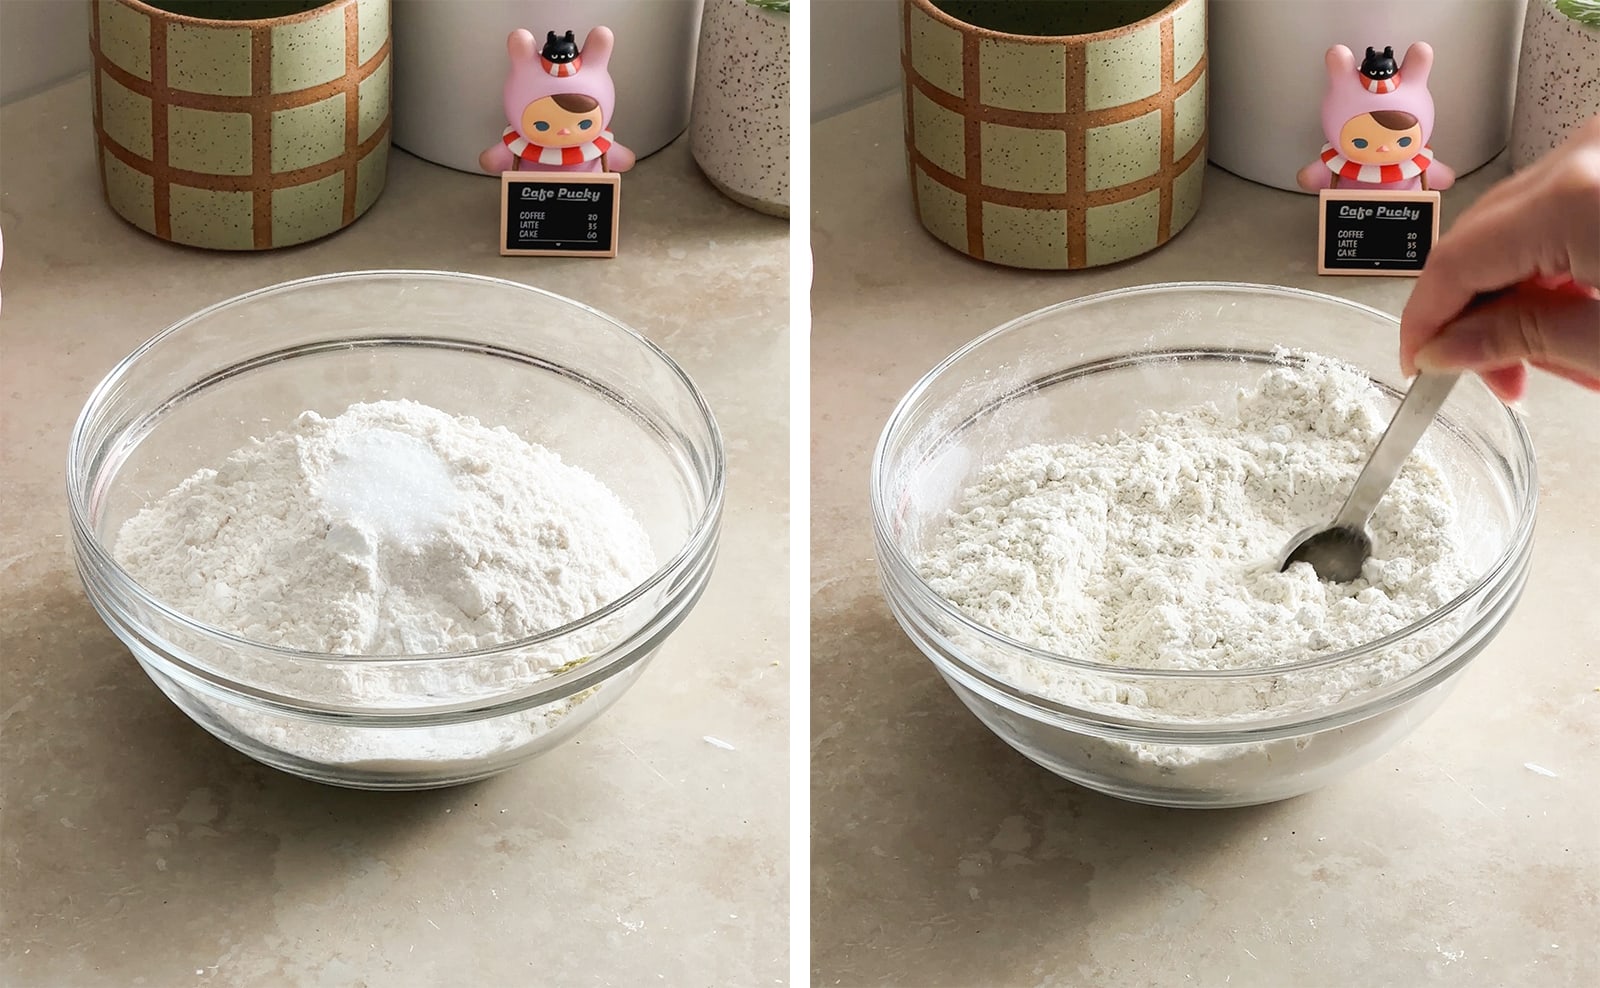
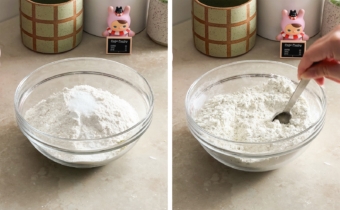
Dry mixture - To the pistachios, add flour, baking powder, baking soda, and salt. Stir together to combine. Set aside.
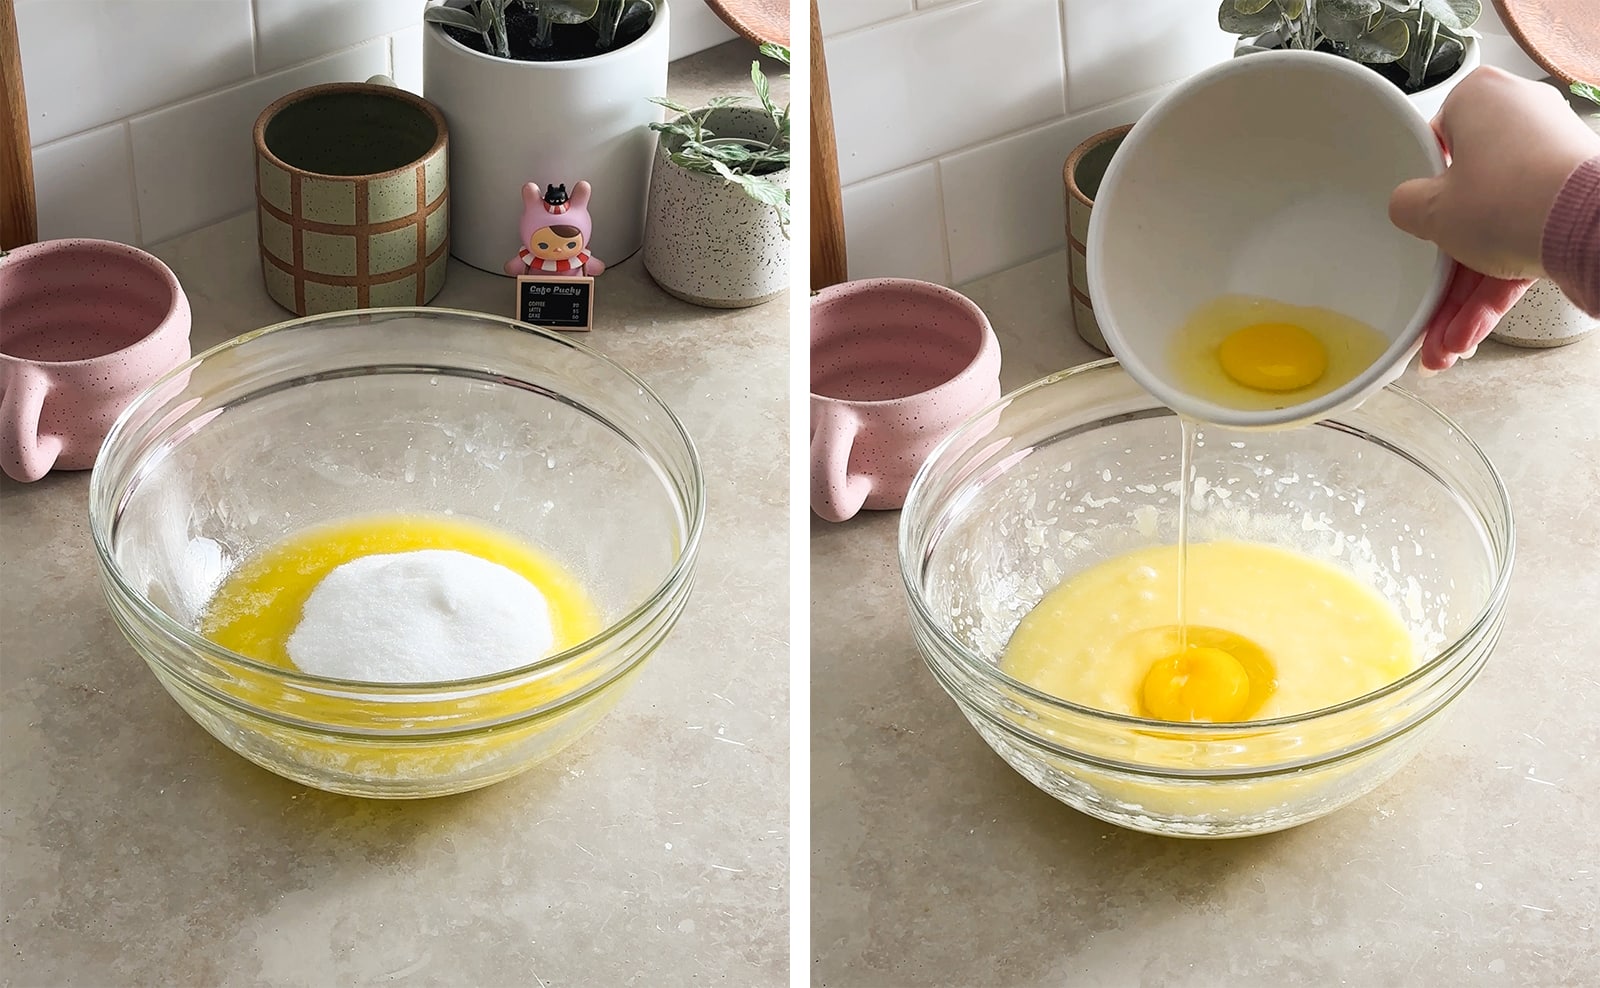
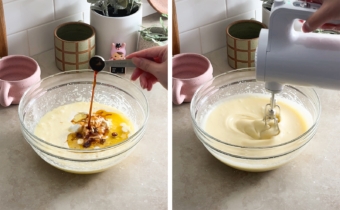
Wet mixture - In a large mixing bowl, add melted butter and sugar. Whisk together until combined. Add the eggs, one at a time, whisking until incorporated.
Wet mixture continued - Add the greek yogurt, oil, and vanilla extract and whisk again until combined.

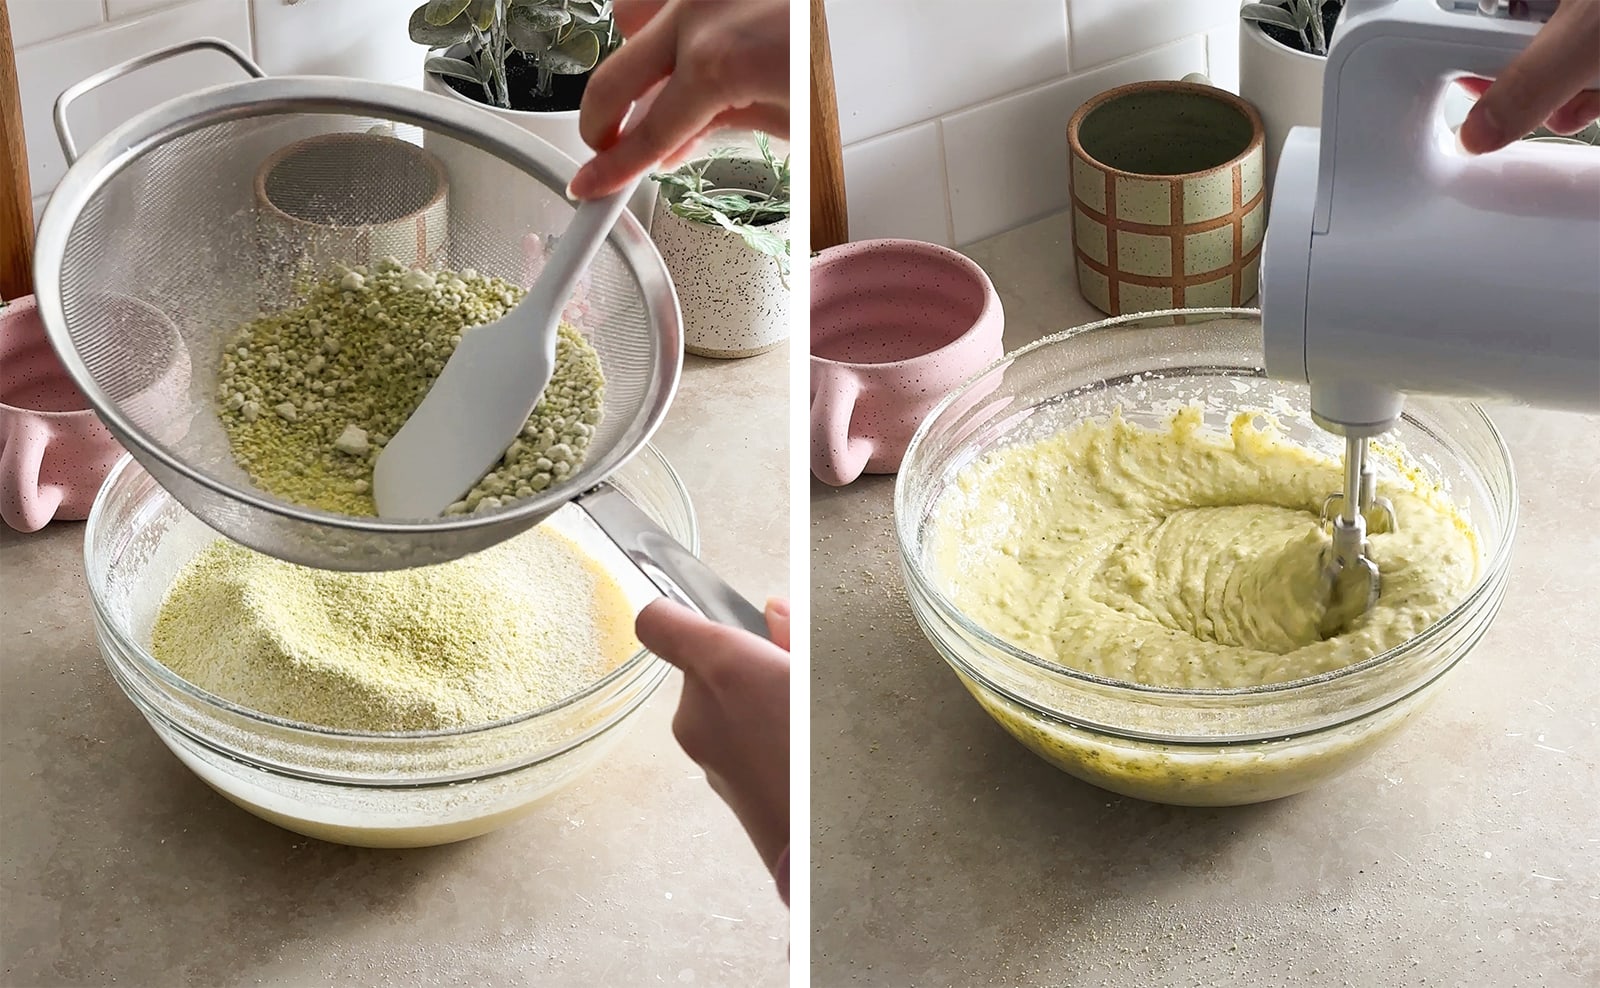
Combine dry and wet mixture - Use a fine-mesh sieve to sift the flour mixture into the wet mixture. The goal is just to break up any clumps of pistachio flour. Any larger pieces of pistachios that are remaining in the sieve can be added back to the batter. Whisk together until just combined.
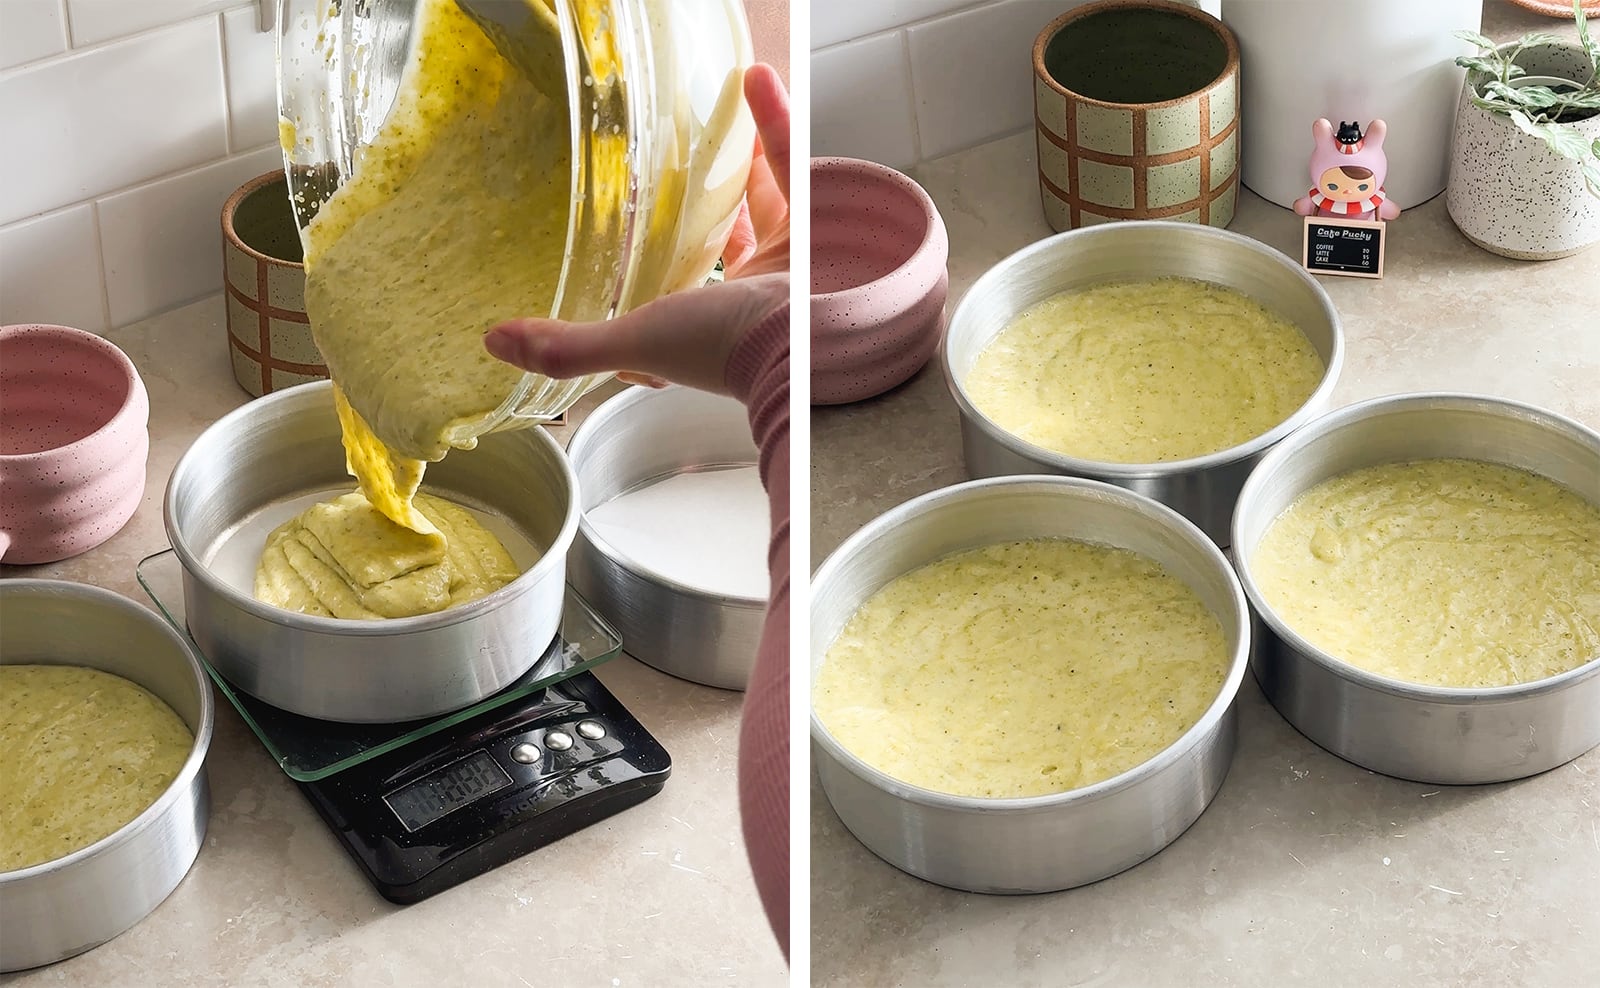
Fill cake pans - Divide the batter into your three lined cake pans (about 320g of batter in each). Give each of the pans a spin on the counter to push the batter to the sides of the pan (a trick to help the cakes bake flatter).
Bake - Bake cakes for about 30-35 minutes or until the tops are lightly golden brown and a toothpick inserted in the middle comes out mostly clean.
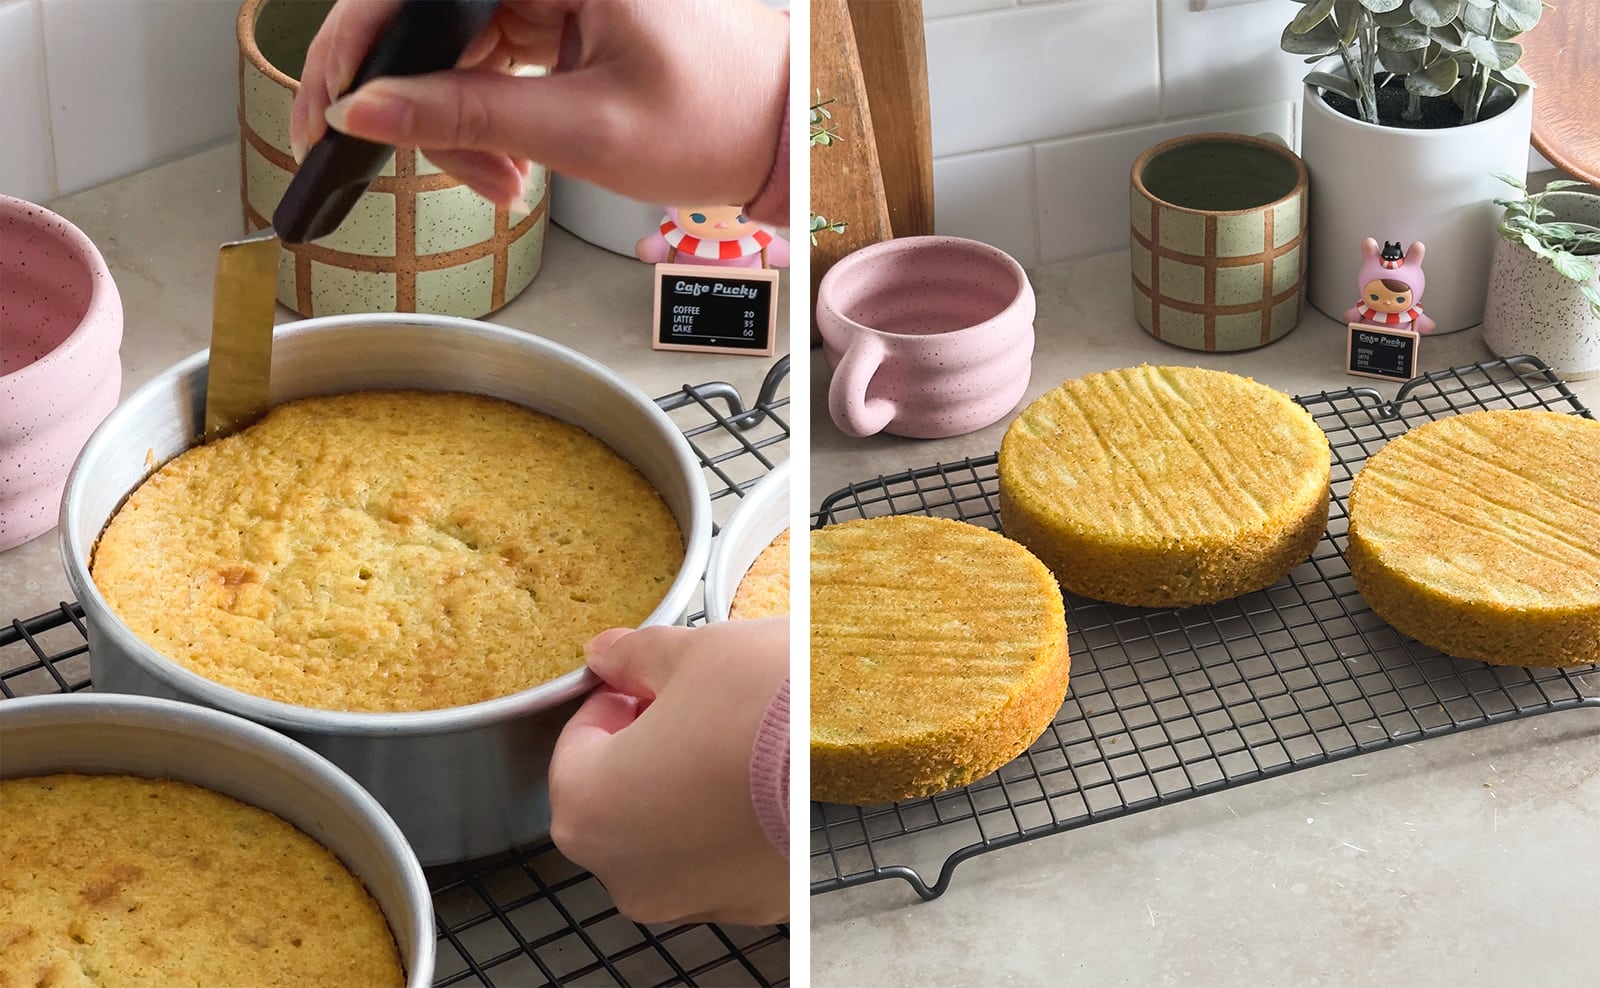
Release cake layers - Let the cakes cool in the pans until they're cool enough to touch with your hands. Run an offset spatula around the sides of each cake and invert the pan to release the cake layers onto a wire rack. Peel the parchment paper off and let the cakes cool completely before assembling.
Tip: To make the cake-making process easier and less stressful, split up the different components and make them on separate days. I like to bake my cake layers and make the jam filling the day before. Keep the cake layers wrapped in plastic wrap and store everything in the fridge. Make the buttercream and put together the cake the next day.
Make the raspberry jam
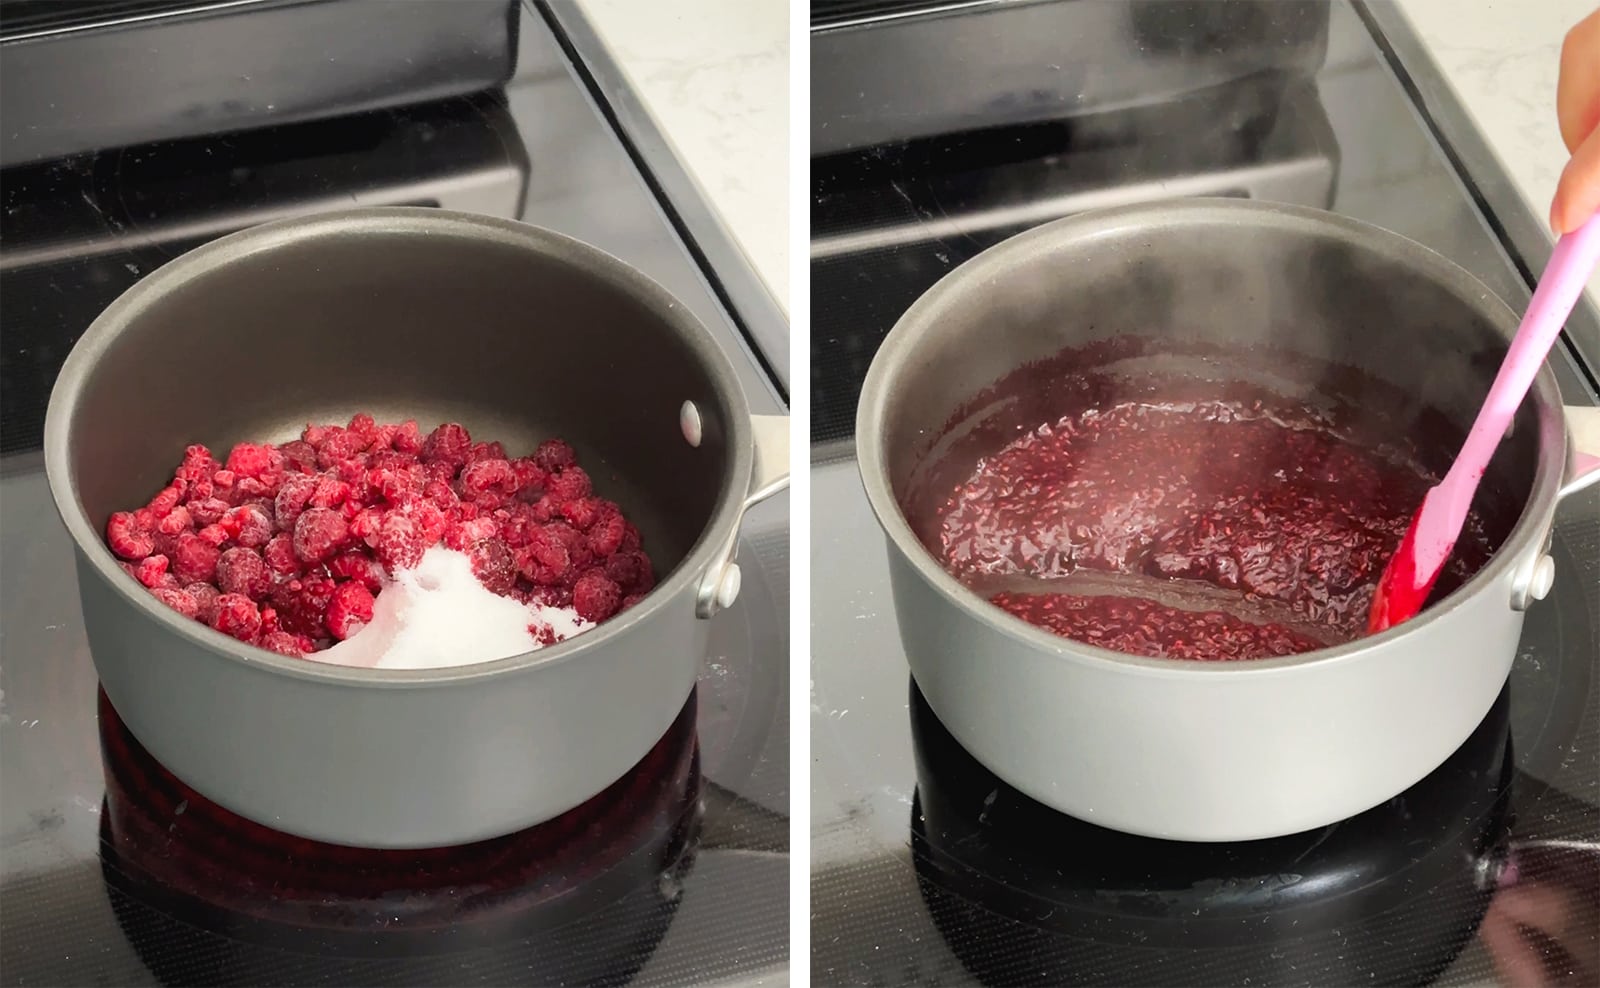
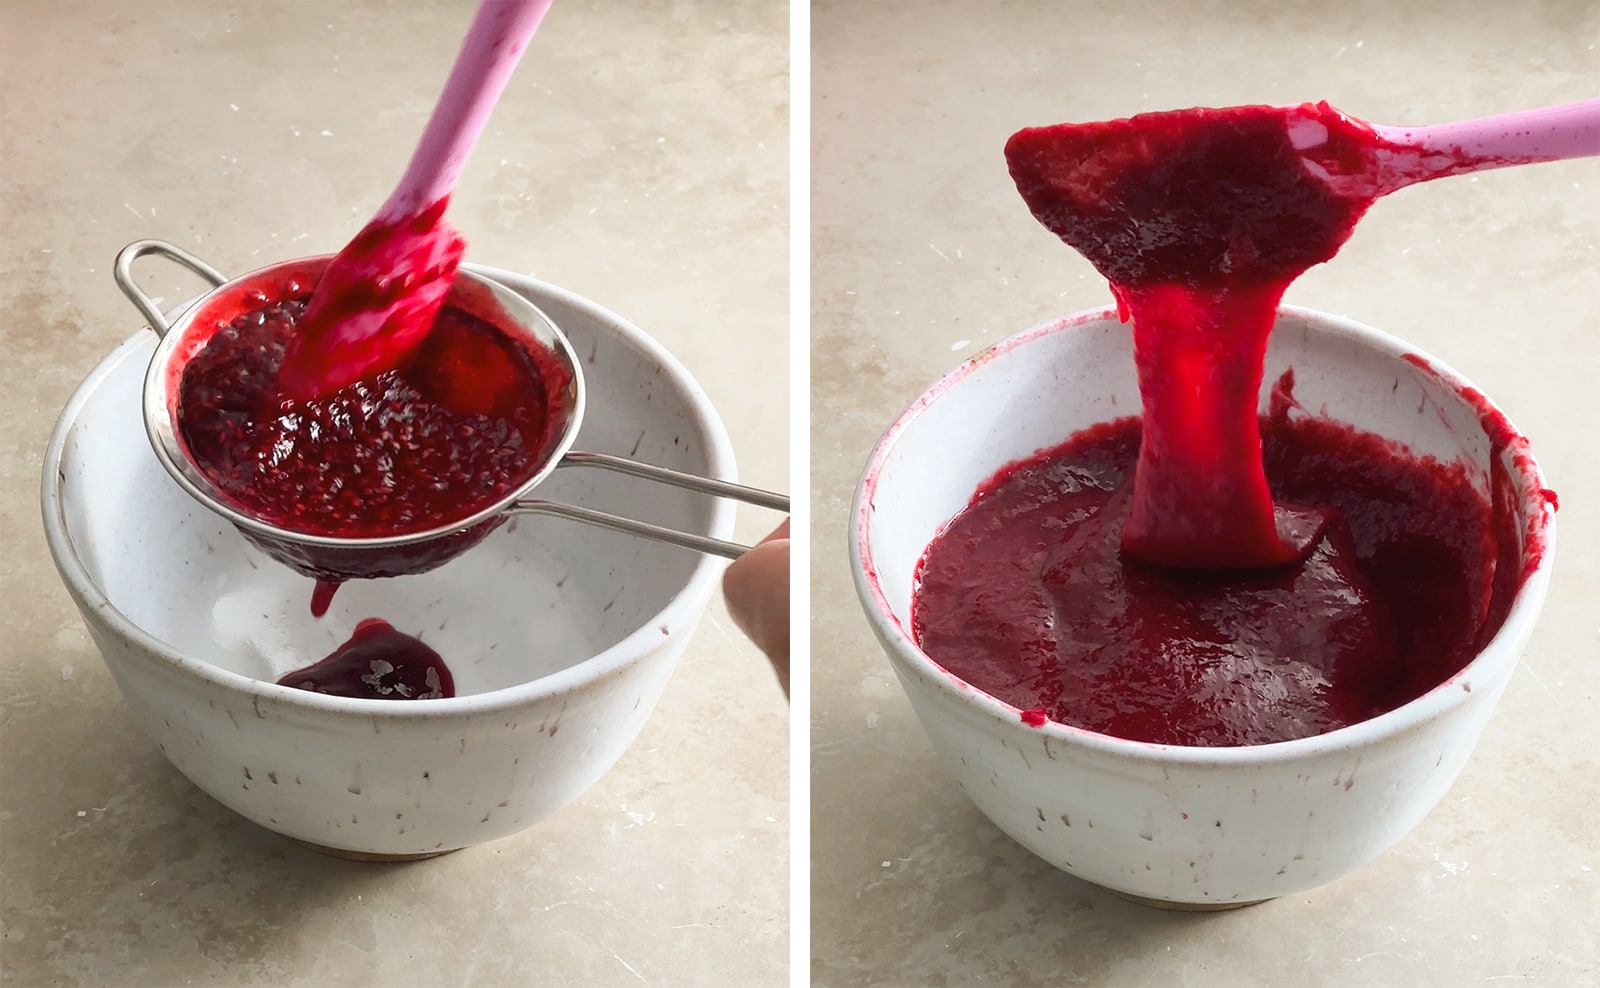
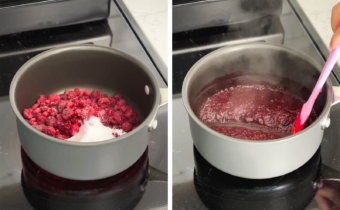
Cook - In a small pot, add raspberries, sugar, and water. Heat on medium heat until it comes to a boil, stirring occasionally. Cook the jam until it thickens to a jammy consistency (when you drag a spatula through it, the jam should part on either side and slowly come back together over a few seconds.
Remove seeds - Push the jam through a fine-mesh sieve. Remove and discard the seeds. Let the jam cool completely before using.
Make the raspberry buttercream
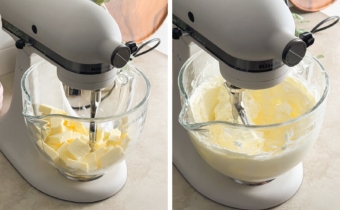
Cream butter - In a stand mixer fitted with a paddle attachment, beat the softened butter on medium-high speed for about 10 minutes, stopping to scrape down the bowl halfway, or until the butter is very creamy and pale in colour.

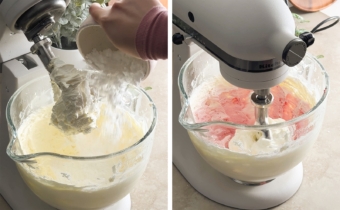
Whip buttercream - Add the powdered sugar. Start the mixer on low speed, working up to medium-high speed for about 5 minutes. Add the raspberry jam and vanilla extract and continue beating. Stream in one tablespoon of heavy cream at a time to thin out the buttercream as desired. After everything has been added, scrape down the bowl and continue beating for another 5 minutes.

Melt buttercream - Transfer a large dollop of buttercream to a small bowl and microwave for about 10 seconds until it becomes partially melted. Pour this back into the rest of the buttercream and fold together with a spatula until the buttercream is smooth and silky. Repeat as needed any time the buttercream gets too cold or has been sitting out for a while.
Transfer - Transfer about ¼ of the buttercream to a piping bag and cut the tip of the bag off.
Assemble the cake
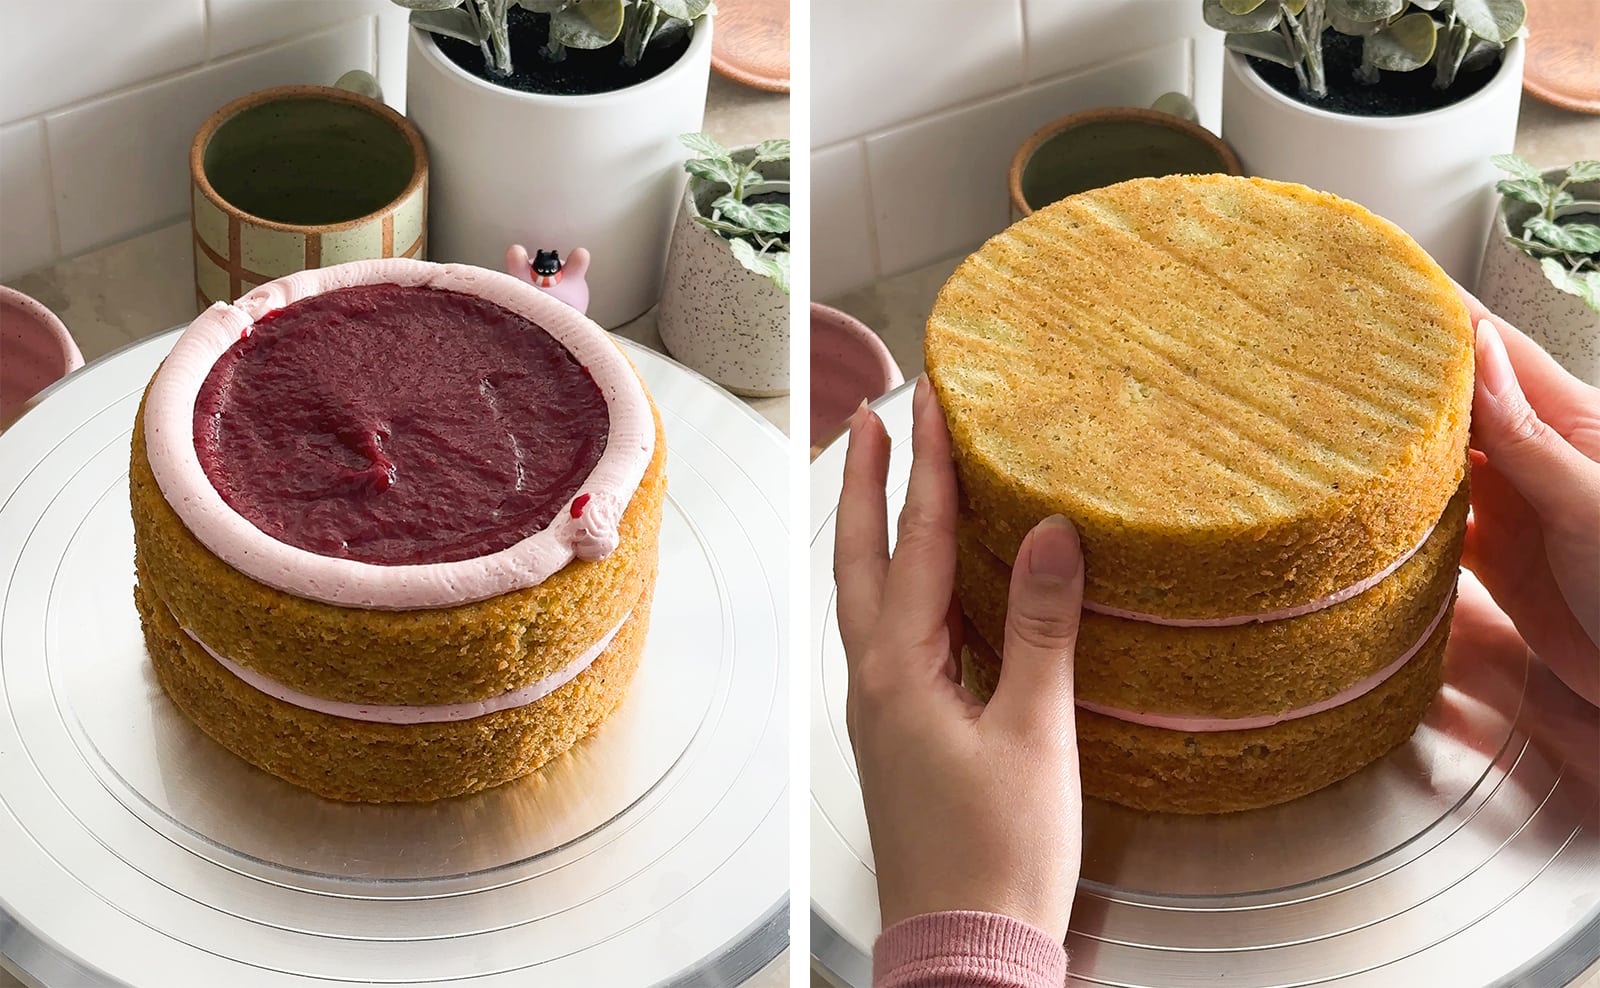
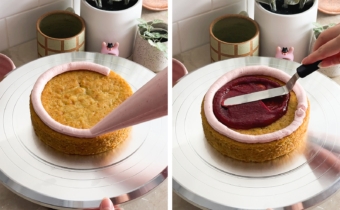
First cake layer - On a cake turntable, place down your first cake layer. Pipe a ring of buttercream around the edge of the cake layer. Add about 4 tablespoons of raspberry jam in the middle of the icing ring. Use an offset spatula to spread it into an even layer.
Tip: The ring of icing prevents the jam filling from leaking out the sides of the cake. If you're using a particularly liquidy filling, you may want to chill the cake to harden the buttercream ring before adding the filling.

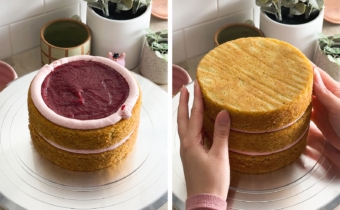
Second & third cake layers - Place a second cake layer on top. Repeat adding the ring of icing and raspberry jam. Top with the last cake layer.
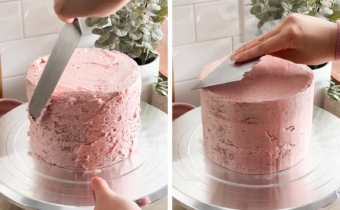
Crumb coat - Smooth a thin layer of frosting over the entire cake as a crumb coat and scrape away the excess with a cake scraper. Let the cake chill in the fridge for about 15 minutes until the crumb coat is firm to the touch.
Tip: A thin crumb coat frosting helps prevent cake crumbs from getting into your frosting, making it lumpy. The crumb coat should be thin (you should still be able to see some of the cake through it) and doesn't need to be perfect since you'll be covering it up with another thicker layer of buttercream.

Final buttercream layer - Spread about ¾ of the remaining buttercream around the entire cake and scrape off the excess with a scraper.

Tip: Use a metal cake scraper. Run the scraper under hot water and wipe dry before using it to scrape the frosting on the cake. The heat melts the top layer of frosting as you scrape it, removes air bubbles, and leaves a super smooth finish! Repeat as needed.
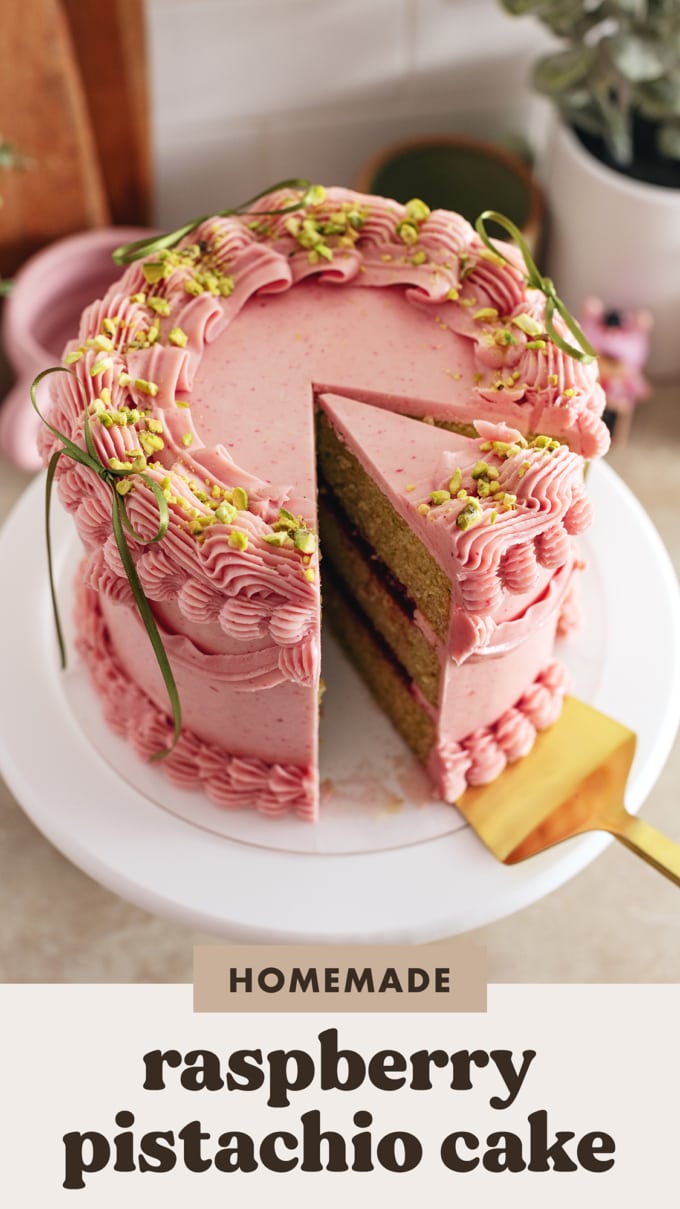
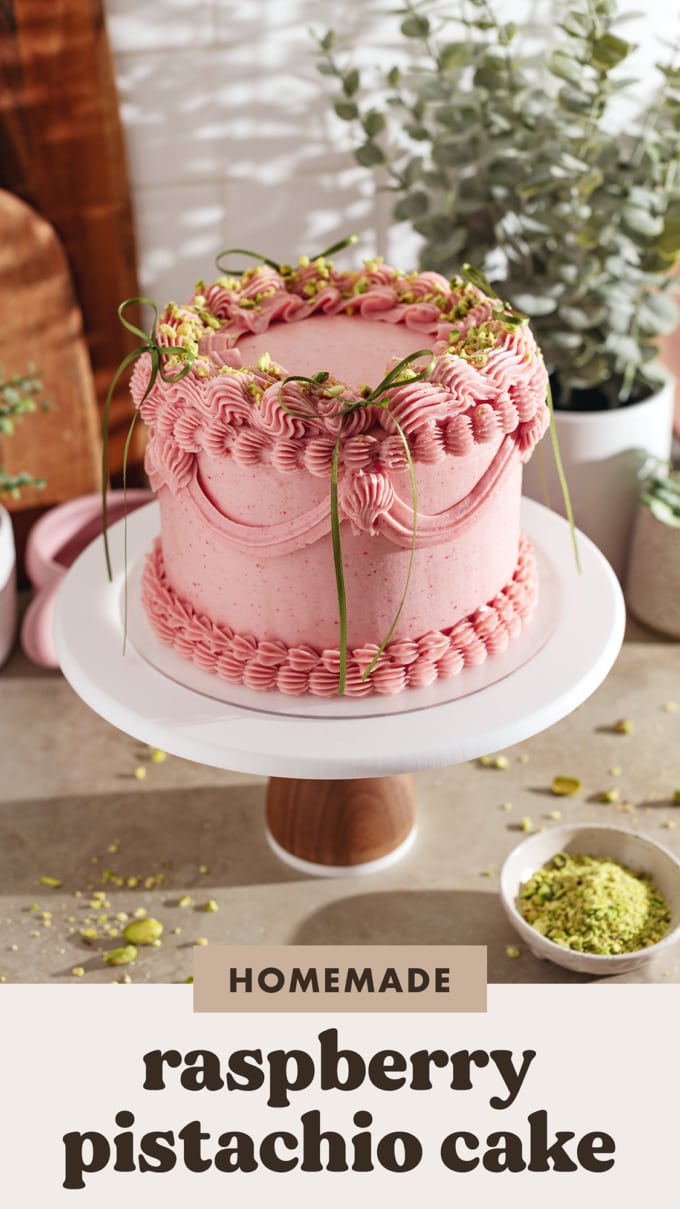
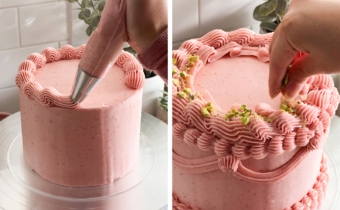
Decorate - Transfer the remaining buttercream to piping bags fitted with piping tips of your choice. Pipe your buttercream design on the cake. Finish by sprinkling crushed pistachios on top of the cake and decorating with ribbon bows.

Storage
This raspberry pistachio cake can be stored in a cake container, airtight container, or covered in plastic wrap in the fridge for up to 3 days. Let it come back to room temperature before serving.
Freezing
Leftover slices can be frozen by placing them in an airtight container or wrapping well with plastic wrap and/or aluminum foil and freezing for up to 1 month.
Thaw in the fridge overnight or at room temperature for several hours before eating.
Frequently asked questions
To scale this recipe for a 3-layer 8" cake, the exact conversion would be to multiply everything by 1.78x. To make it easier and avoid weird decimals, I would recommend multiplying everything by 2x. Bake the cakes for a few minutes longer and use visual cues to check doneness.
Baking by weight is much more accurate than volume. When using US standard cups, ingredients like flour and sugar can easily be overpacked into the cup causing you to add too much of certain ingredients. Baking is a science and small changes like these can have unwanted effects on the finished product. I'm Canadian so I measure in grams but they can easily be converted to ounces. To measure by weight, you simply need a kitchen scale which you can usually pick up for less than $20.
Recipes with weight measurements are also easier to scale to smaller or bigger batches without dealing with weird fractions.
Small measurements are given in tablespoons and teaspoons because most kitchen scales are not accurate under about 10g. Tiny amounts like a ¼ teaspoon may not register accurately unless you have a drug scale 😉 This is not an uncommon practice among other recipe sites and commercial kitchens.
More raspberry recipes to try
Recipe
Raspberry Pistachio Cake
Equipment
Ingredients
Pistachio Cake
- 100 g unsalted pistachios, shelled
- 170 g all-purpose flour
- ½ teaspoon baking powder
- ½ teaspoon baking soda
- ½ teaspoon salt
- 115 g unsalted butter, melted
- 225 g granulated sugar
- 3 large eggs, room temperature
- 180 g greek yogurt, room temperature
- 65 g light-tasting oil
- 2 teaspoon vanilla extract
Raspberry Jam
- 300 g raspberries, fresh or frozen
- 50 g granulated sugar
- 1 tablespoon water
Raspberry Buttercream
- 460 g unsalted butter, softened to room temperature
- 230 g powdered sugar
- 2 tablespoons raspberry jam, from above
- 2 teaspoons vanilla extract
- 3 tablespoons heavy cream
Instructions
Pistachio Cake
- Prep: Preheat oven to 350°F. Line three 6" cake pans with rounds of parchment paper on the bottom and set aside.
- Grind pistachios: In a bullet blender or food processor, whiz pistachios for about 30 seconds until they become a coarse flour texture. Transfer this to a medium bowl.

- Dry mixture: To the pistachios, add flour, baking powder, baking soda, and salt. Stir together to combine. Set aside.
- Wet mixture: In a large mixing bowl, add melted butter and sugar. Whisk together until combined. Add the eggs, one at a time, whisking until incorporated.
- Wet mixture continued: Add the greek yogurt, oil, and vanilla extract and whisk again until combined.
- Combine dry and wet mixture: Use a fine-mesh sieve to sift the flour mixture into the wet mixture. The goal is just to break up any clumps of pistachio flour. Any larger pieces of pistachios that are remaining in the sieve can be added back to the batter. Whisk together until just combined.
- Fill cake pans: Divide the batter into your three lined cake pans (about 320g of batter in each). Give each of the pans a spin on the counter to push the batter to the sides of the pan (a trick to help the cakes bake flatter).
- Bake: Bake cakes for about 30-35 minutes or until the tops are lightly golden brown and a toothpick inserted in the middle comes out mostly clean.
- Release cake layers: Let the cakes cool in the pans until they're cool enough to touch with your hands. Run an offset spatula around the sides of each cake and invert the pan to release the cake layers onto a wire rack. Peel the parchment paper off and let the cakes cool completely before assembling.


Raspberry Jam
- Cook: In a small pot, add raspberries, sugar, and water. Heat on medium heat until it comes to a boil, stirring occasionally. Cook the jam until it thickens to a jammy consistency (when you drag a spatula through it, the jam should part on either side and slowly come back together over a few seconds.
- Remove seeds: Push the jam through a fine-mesh sieve. Remove and discard the seeds. Let the jam cool completely before using.

Raspberry Buttercream
- Cream butter: In a stand mixer fitted with a paddle attachment, beat the softened butter on medium-high speed for about 10 minutes, stopping to scrape down the bowl halfway, or until the butter is very creamy and pale in colour.
- Whip buttercream: Add the powdered sugar. Start the mixer on low speed, working up to medium-high speed for about 5 minutes. Add the raspberry jam and vanilla extract and continue beating. Stream in one tablespoon of heavy cream at a time to thin out the buttercream as desired. After everything has been added, scrape down the bowl and continue beating for another 5 minutes.
- Melt buttercream: Transfer a large dollop of buttercream to a small bowl and microwave for about 10 seconds until it becomes partially melted. Pour this back into the rest of the buttercream and fold together with a spatula until the buttercream is smooth and silky. Repeat as needed any time the buttercream gets too cold or has been sitting out for a while.
- Transfer: Transfer about ¼ of the buttercream to a piping bag and cut the tip of the bag off.
Assemble the cake
- First cake layer: On a cake turntable, place down your first cake layer. Pipe a ring of buttercream around the edge of the cake layer. Add about 4 tablespoons of raspberry jam in the middle of the icing ring. Use an offset spatula to spread it into an even layer.
- Second & third cake layers: Place a second cake layer on top. Repeat adding the ring of icing and raspberry jam. Top with the last cake layer.
- Crumb coat: Smooth a thin layer of frosting over the entire cake as a crumb coat and scrape away the excess with a cake scraper. Let the cake chill in the fridge for about 15 minutes until the crumb coat is firm to the touch.
- Final buttercream layer: Spread about ¾ of the remaining buttercream around the entire cake and scrape off the excess with a scraper.
- Decorate: Transfer the remaining buttercream to piping bags fitted with piping tips of your choice. Pipe your buttercream design on the cake. Finish by sprinkling crushed pistachios on top of the cake and decorating with ribbon bows.


Juliana Sandoval says
Hi there! This recipe looks absolutely fabulous and delicious! I am making my best friend's wedding cake and she requested a raspberry and pistachio cake. However, she would like white buttercream on the outside. Do you think I could replace the raspberry jam in the buttercream with raspberry extract to avoid the pink color? Looking forward to hearing back, thank you!!
Sarah G says
My daughter and I made this for her 14th birthday. It was so delicious, very fresh tasting & not overwhelmingly sweet like other cakes. Fantastic pairing-pistachio and raspberry!
Mira says
Love! So yummy and looks BEAUTIFUL! So many compliments tooo.
Lisa says
Such an easy cake to make and tastes delicious!
Could I replace the pistachio with hazelnut ?
Mura says
What kind of cake pan did you use. I’m plan on buying cake pans and would like a recommendation.
Jordan says
I want to try this recipe, but do you think I could replace the 3 eggs with 3 flax eggs ?
Anonymous says
Where did you get your ribbon? And what exact color is it?
Anonymous says
I LOVED this recipe! Made it for a Tea & Taxes Party with my friends and they are raving. It’s moist, flavorful but not too sweet. Will definitely make again 🙂
Yasmin says
Hello!
I want to make this cake for my mother’s birthday next week. Can I use store brought pistachio butter instead of ground pistachios? Also could I add spinach to enhance the color of the cake?
Anonymous says
Going to try baking my first cake following this recipe! Though, I don't think I have enough people to feed so would halving the recipe in half work?
Patricia says
Sounds so good! Do you know what steps I might take for high altitude?
Lyca says
Could I make the cake ahead of time and freeze it?
Gail Ng says
Yes you can! Make sure you let it thaw thoroughly (like several hours!) before serving it.
Nadine says
Hi are the pistachios raw or roasted?
Gail Ng says
I used raw pistachios but either one works!
Heidi says
I made this cake for my 19TH Birthday last weekend. It was so dense, delicious and flavourful… everyone loved it!
Gio says
I made this for my friend's birthday and it was absolutely amazing. Everyone loved it and kept complementing me for how good it was. It has flavour and it's not too sweet at all. I used pistachio cream and cherry jam instead and still turned out tunning. Really recommend it!!
Matea says
Do you think I could make this ahead of time? Maybe the day before and keep in the fridge overnight?
Ale Ortiz says
Could the recipe for the cake batter be used for cupcakes?
Gail Ng says
Yes, I don't see why not! Bake them for less time and use visual cues to check for doneness.
Kathy says
This cake looks and sounds amazing! If you increase the quantity x2 what size tins do you use? I’d like to make an 8” cake.
Gail Ng says
Yes, you can use 8" pans if you double the recipe 🙂 bake the cakes for a few minutes longer!
Kathy says
Thank you!
Olivia says
So sorry if this is a dumb question but I just wanted to be sure… if doubling the recipe, would you use two or three 8” cake tins? Thanks so much - the recipe looks so good & I hope to make it for a bridal shower!
Gail Ng says
Use three 8" cake pans 🙂