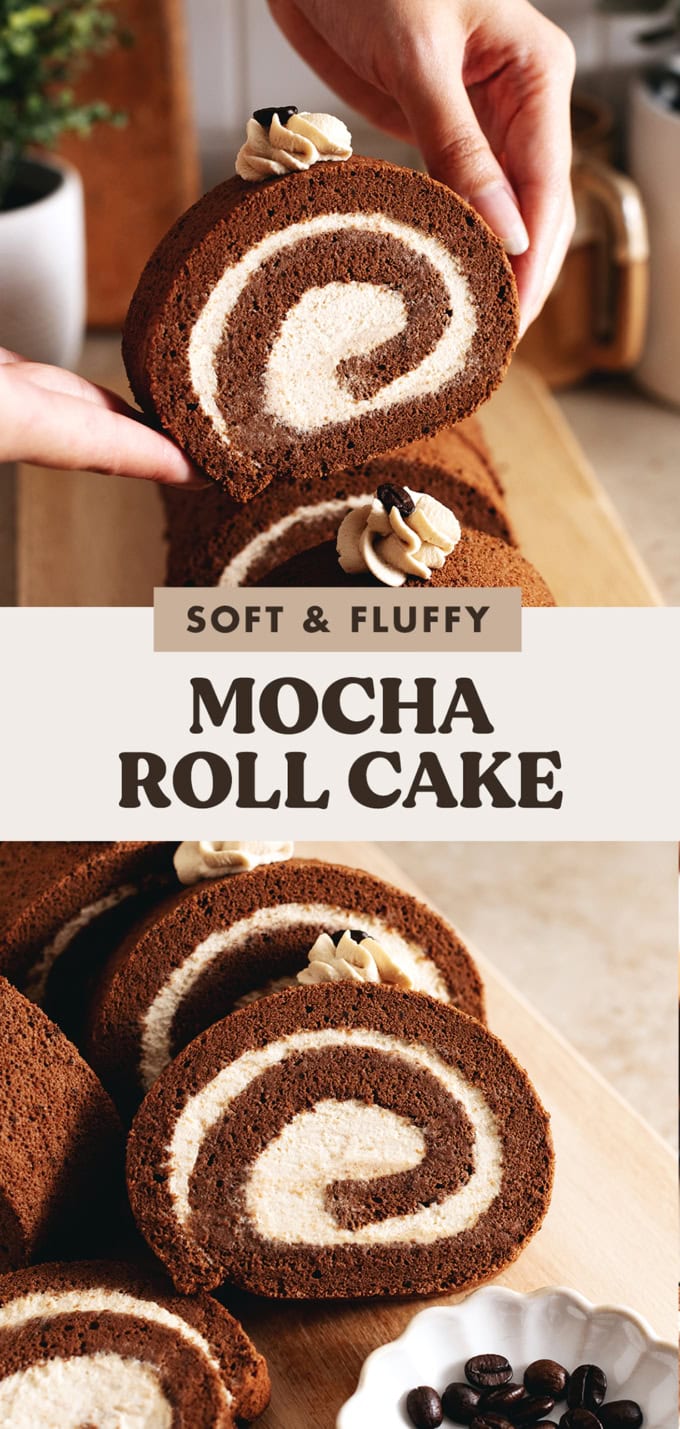
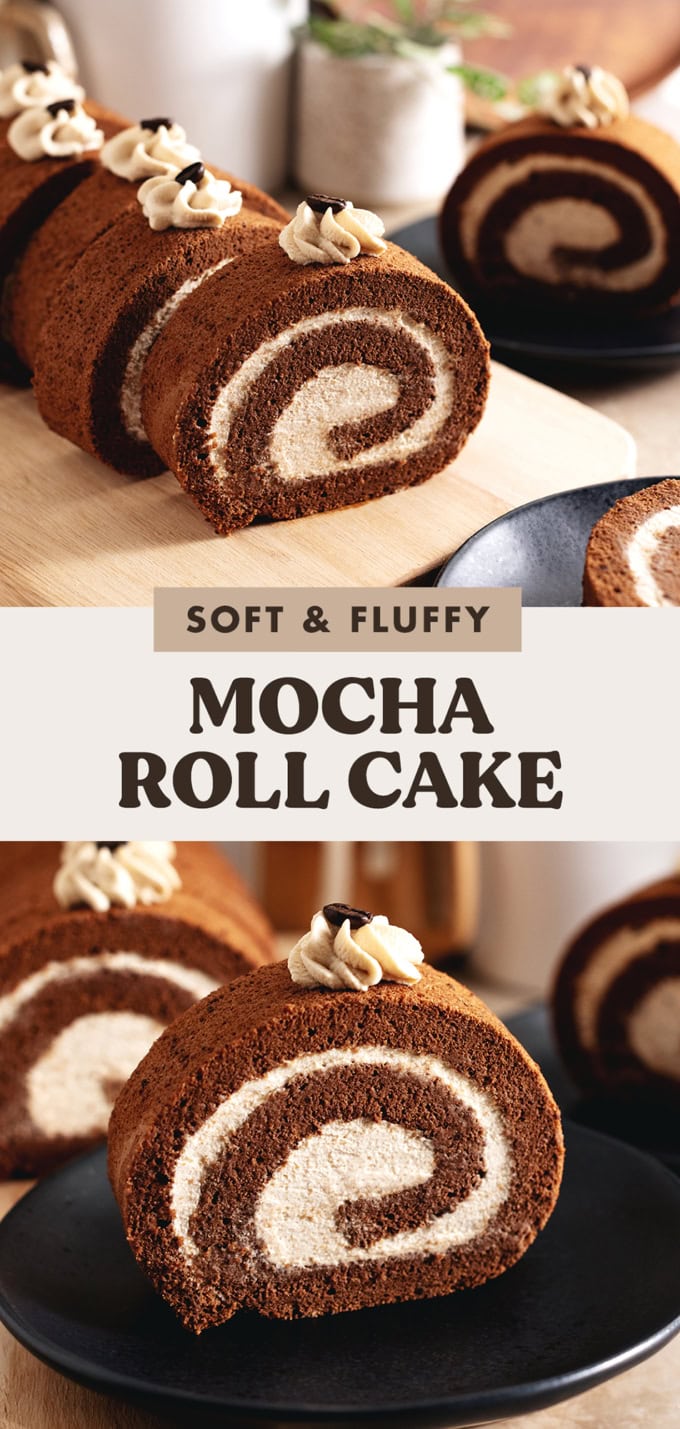
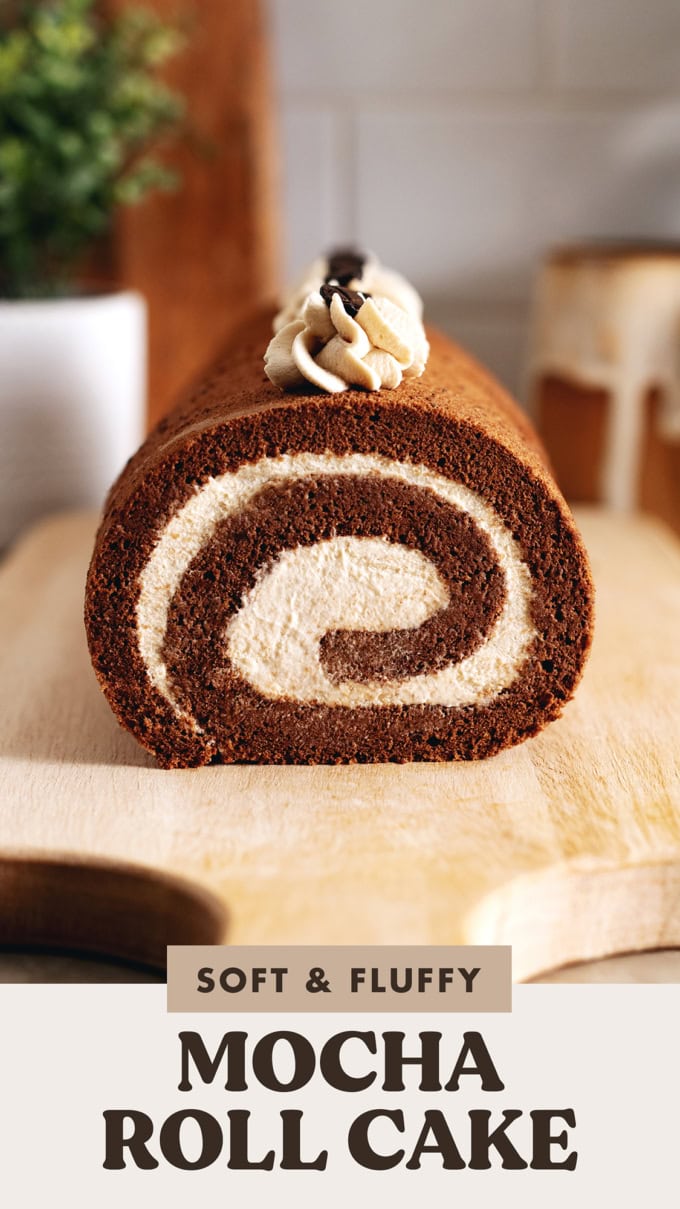
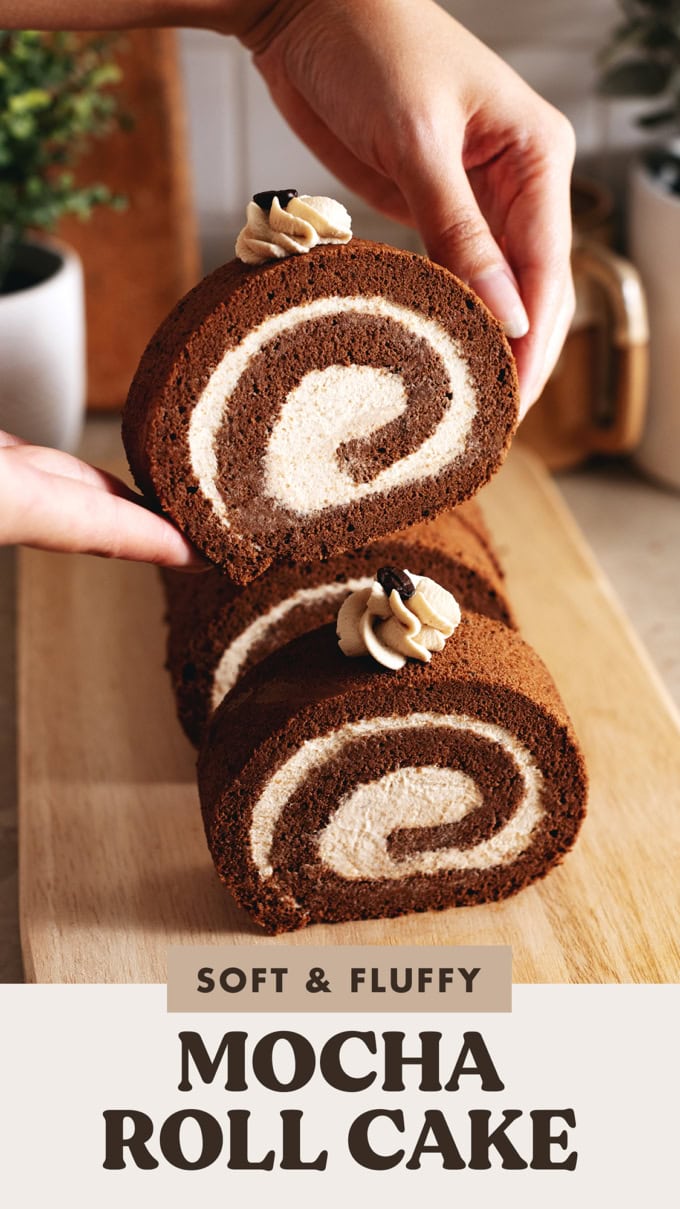
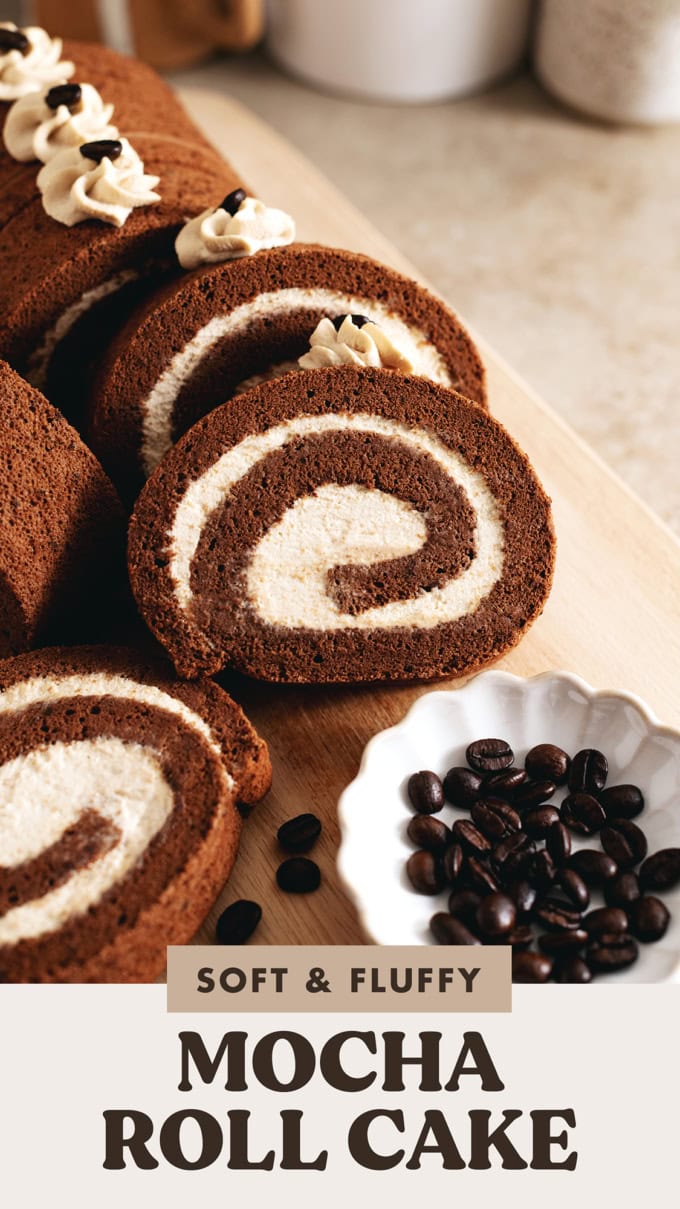
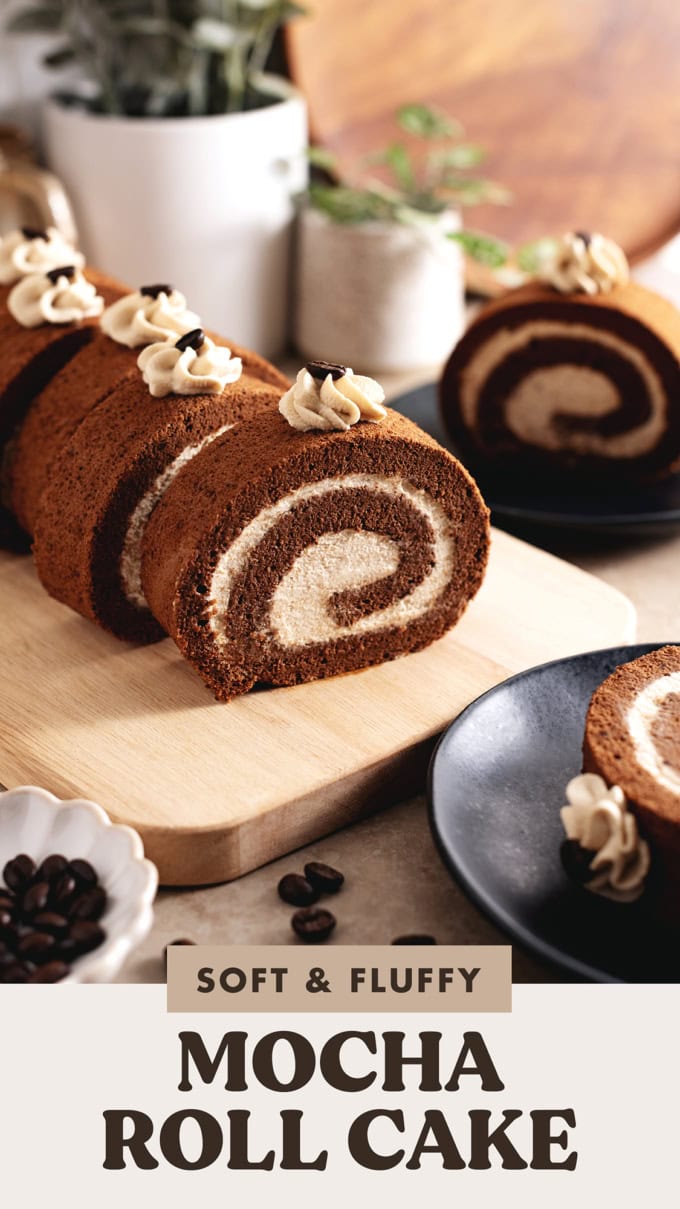
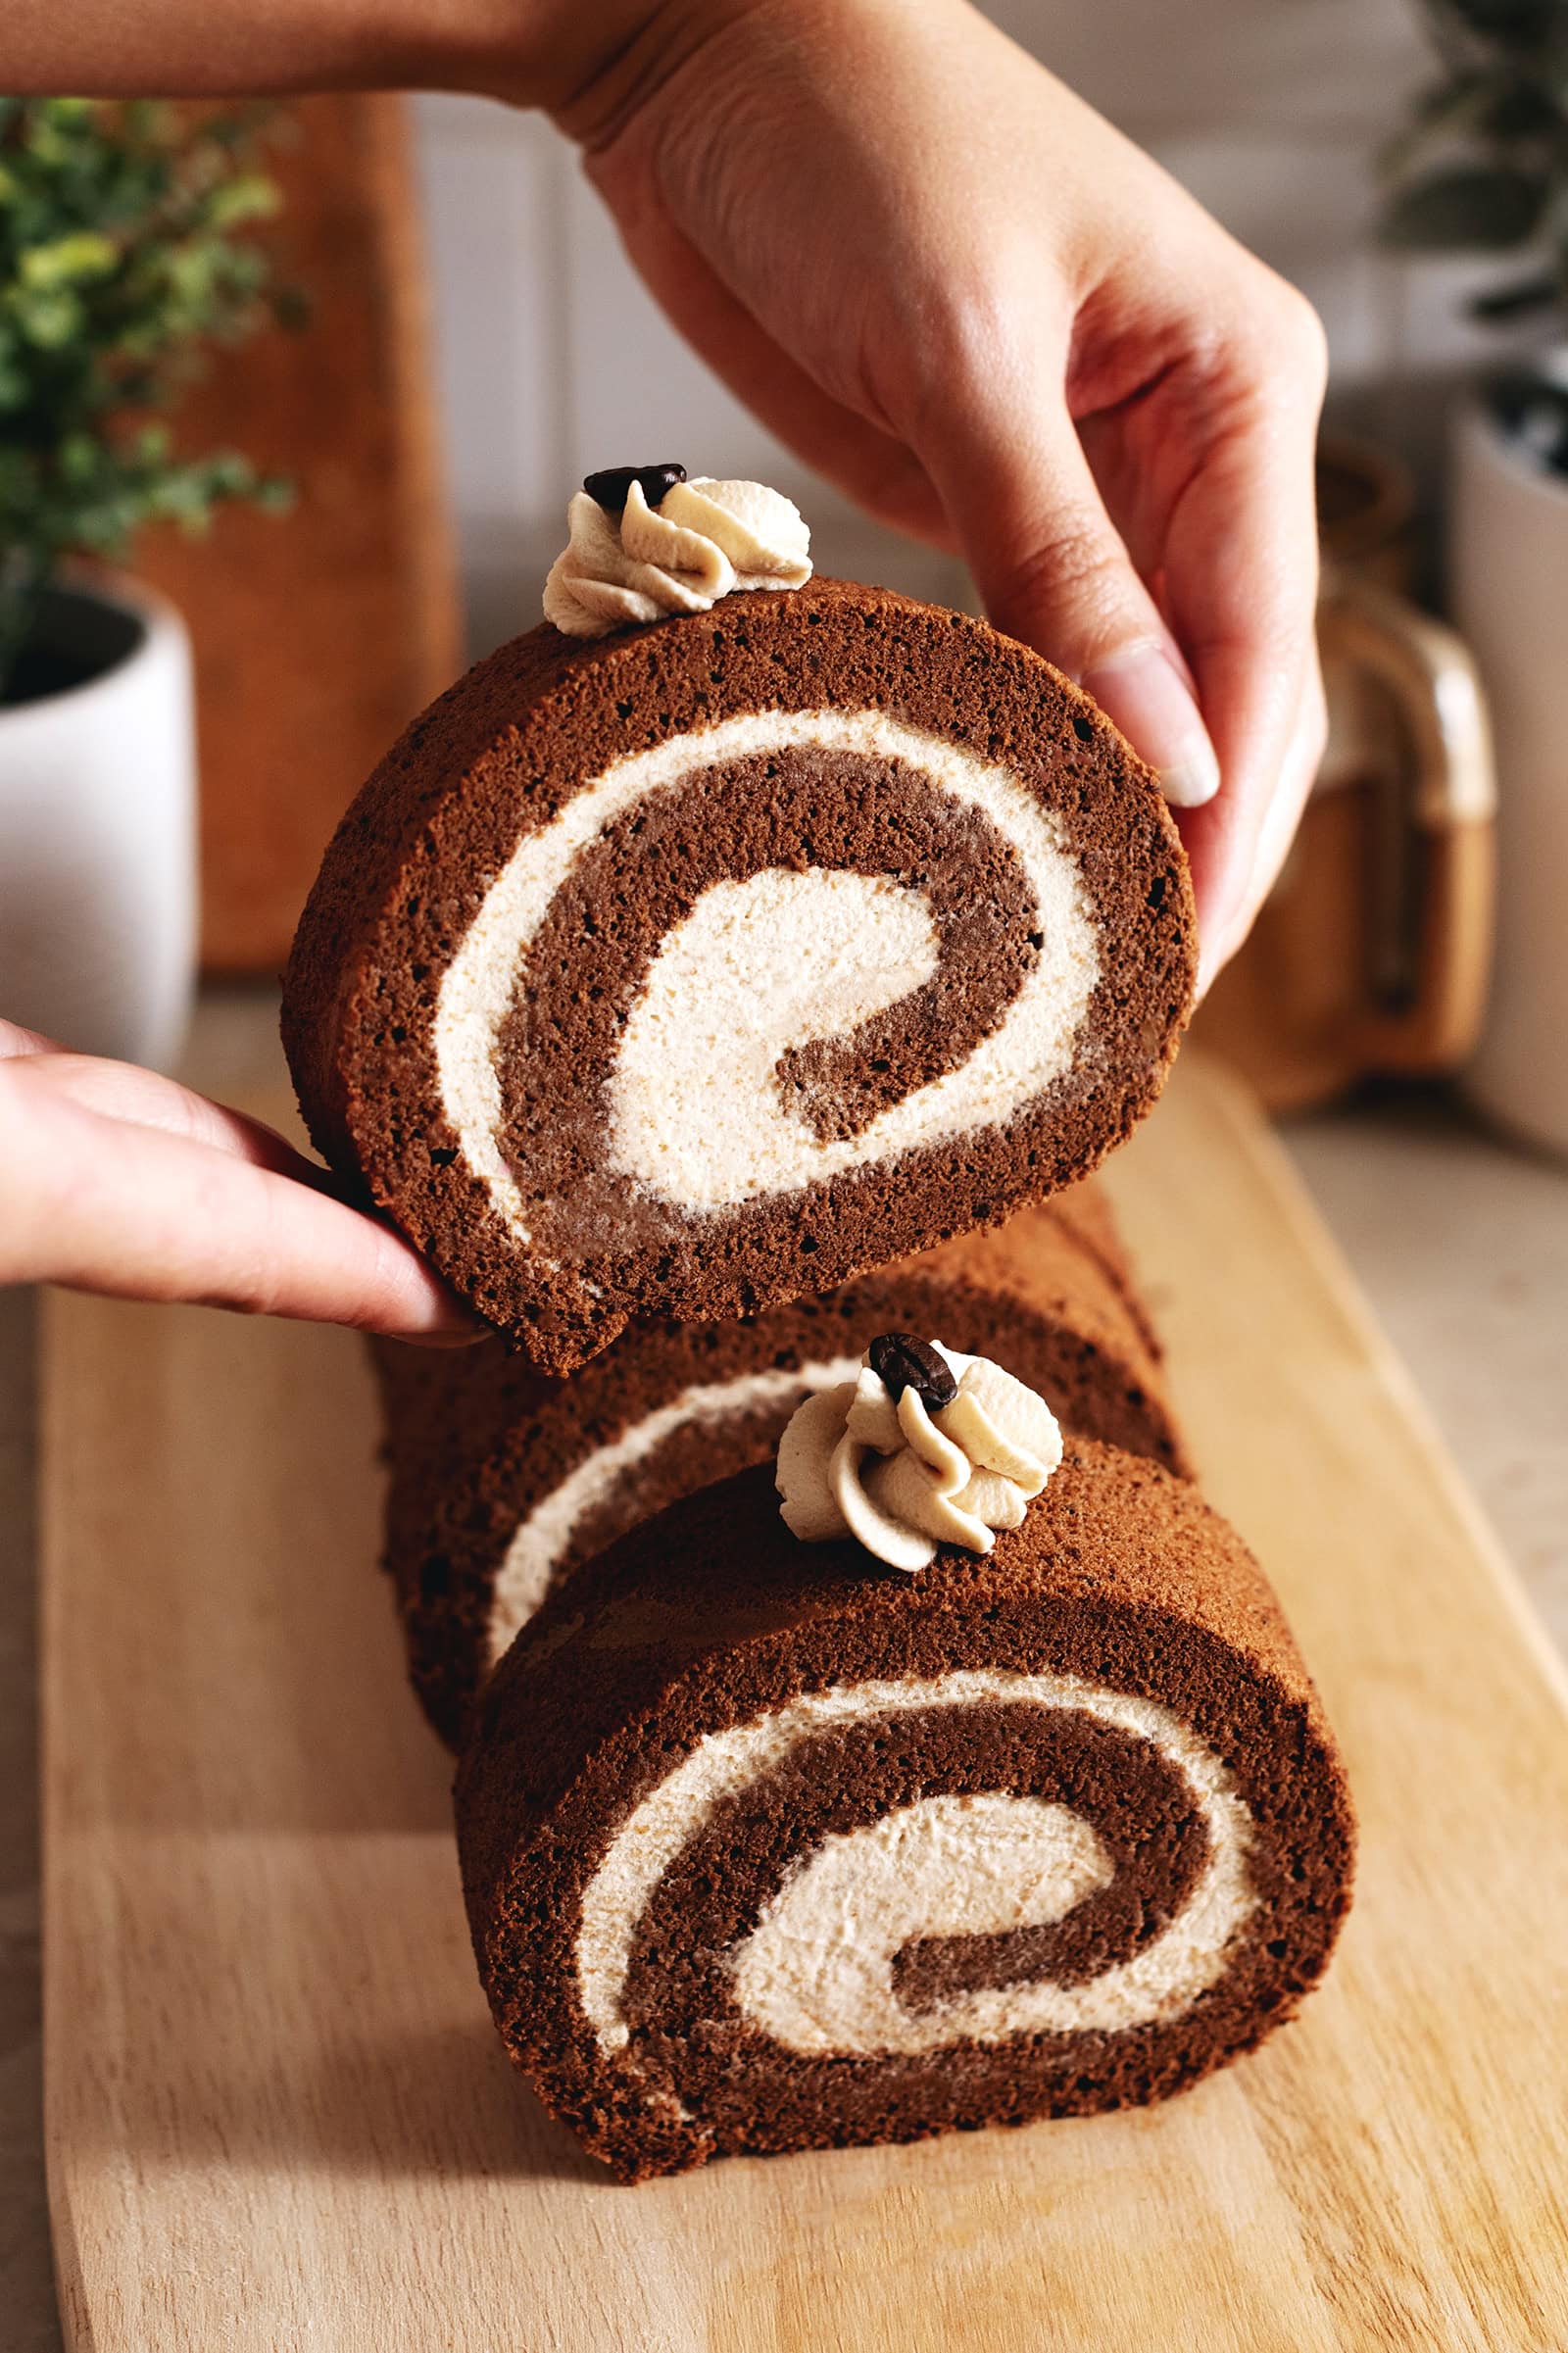
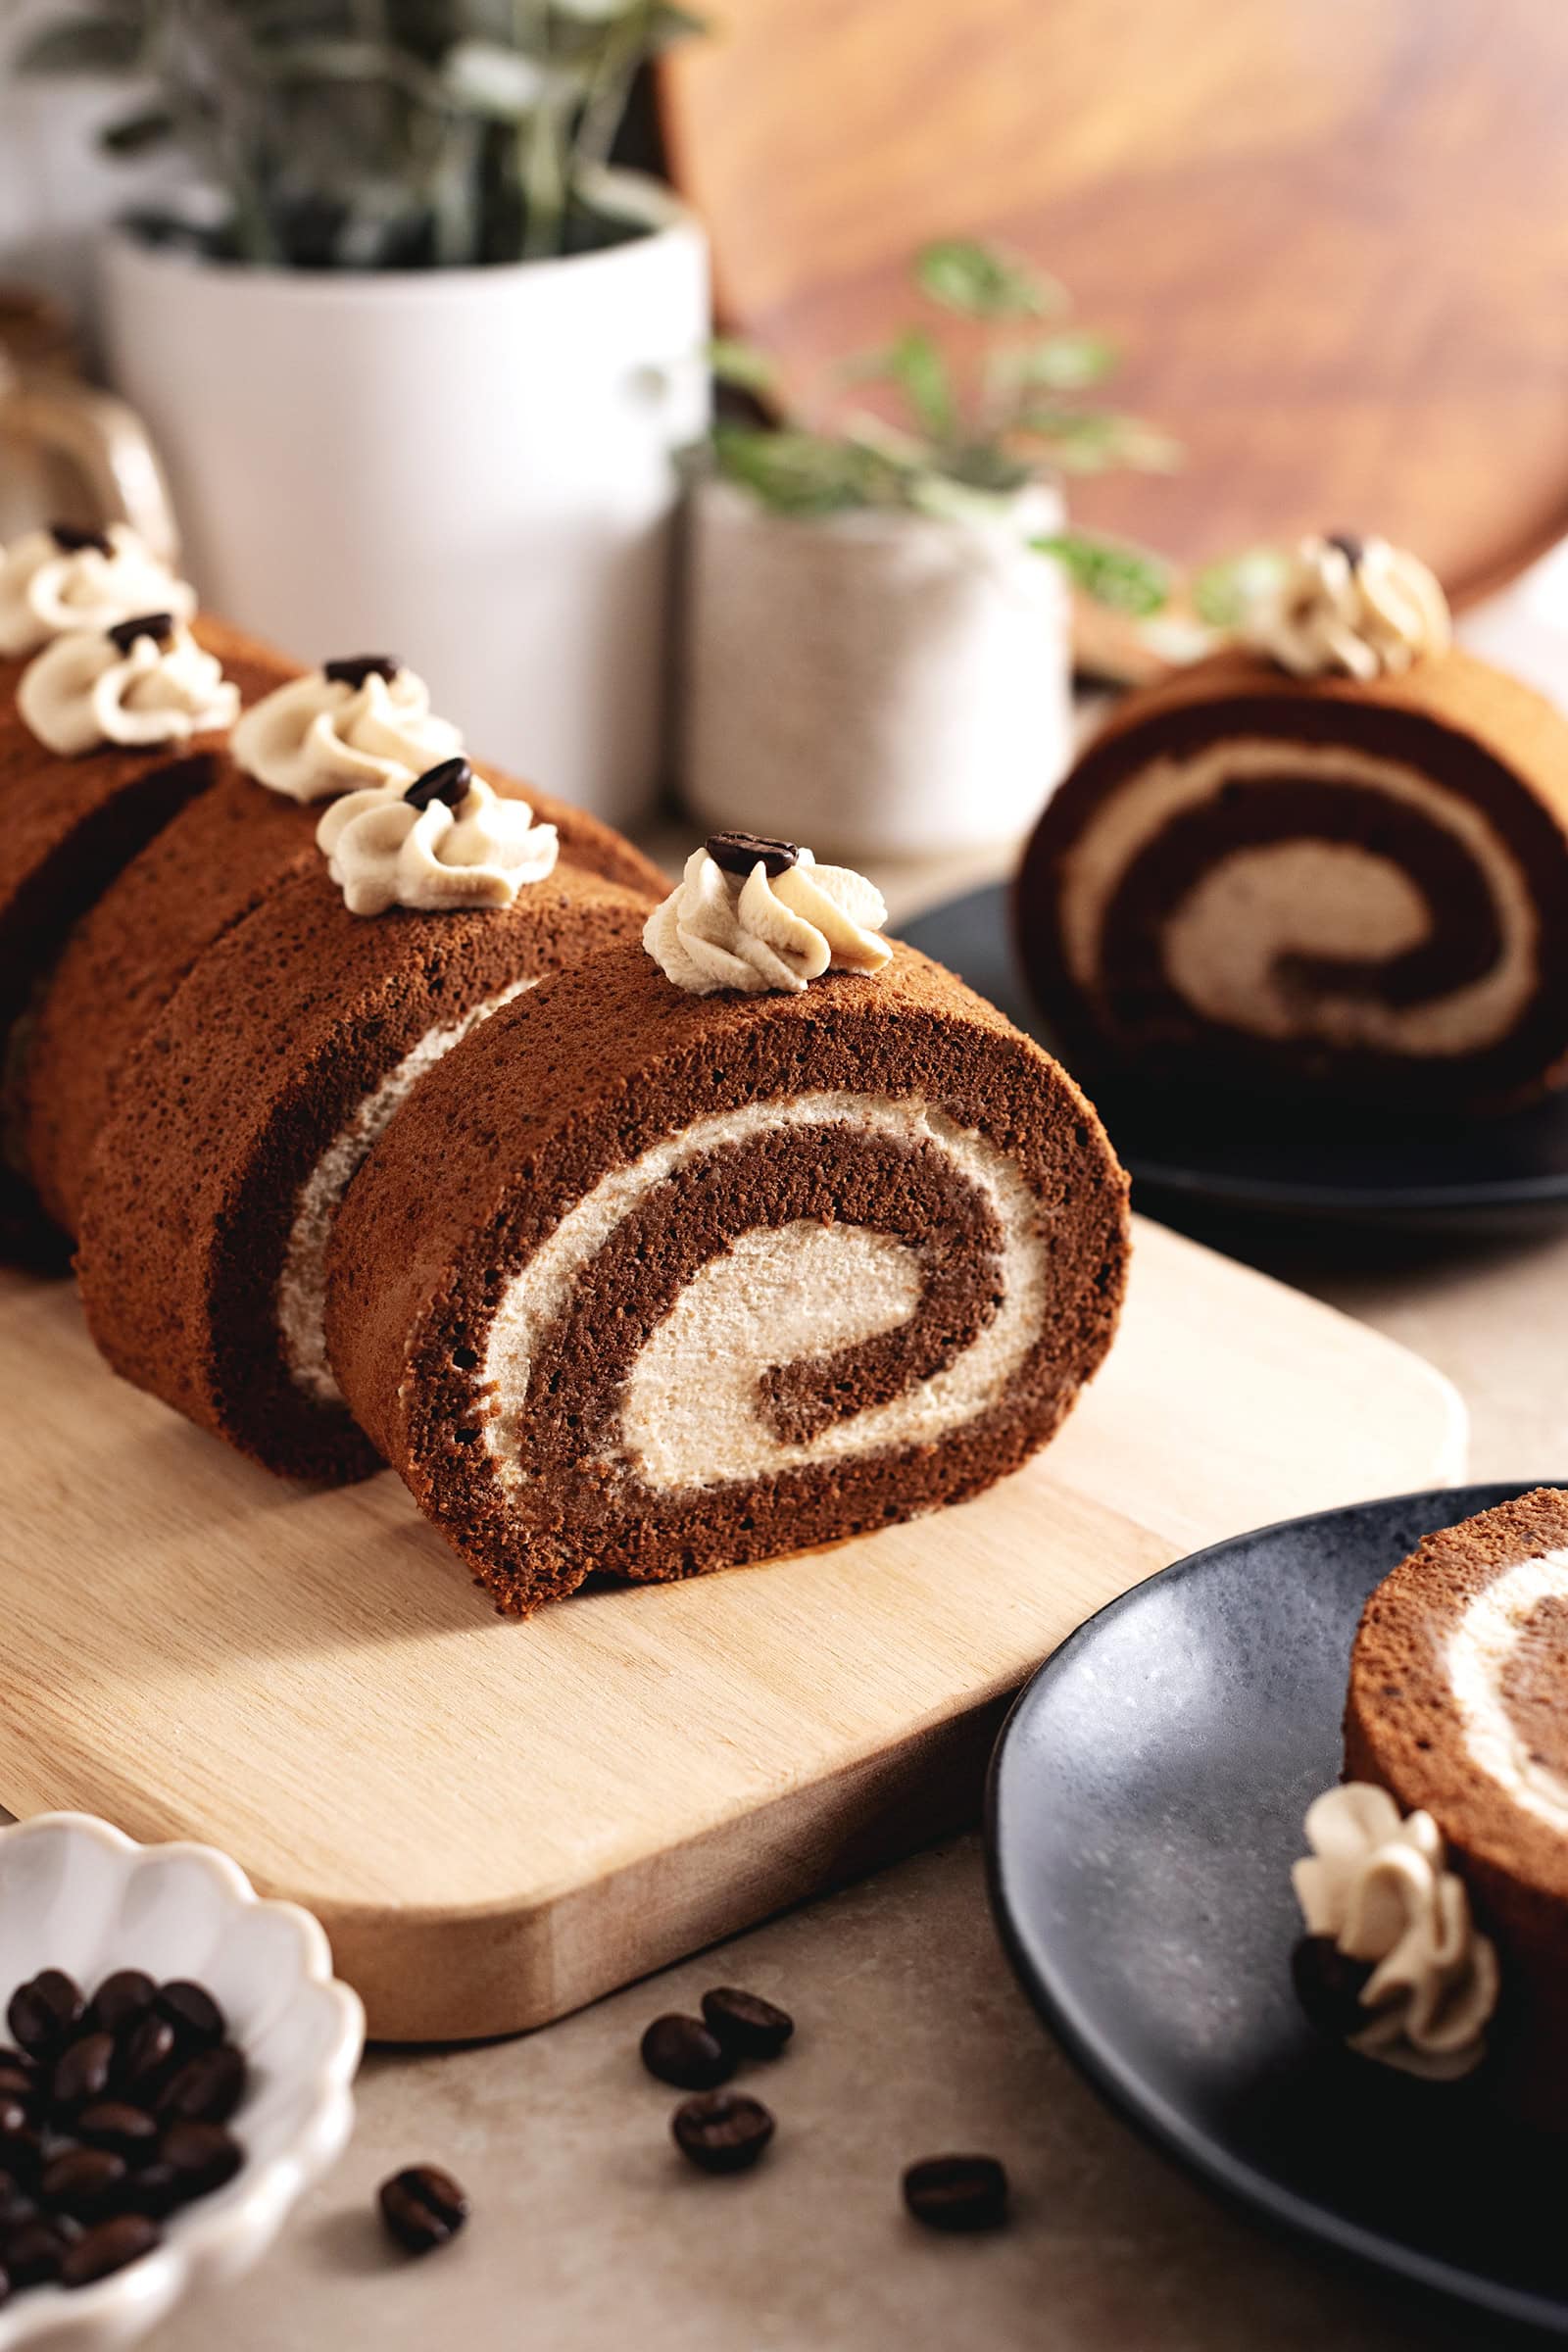
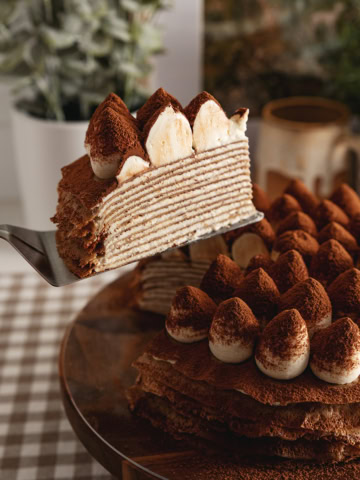
This delicious mocha roll cake is made with soft and fluffy mocha chiffon cake and filled with coffee whipped cream. It's the perfect light and airy cake that's not too sweet.
Jump to:
Notes from the baker
I've made so many roll cakes in my baking lifetime but this mocha roll cake has to be one of my favourites. I usually go for fruity flavours when it comes to roll cakes but this one is for my chocolate and coffee lovers!
The mocha and espresso flavours are deep and incredible with the cake still being the same light and fluffy chiffon cake just like in all my other swiss roll recipes. The cocoa powder and espresso powder doesn't change the texture.
If you're looking for the perfect Fall or Winter cake (this one is great for holiday celebrations!), this one might be what you need!
Why you'll love this recipe
- Light and fluffy cake. This mocha roll cake is made with a soft and spongey chiffon cake base that you'd find in Asian bakeries.
- Rich and fragrant mocha and coffee flavours. The mocha and coffee flavours are perfect if you love deep and creamy flavours without being overly chocolatey.
- Roll cake that doesn't crack when rolled. This is my go-to recipe that I use for all my roll cakes. It's soft and pliable enough that there's no cracking or rippling ever!
Tools
- 12x17" baking tray - The cake sheet for this cake is baked in a regular 12x17" baking tray that I normally use for baking cookies. You use any similarly sized pan or jelly roll pan as long as the walls are at least 1" tall.
- Electric hand mixer - A hand mixer or stand mixer is essential for whipping the egg whites and whipped cream until they reach stiff peaks.
- Offset spatula (optional) - An offset spatula has the perfect angle for smoothing the whipped cream onto the cake sheet and for cleaning up any edges.
- Piping bag (optional) - You'll need a piping bag if you want to pipe a rosette of whipped cream on top of the cake rolls.
- Piping tip (optional) - I used a closed star piping tip for the rosette on top of the cake rolls.
Ingredient notes
As always, the full recipe card with ingredient amounts and instructions is at the bottom of this post! Keep reading for more details on each ingredient or skip ahead to the recipe.
- Cake flour - Cake flour contains less gluten than all-purpose flour and makes a lighter and fluffier cake.
- Natural cocoa powder - Natural cocoa powder is the most common kind of cocoa powder you can find. It's lighter in colour and flavour than Dutch-processed cocoa powder so it doesn't overwhelm the coffee flavour.
- Instant espresso powder - This is where we'll get all the delicious coffee flavour in the cake and the whipped cream. Instant espresso powder fully dissolves in water - it's NOT ground coffee beans. You can also use instant coffee but I love the intense flavour you get from espresso powder especially when using small amounts.
- Eggs - These should be at room temperature. Room-temperature eggs whip up faster. For this recipe, you'll be separating the eggs into bowls of egg whites and egg yolks.
- Cream of tartar - This is an acidic powder that helps stabilize the egg whites and helps them whip up faster into a stable meringue. If you don't have this, you can substitute it with a splash of vinegar or lemon juice or omit it altogether.
- Granulated sugar - Divide your sugar into separate bowls of 100g and 50g to make it easier when using them in the recipe.
- Milk - Use any dairy or non-dairy milk prefer. I usually use oat milk or almond milk because it's what I have on hand. It's a small amount so it doesn't matter.
- Oil - Use any light-tasting, neutral oil such as canola oil, avocado oil, or grapeseed oil.
- Vanilla extract
- Whipping cream or heavy cream - I usually use whipping cream but heavy cream also works well for a richer and thicker cream filling.
- Powdered sugar
- Coffee beans (optional) - To use as garnish on top of the cake slices. Completely optional.
How to make a mocha roll cake
Make the mocha chiffon cake sheet
Prep: Preheat oven to 350°F. Line a 12x17" baking tray with parchment paper cut to size and set aside.
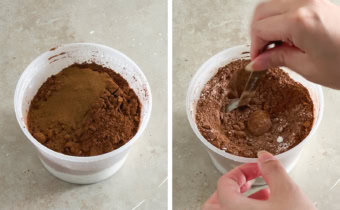
Flour mixture: In a small bowl, stir together cake flour, cocoa powder, and espresso powder. Set aside.

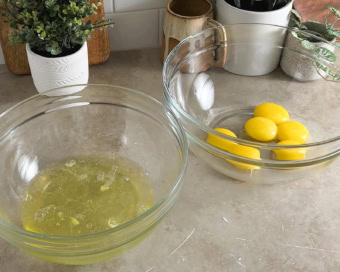
Separate eggs: Separate the egg whites and egg yolks into two large mixing bowls, being careful not to get any yolk in the egg whites. Set the bowl of egg yolks aside.

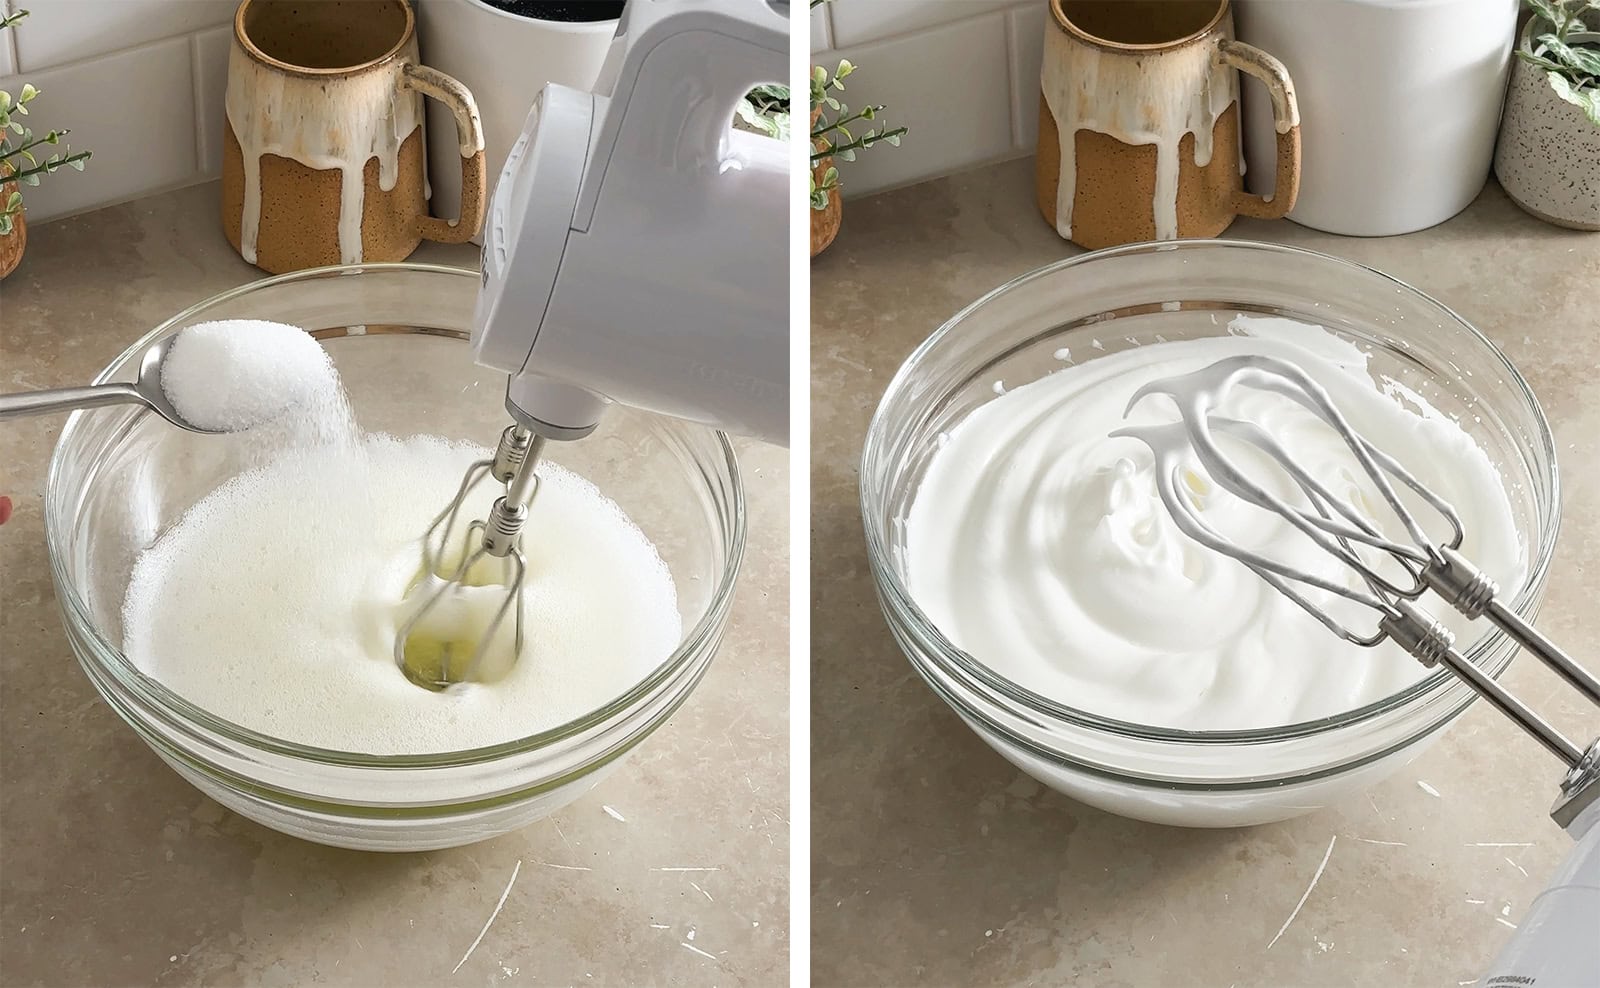
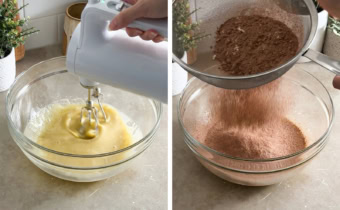
Egg white meringue: To the egg whites, add cream of tartar. Use an electric hand mixer to beat the egg whites on low-medium speed until they become frothy like cappuccino foam. Add 100g of sugar, one spoonful at a time, mixing in between each addition. After all the sugar has been added, continue beating on medium-high speed until the meringue becomes stiff peaks. Set aside.
Egg yolk mixture: To the egg yolks, add the remaining 50g of sugar. Use the same hand mixer to mix until combined. Add the milk, oil, and vanilla extract and mix until combined. Use a fine mesh sieve to sift the flour mixture into the egg yolk mixture. Mix on low speed until the flour has just combined.

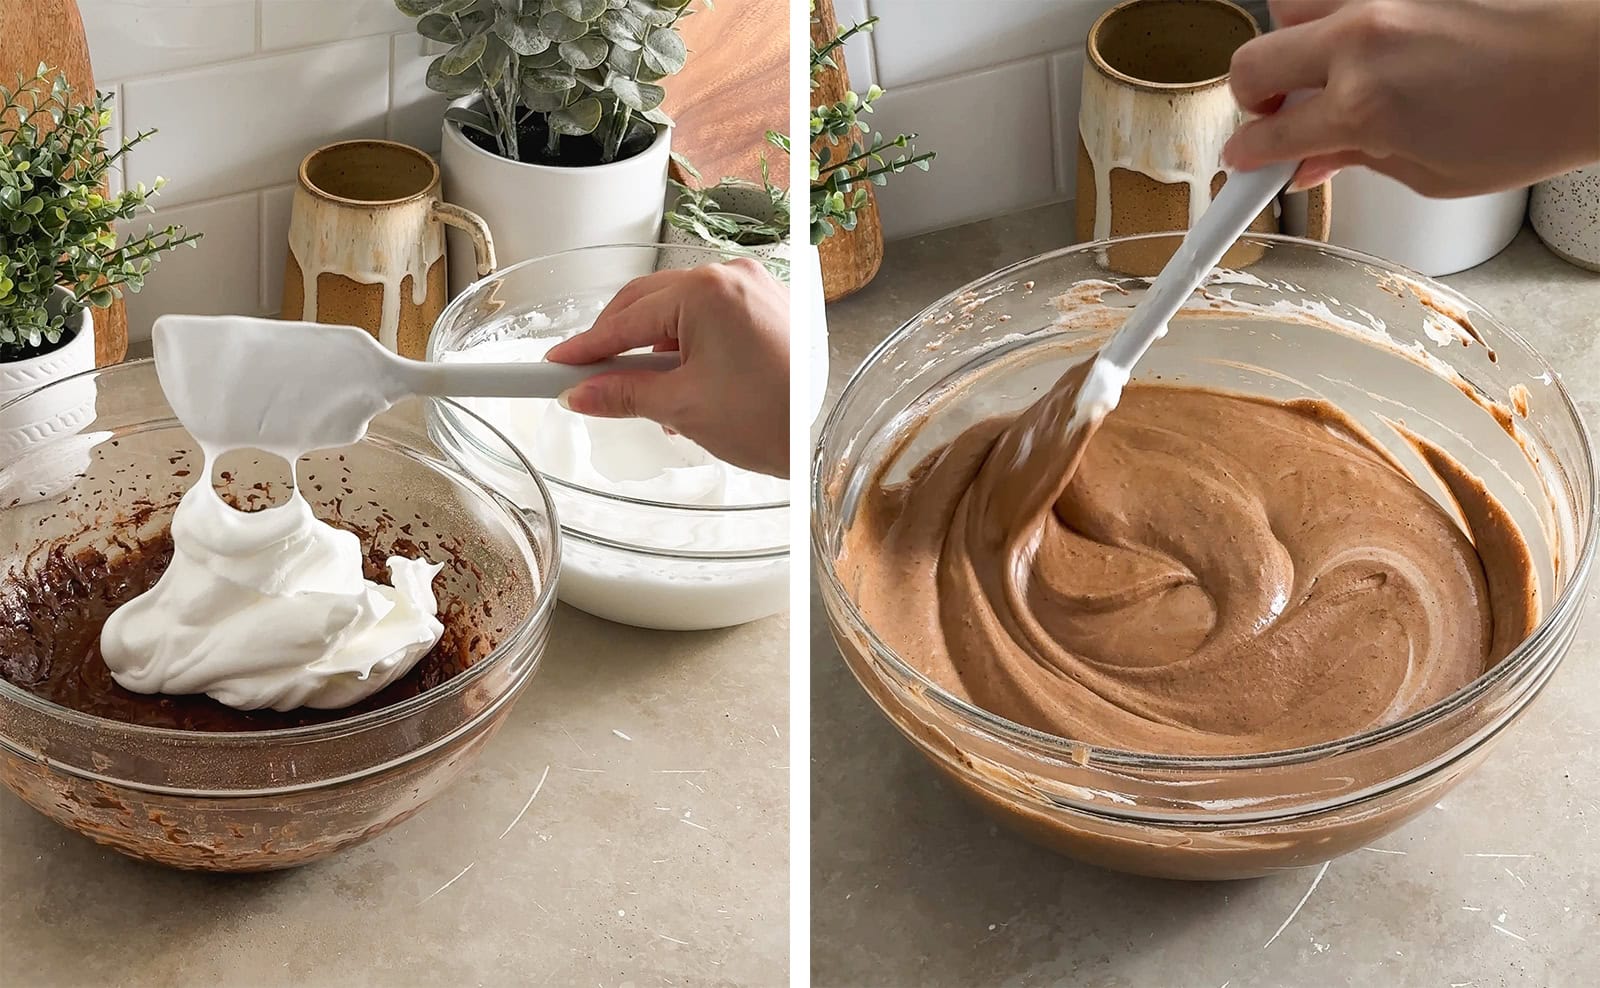
Combine meringue and egg yolk mixture: Add about ⅓ of the egg white meringue into the egg yolk mixture and fold together with a spatula, making sure to scrape the bottom of the bowl. Add the rest of the meringue and fold together until no streaks remain. Again, make sure to scrape the bottom and sides of the bowl where thicker batter can stick. Don't overmix.
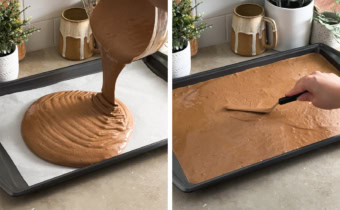
Fill pan: Pour the batter into your lined baking tray. Use an offset spatula to spread the batter into the corners and edges of the pan and smooth the batter into an even layer.

Bake: Bake for 13-14 minutes or until the edges are lightly browned and the top of the cake sheet is puffed up.
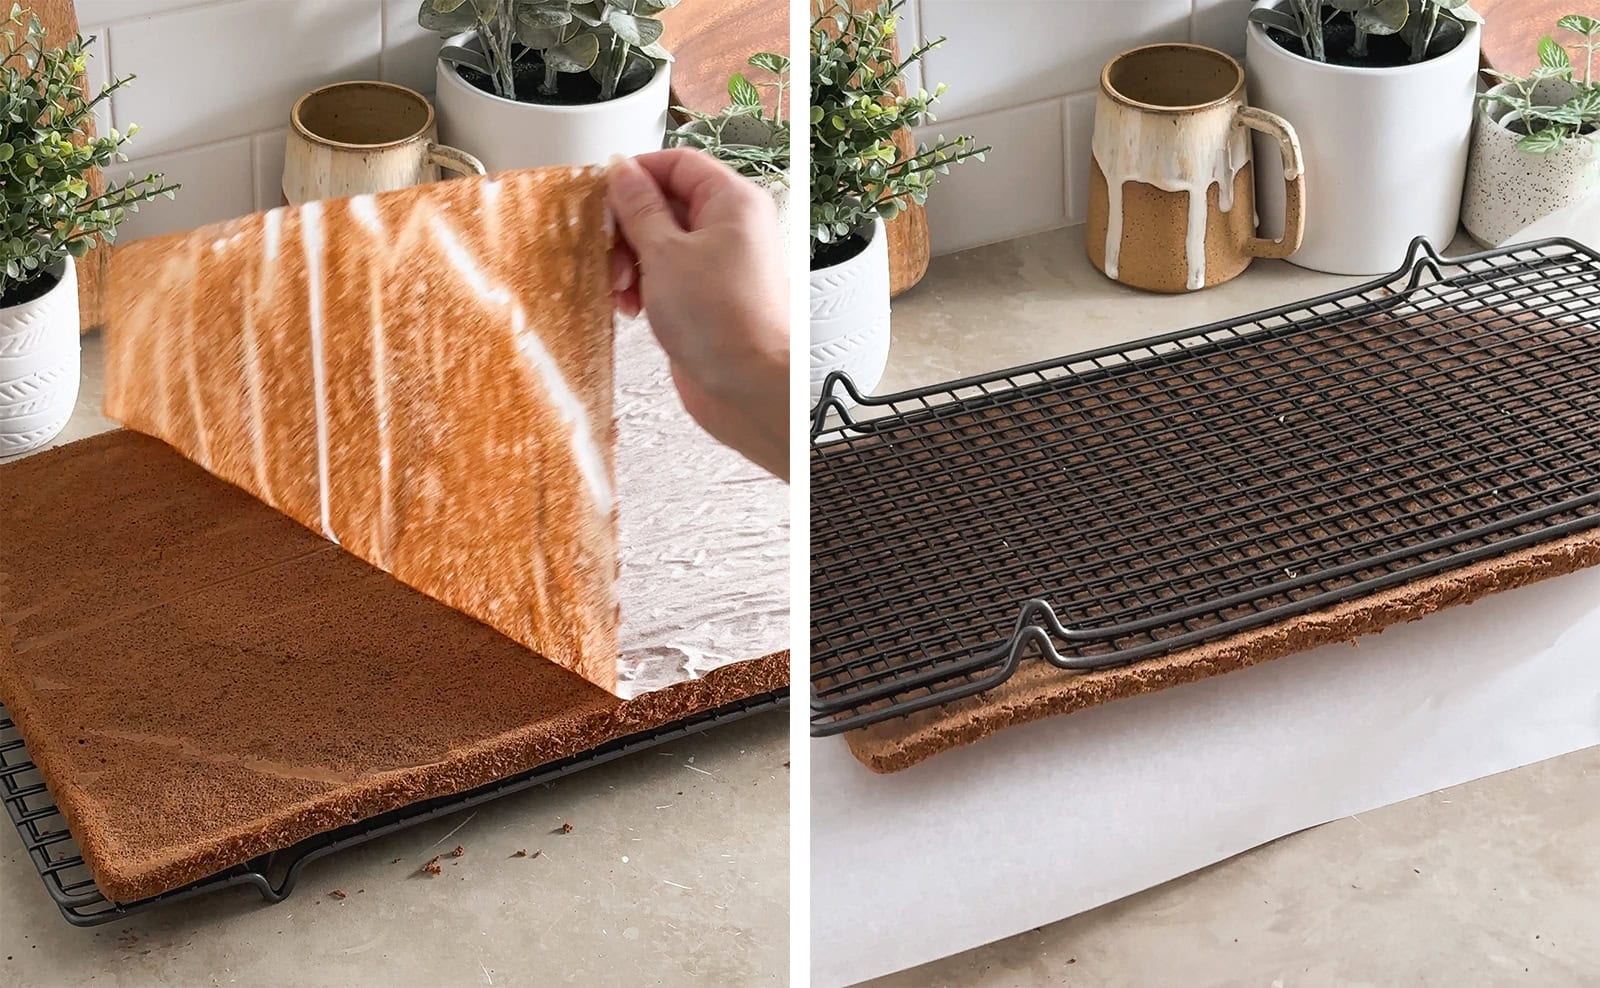
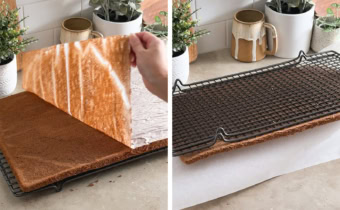
Release cake: Let the cake cool on a wire rack for only about 5 minutes before running an offset spatula around the edges of the pan to release the cake. Place a wire rack on top of the pan, grip both sides of the pan and rack (with oven mitts), and flip the cake onto the rack. Peel the parchment paper off the cake. Place a fresh sheet of parchment paper on top and flip the cake onto the parchment paper.
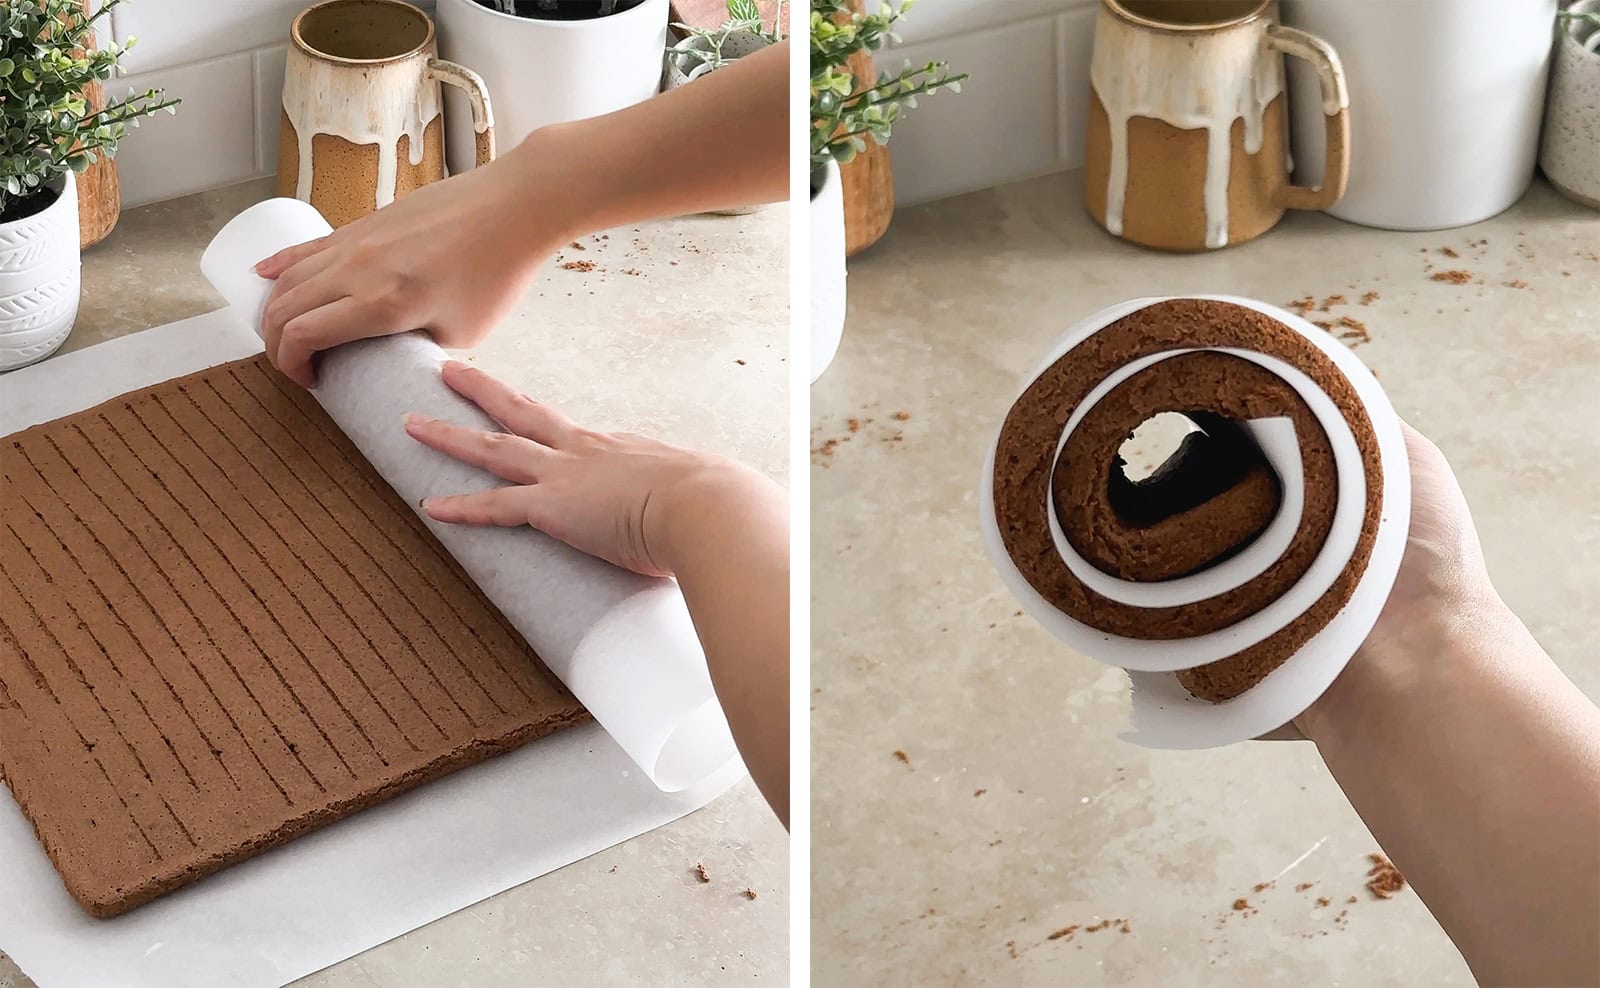
Pre-roll cake: While the cake is still warm, roll the cake up with the parchment paper starting from a short end. Let the cake cool completely in this rolled-up log shape.
Make the espresso whipped cream
Whip cream: To a mixing bowl, add the whipping cream, powdered sugar, espresso powder, and vanilla extract. Use a hand mixer to whip until it becomes stiff peaks.

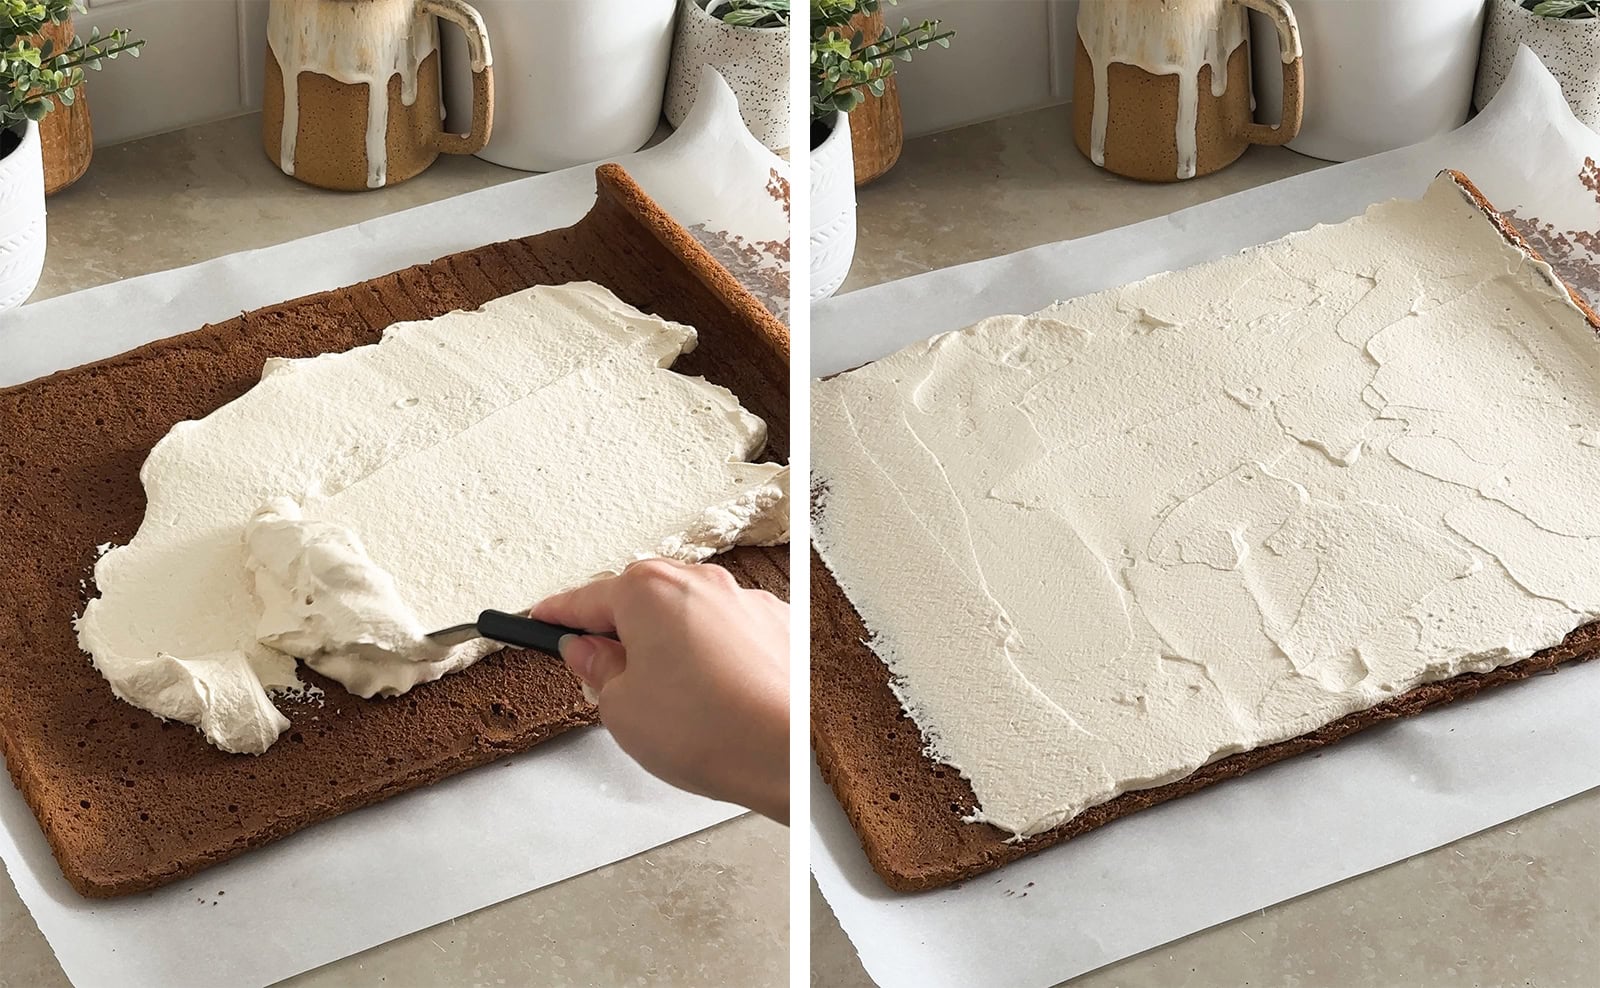
Spread cream on cake: Unroll your cooled cake sheet. Add dollops of whipped cream on top of the cake sheet. Use an offset spatula to spread the cream into a thick, even layer. Leave the last 2" at the end of the cake sheet empty. Save any remaining whipped cream for decoration later.
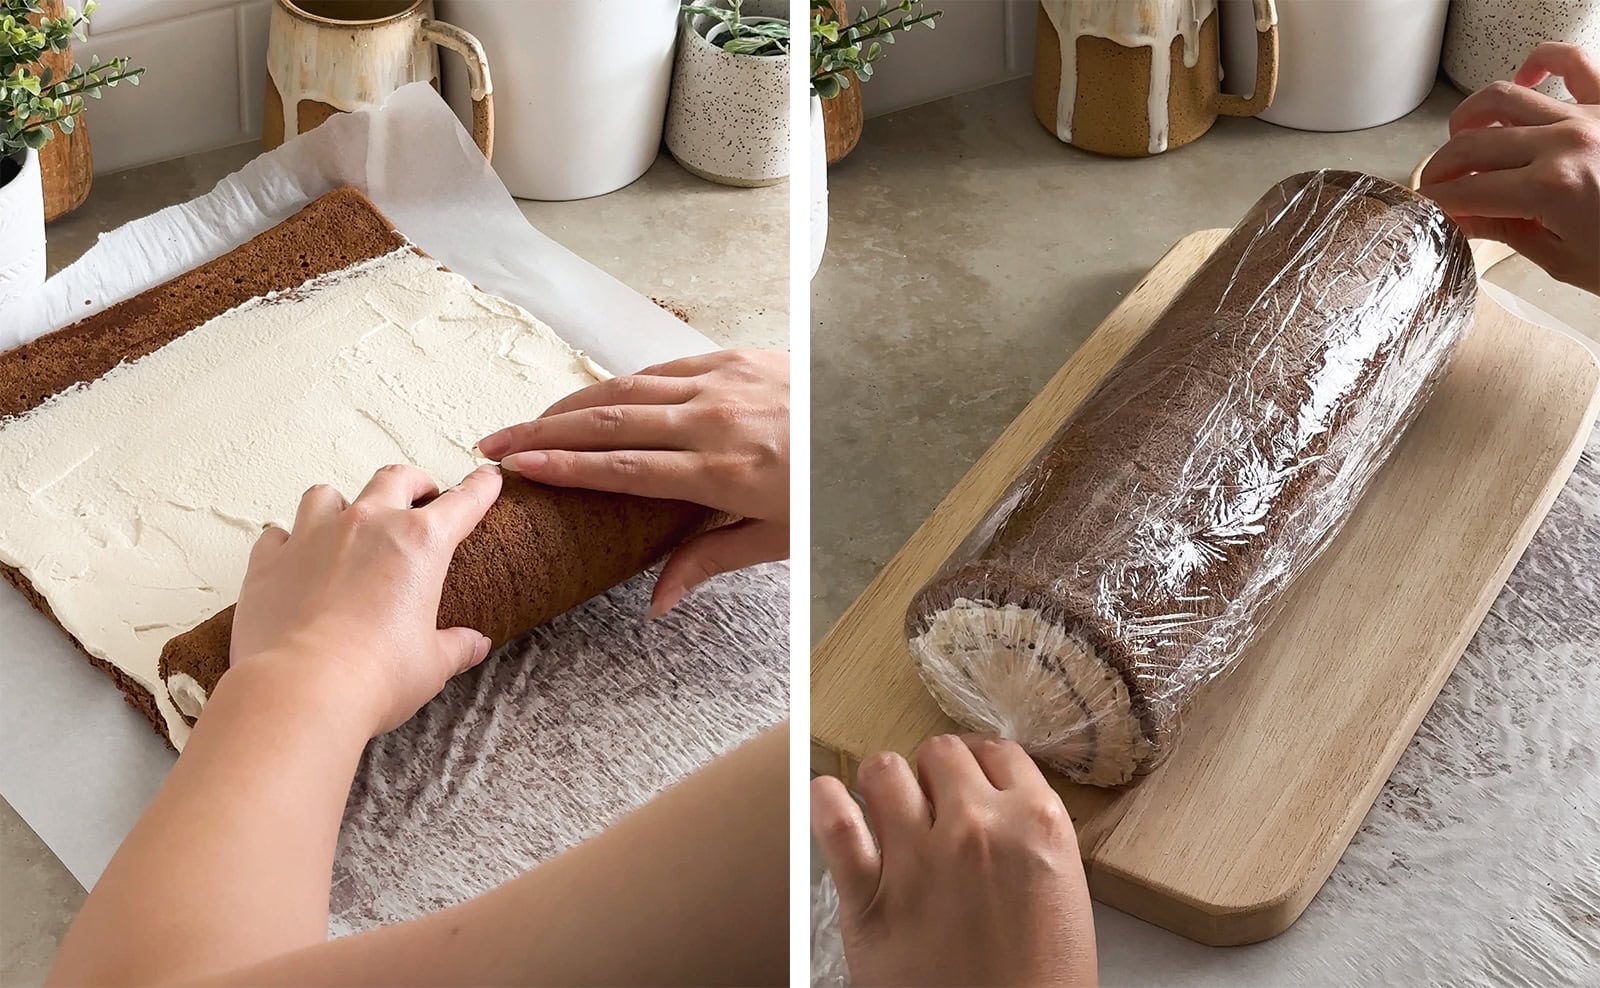
Roll cake: Roll the cake up in the same way as before. When you get to the end of the roll, place a sheet of plastic wrap next to the cake so that you can roll the cake right onto the plastic wrap. Use an offset spatula to remove any excess cream that squishes out of the seam and push any cream that comes out from the two ends of the roll. Wrap the cake roll in plastic wrap and chill the in fridge for at least 3 hours or overnight to allow the cream to set.
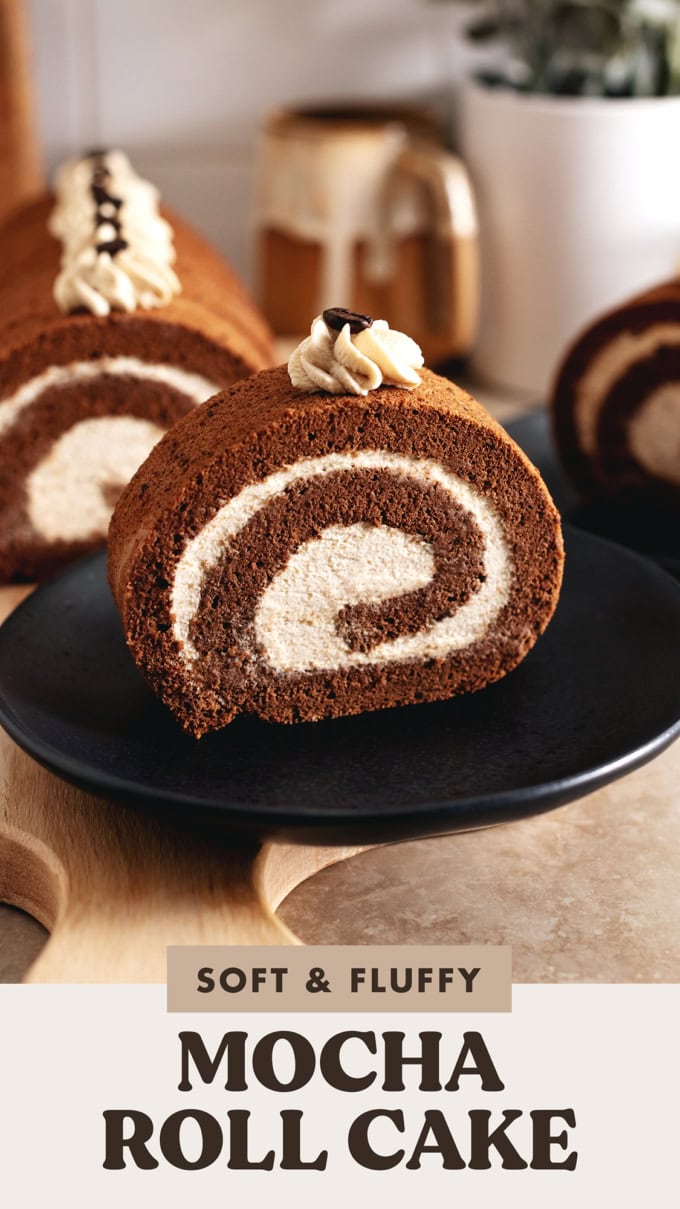
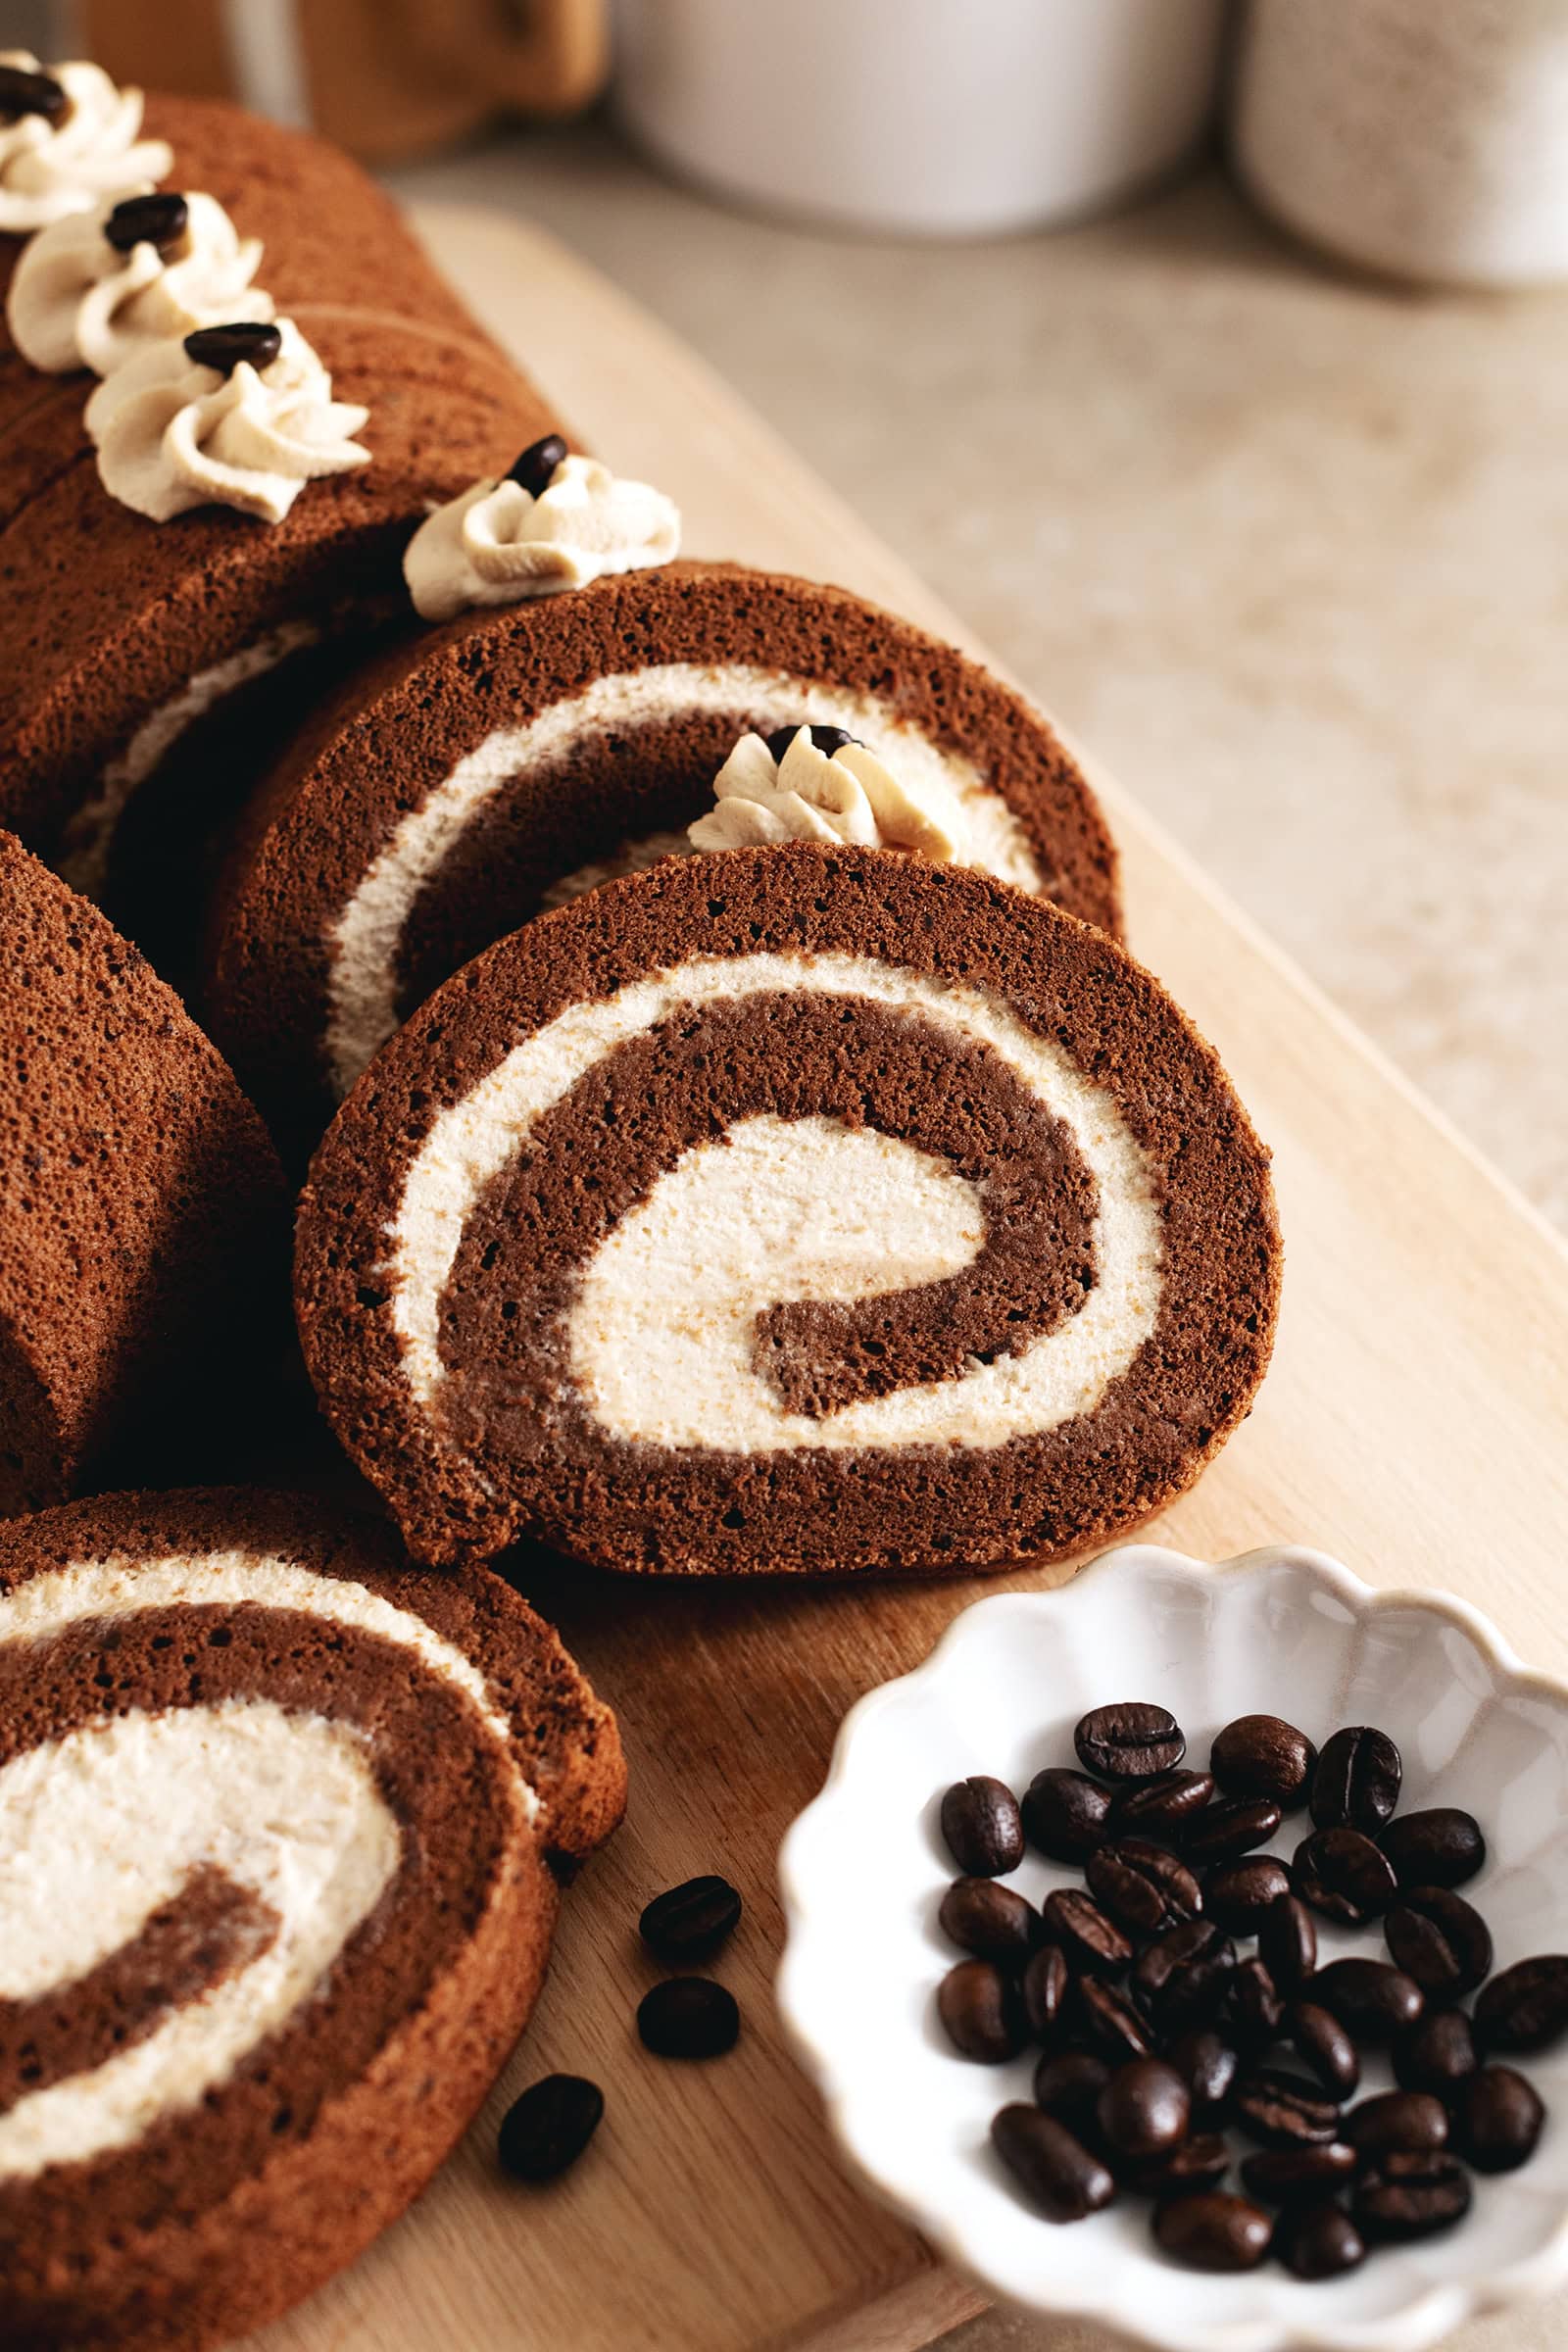
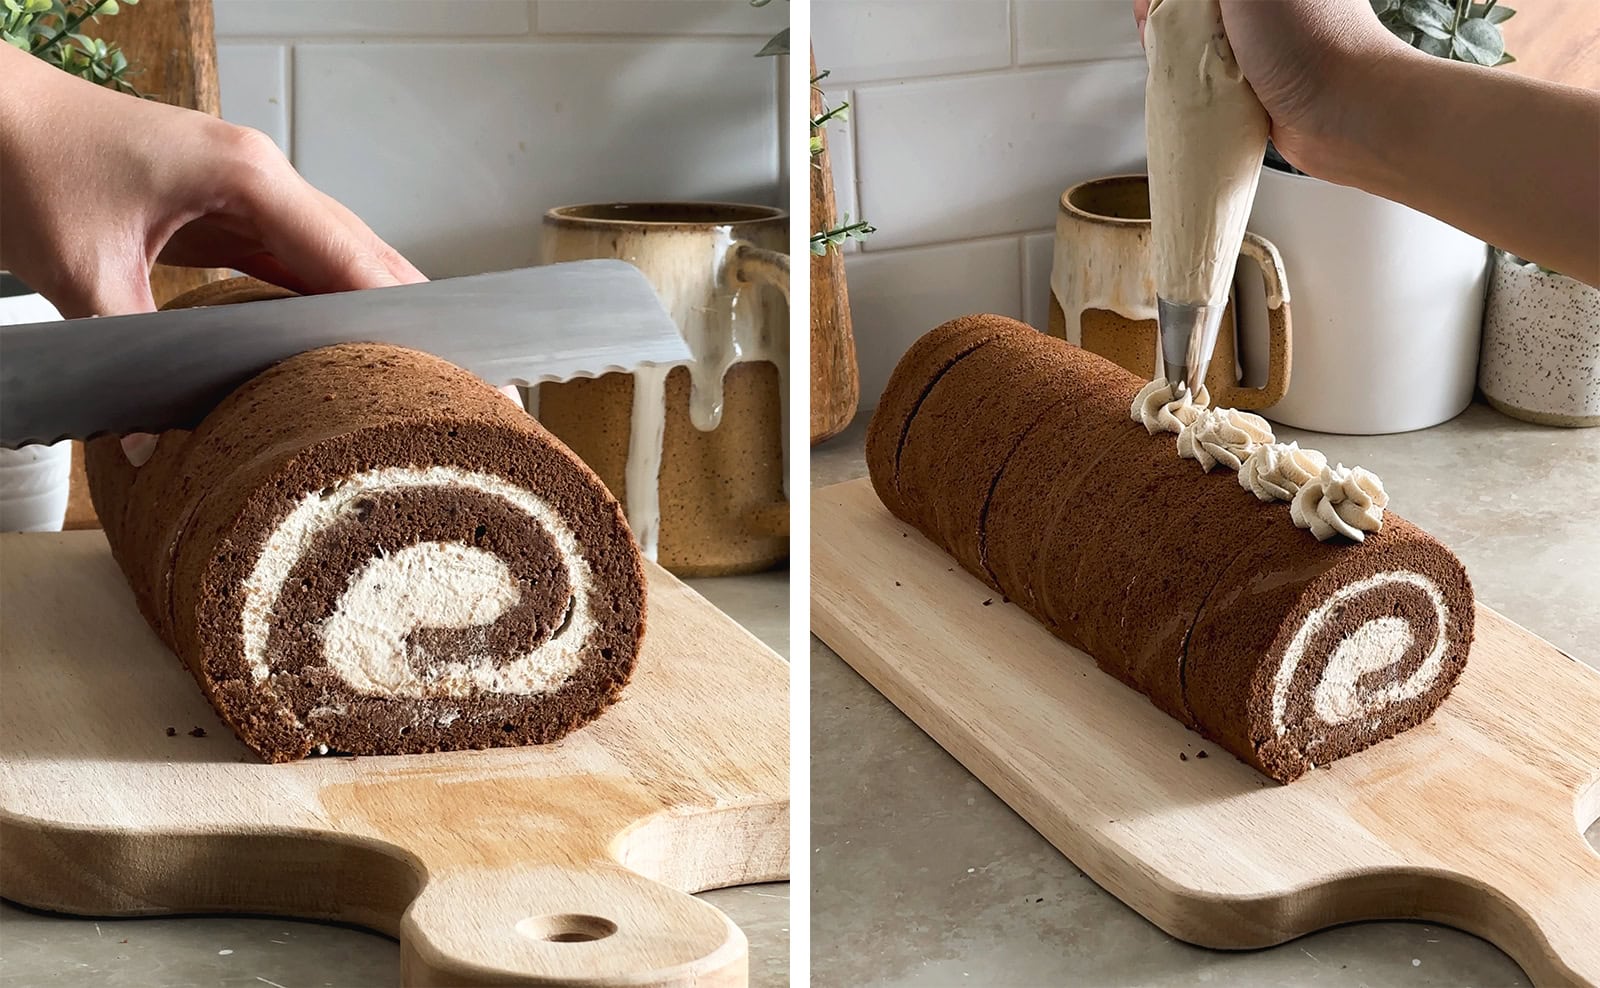
Slice: Before serving, use a serrated knife to cut off about ½" off both ends of the roll to reveal the swirl. Cut the cake into 1-1.5" slices. Pipe any remaining whipped cream on top and garnish with coffee beans (optional).
Storage
This mocha roll cake can be stored in an airtight container or wrapped in plastic wrap in the fridge for up to 5 days. Serve it straight from the fridge or let it come back to room temperature for 15 minutes or more.
Leftovers can be frozen in an airtight container or wrapped well in plastic wrap and/or aluminum foil for up to 1 month. Thaw in the fridge overnight before eating.
More roll cake recipes to try
- Matcha Roll Cake (Swiss Roll)
- Ube Roll Cake
- Pumpkin Swiss Roll
- Strawberry Swiss Roll
- Pandan Swiss Roll
Recipe
Mocha Roll Cake
Equipment
- 1 offset spatula, optional
- 1 piping bag, optional
- 1 piping tip, optional
Ingredients
Mocha Cake Sheet
- 100 g cake flour
- 50 g natural cocoa powder
- 1 teaspoon instant espresso powder
- 6 large eggs, room temperature
- ¼ teaspoon cream of tartar
- 150 g granulated sugar, divided into 100g + 50g
- 70 g milk, dairy or non-dairy
- 60 g neutral oil, e.g. canola oil, avocado oil
- 1 teaspoon vanilla extract
Espresso Whipped Cream
- 400 g whipping cream or heavy cream
- 40 g powdered sugar
- 1 ½ teaspoons instant espresso powder
- 1 teaspoon vanilla extract
- coffee beans, optional, as garnish
Instructions
Mocha Cake Sheet
- Prep: Preheat oven to 350°F. Line a 12x17" baking tray with parchment paper cut to size and set aside.
- Flour mixture: In a small bowl, stir together cake flour, cocoa powder, and espresso powder. Set aside.

- Separate eggs: Separate the egg whites and egg yolks into two large mixing bowls, being careful not to get any yolk in the egg whites. Set the bowl of egg yolks aside.

- Egg white meringue: To the egg whites, add cream of tartar. Use an electric hand mixer to beat the egg whites on low-medium speed until they become frothy like cappuccino foam. Add 100g of sugar, one spoonful at a time, mixing in between each addition. After all the sugar has been added, continue beating on medium-high speed until the meringue becomes stiff peaks. Set aside.
- Egg yolk mixture: To the egg yolks, add the remaining 50g of sugar. Use the same hand mixer to mix until combined. Add the milk, oil, and vanilla extract and mix until combined. Use a fine mesh sieve to sift the flour mixture into the egg yolk mixture. Mix on low speed until the flour has just combined.
- Combine meringue and egg yolk mixture: Add about ⅓ of the egg white meringue into the egg yolk mixture and fold together with a spatula, making sure to scrape the bottom of the bowl. Add the rest of the meringue and fold together until no streaks remain. Again, make sure to scrape the bottom and sides of the bowl where thicker batter can stick. Don't overmix.
- Fill pan: Pour the batter into your lined baking tray. Use an offset spatula to spread the batter into the corners and edges of the pan and smooth the batter into an even layer.
- Bake: Bake for 13-14 minutes or until the edges are lightly browned and the top of the cake sheet is puffed up.
- Release cake: Let the cake cool on a wire rack for only about 5 minutes before running an offset spatula around the edges of the pan to release the cake. Place a wire rack on top of the pan, grip both sides of the pan and rack (with oven mitts), and flip the cake onto the rack. Peel the parchment paper off the cake. Place a fresh sheet of parchment paper on top and flip the cake onto the parchment paper.
- Pre-roll cake: While the cake is still warm, roll the cake up with the parchment paper starting from a short end. Let the cake cool completely in this rolled-up log shape.


Espresso Whipped Cream
- Whip cream: To a mixing bowl, add the whipping cream, powdered sugar, espresso powder, and vanilla extract. Use a hand mixer to whip until it becomes stiff peaks.
- Spread cream on cake: Unroll your cooled cake sheet. Add dollops of whipped cream on top of the cake sheet. Use an offset spatula to spread the cream into a thick, even layer. Leave the last 2" at the end of the cake sheet empty. Save any remaining whipped cream for decoration later.
- Roll cake: Roll the cake up in the same way as before. When you get to the end of the roll, place a sheet of plastic wrap next to the cake so that you can roll the cake right onto the plastic wrap. Use an offset spatula to remove any excess cream that squishes out of the seam and push any cream that comes out from the two ends of the roll. Wrap the cake roll in plastic wrap and chill the in fridge for at least 3 hours or overnight to allow the cream to set.
- Slice: Before serving, use a serrated knife to cut off about ½" off both ends of the roll to reveal the swirl. Cut the cake into 1-1.5" slices. Pipe any remaining whipped cream on top and garnish with coffee beans (optional).


Gemma says
Loved flavour and texture! About to bake for a second time!
Anonymous says
The recipe was wonderful. But how can you prevent the cake from sticking to the parchment paper when setting the form? I let it chill for 30mins and then it was really hard to remove the parchment paper when rolling it in. Thank you
Kaia says
This recipe is sooooo good. Everybody around me loves it and would love to try it again. I love the cake texture, I wonder if I can I use this recipe to make a sponge cake or not? Would it still be nice and squishy like this? Many thanksss
Anonymous says
Recipe was a hit! The flavor reminds me of a tiramisu.
Karen Sheldrick says
This is the Canadian Living recipe, except that recipe frosts the log once filled and then draws a fork through the icing to create the look of a tree log.
You can use 1 tsp. instant coffee dissolved in a little hot water instead of using espresso powder.
Anonymous says
Thank you for the tip of using instant coffee instead of the espresso powder!!
Colette says
Since I do not have instant espresso powder what can I use as an alternative?
Anna says
Hello! I don't have espresso powder. I can make a fresh espresso, how much should I use? Thank you!
Amanda says
could we halve this recipe and bake it in a 12x8 pan? Really looking forward to baking this but I don’t have a big enough oven or pan
ava says
this recipe is so good!! im too lazy to make it into an actual roll cake and make whipping cream so i just bake the cake as a regular ol' cake and it turned out so yummy! i honestly almost ate the whole thing by myself, its so addictive. the meringue actually made the top a little crackly so it created this nice texture similar to a brownie too
Anonymous says
Wow! You make it look so easy
My cake usually cracks and gets stuck to the parchment paper.
An absolute mess
Shirley McClananhan says
Made it today and it was good. My family thought it could be sweeter, should I adjust the cocoa powder?
Salimashrafi says
Omgawdd i tried it and it was so gooood now my family wants me to keep making them
Tysm for this recipe and keep it up
Ximena says
This was my first attempt at making a cake from scratch instead of using a box cake mix and my family LOVED IT! The recipe was surprisingly easy to follow. It's the best cake I've had in ages. Not too sweet which is perfect! I will definitely try making this again someday.
Seonghwa says
Hi! Have loved all your roll cakes so far. Any advice on how to prevent the parchment paper from wrinkling during baking, and leaving lines/wrinkles in the finished cake? The cakes always look so smooth in your photos. Thanks!
Seonghwa says
Hi! Have loved all your roll cakes so far. Any advice on how to prevent the parchment paper from wrinkling during baking, and leaving lines/wrinkles in the finished cake? The cakes always look so smooth in your photos. Thanks!
Karlie Pidgeon says
I want to be ahead of the Christmas rush of baking and cooking. Can the cake be made in advance (2 or 3 days) and assemble the cream in the day it’s to be served?
Gail Ng says
Yes, you can! The assembled cake with the cream needs to set in the fridge for at least a few hours or overnight anyways so you could just make the whole cake and keep it in the fridge for 1-2 days before.
Riya says
Can’t wait to try this!! I only have espresso, no instant espresso powder, how much liquid espresso would equal the powder? Thank you!!
Kath says
This looks awesome! Just wondering if it’s possible to substitute the espresso powder with instant coffee powder instead?
Gail Ng says
Yes, you can! The coffee flavour might be a little more subtle because espresso powder is stronger but it'll still work!
Seanna says
This mocha cake looks amazing! I noticed that there's no baking powder or salt in the ingredient list and was wondering if you're using a self-rising cake & pastry flour that has salt and baking powder added to it already? (Eg. Robin Hood Brodie Cake & Pastry flour).
Gail Ng says
This is a chiffon cake so it's leavened by all the tiny air bubbles you whip into the egg white meringue - no baking powder needed! Sometimes I add it as a back up in case the meringue fails but it usually doesn't need it.
Avuyile says
This looks amazing, thank you so much for your recipes. Will definitely try this one for Christmas lunch.♥️