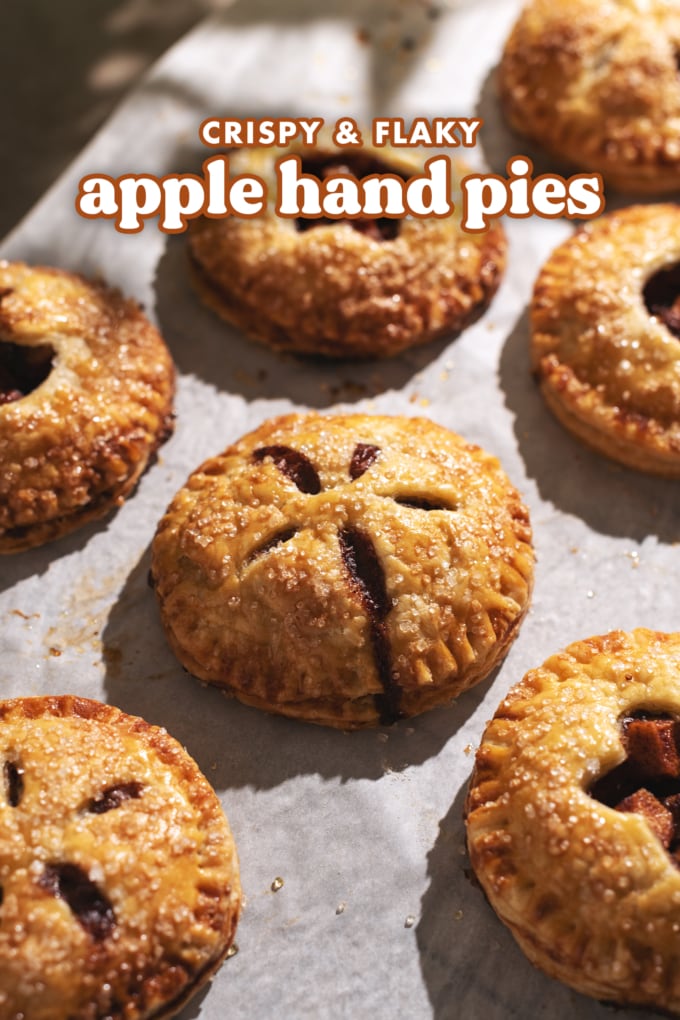

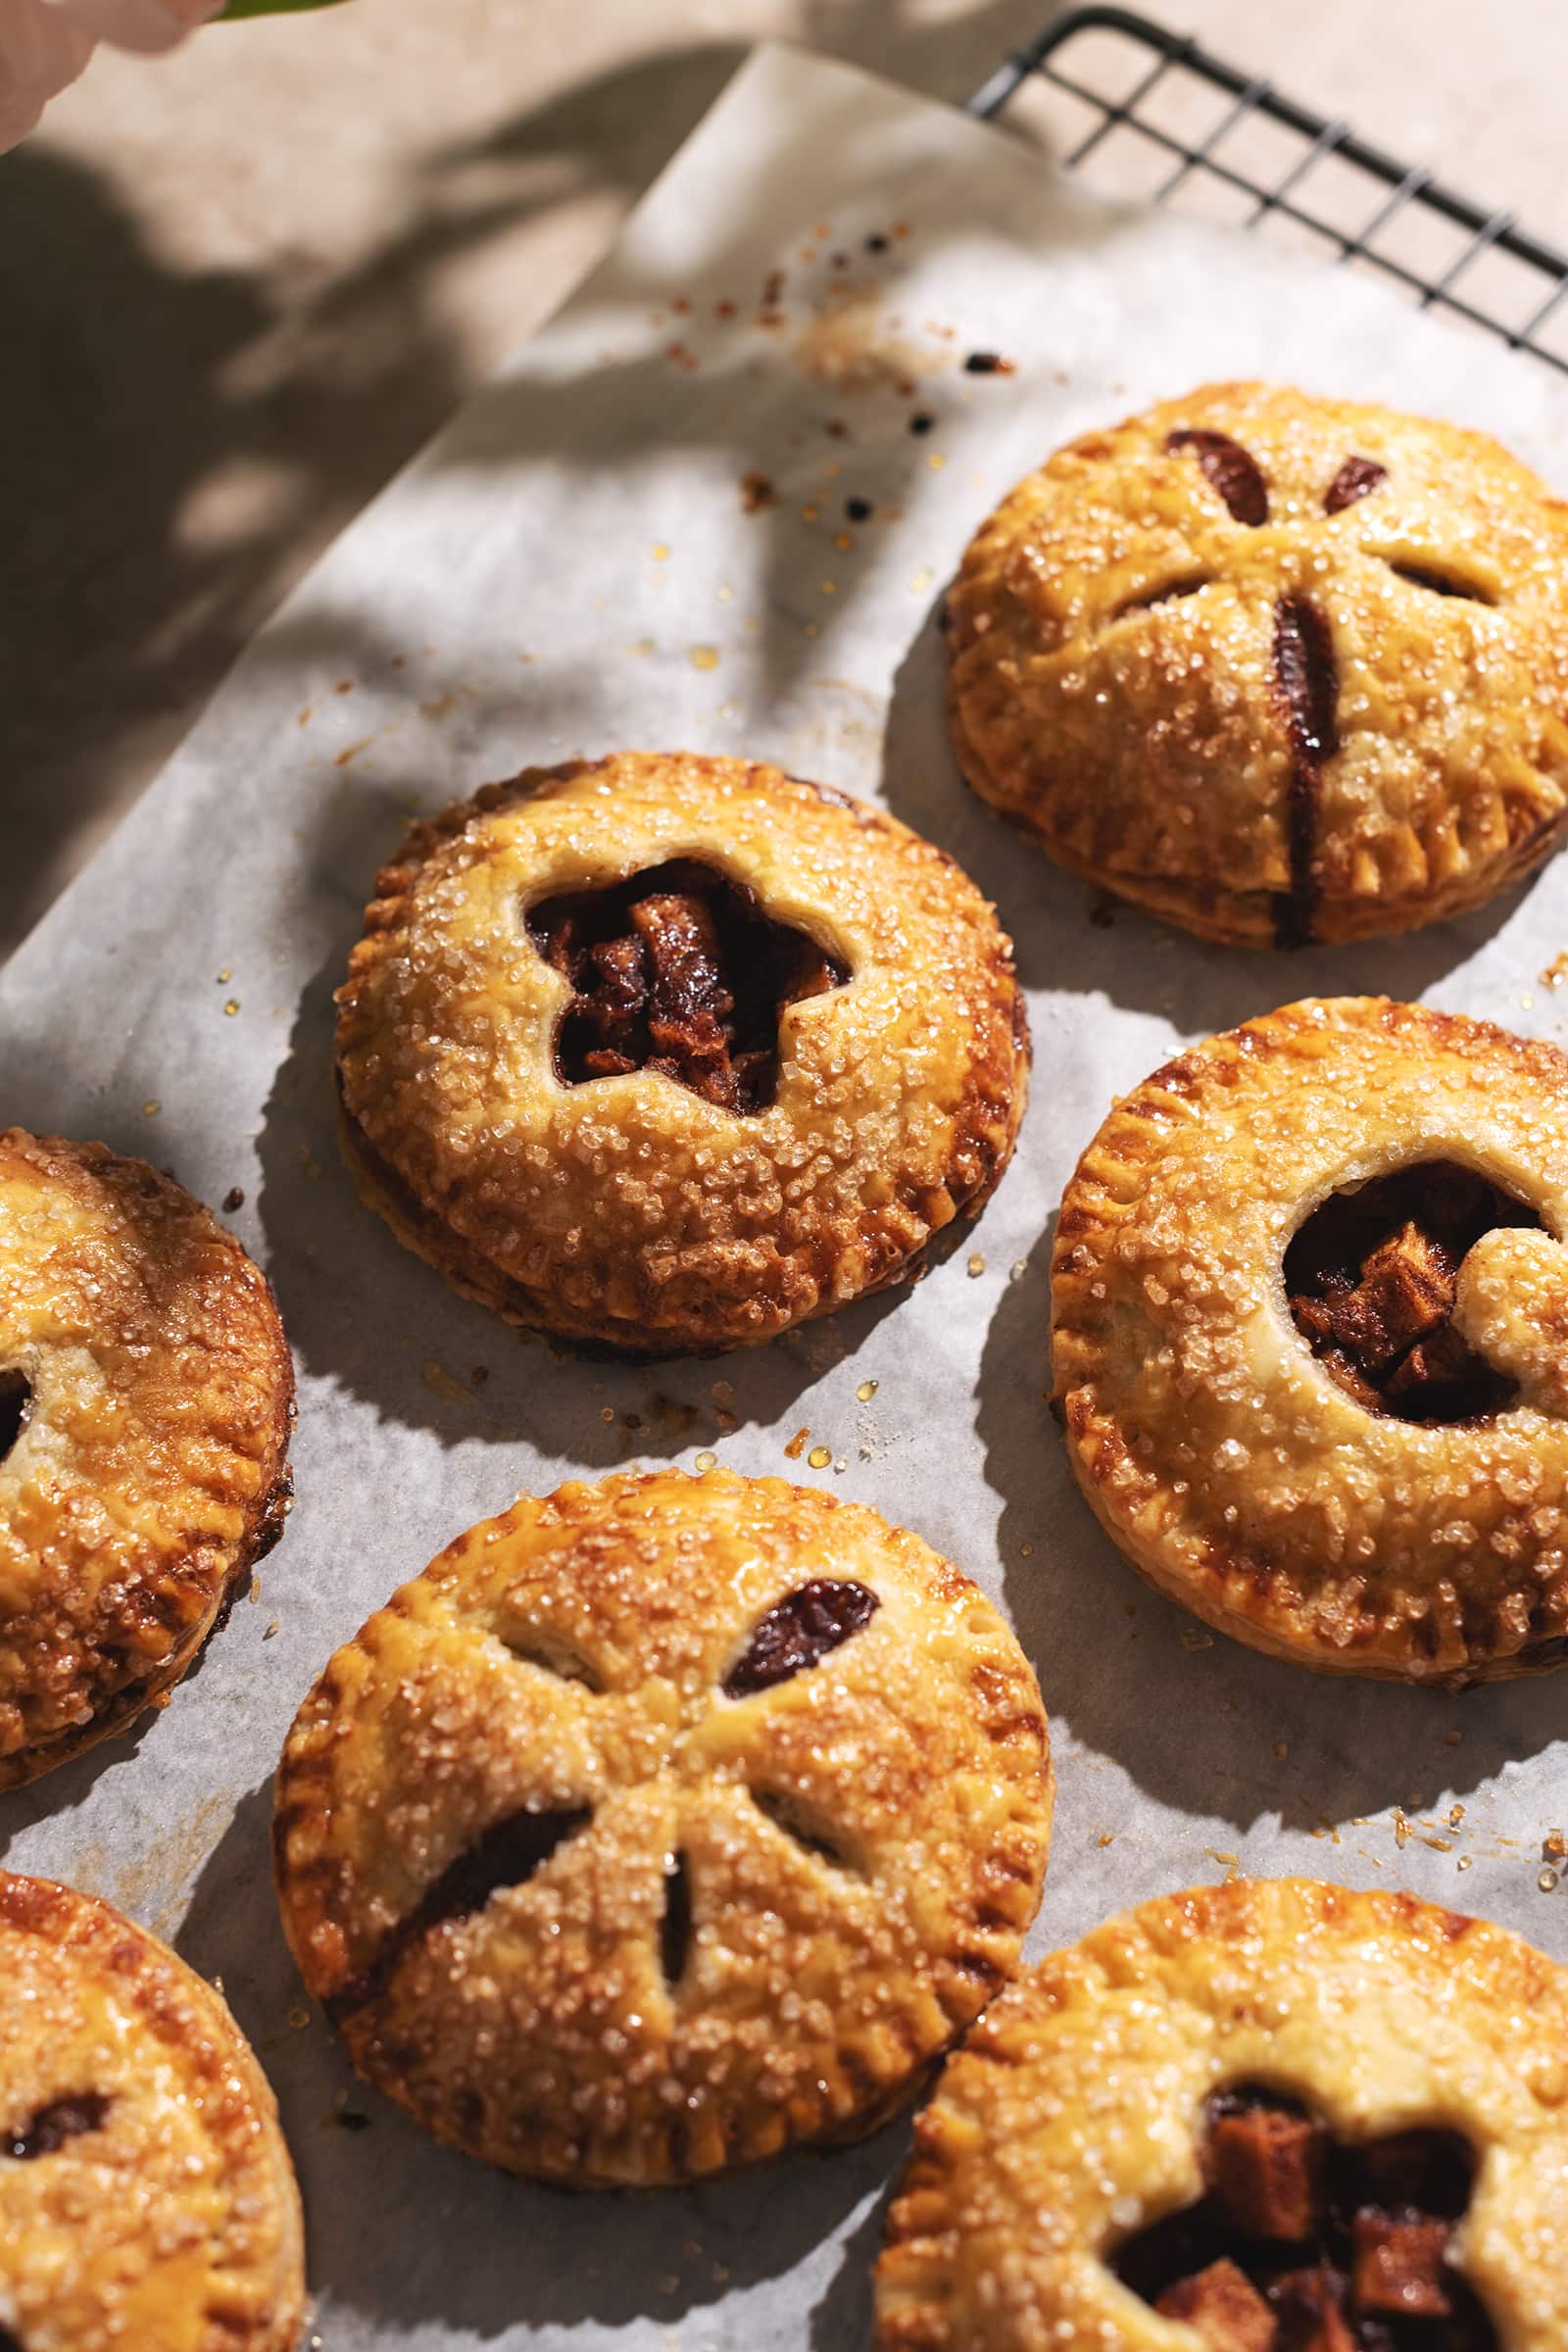
These mini apple hand pies are made with the best super crispy and flaky pie crust and stuffed with a tender, cinnamon apple filling. They're so delicious and cozy for Fall!
Jump to:
These apple hand pies are one of my favourite recipes. Let me tell you why.
This pie crust recipe is the star of the show with its crispiness fresh out of the oven. The crust-to-filling ratio of hand pies is perfect for those who love the crunch of buttery pie pastry.
This is the pie crust recipe that I’ve used over and over again in most of my pie-related desserts like my Cherry Galette and Blueberry Apple Pie. It’s a tried and true staple recipe for me because of how crispy and flaky it bakes up. The bottom crust is always crispy, never soggy.
The cinnamon apple filling is the perfect warming and cozy flavour. These hand pies will make your house smell amazing as you’re baking them. They’re an essential cozy Fall dessert. And you have to try them fresh and warm from the oven!
Why you’ll love this recipe
- These apple hand pies are seriously delicious and will make your house smell incredible!
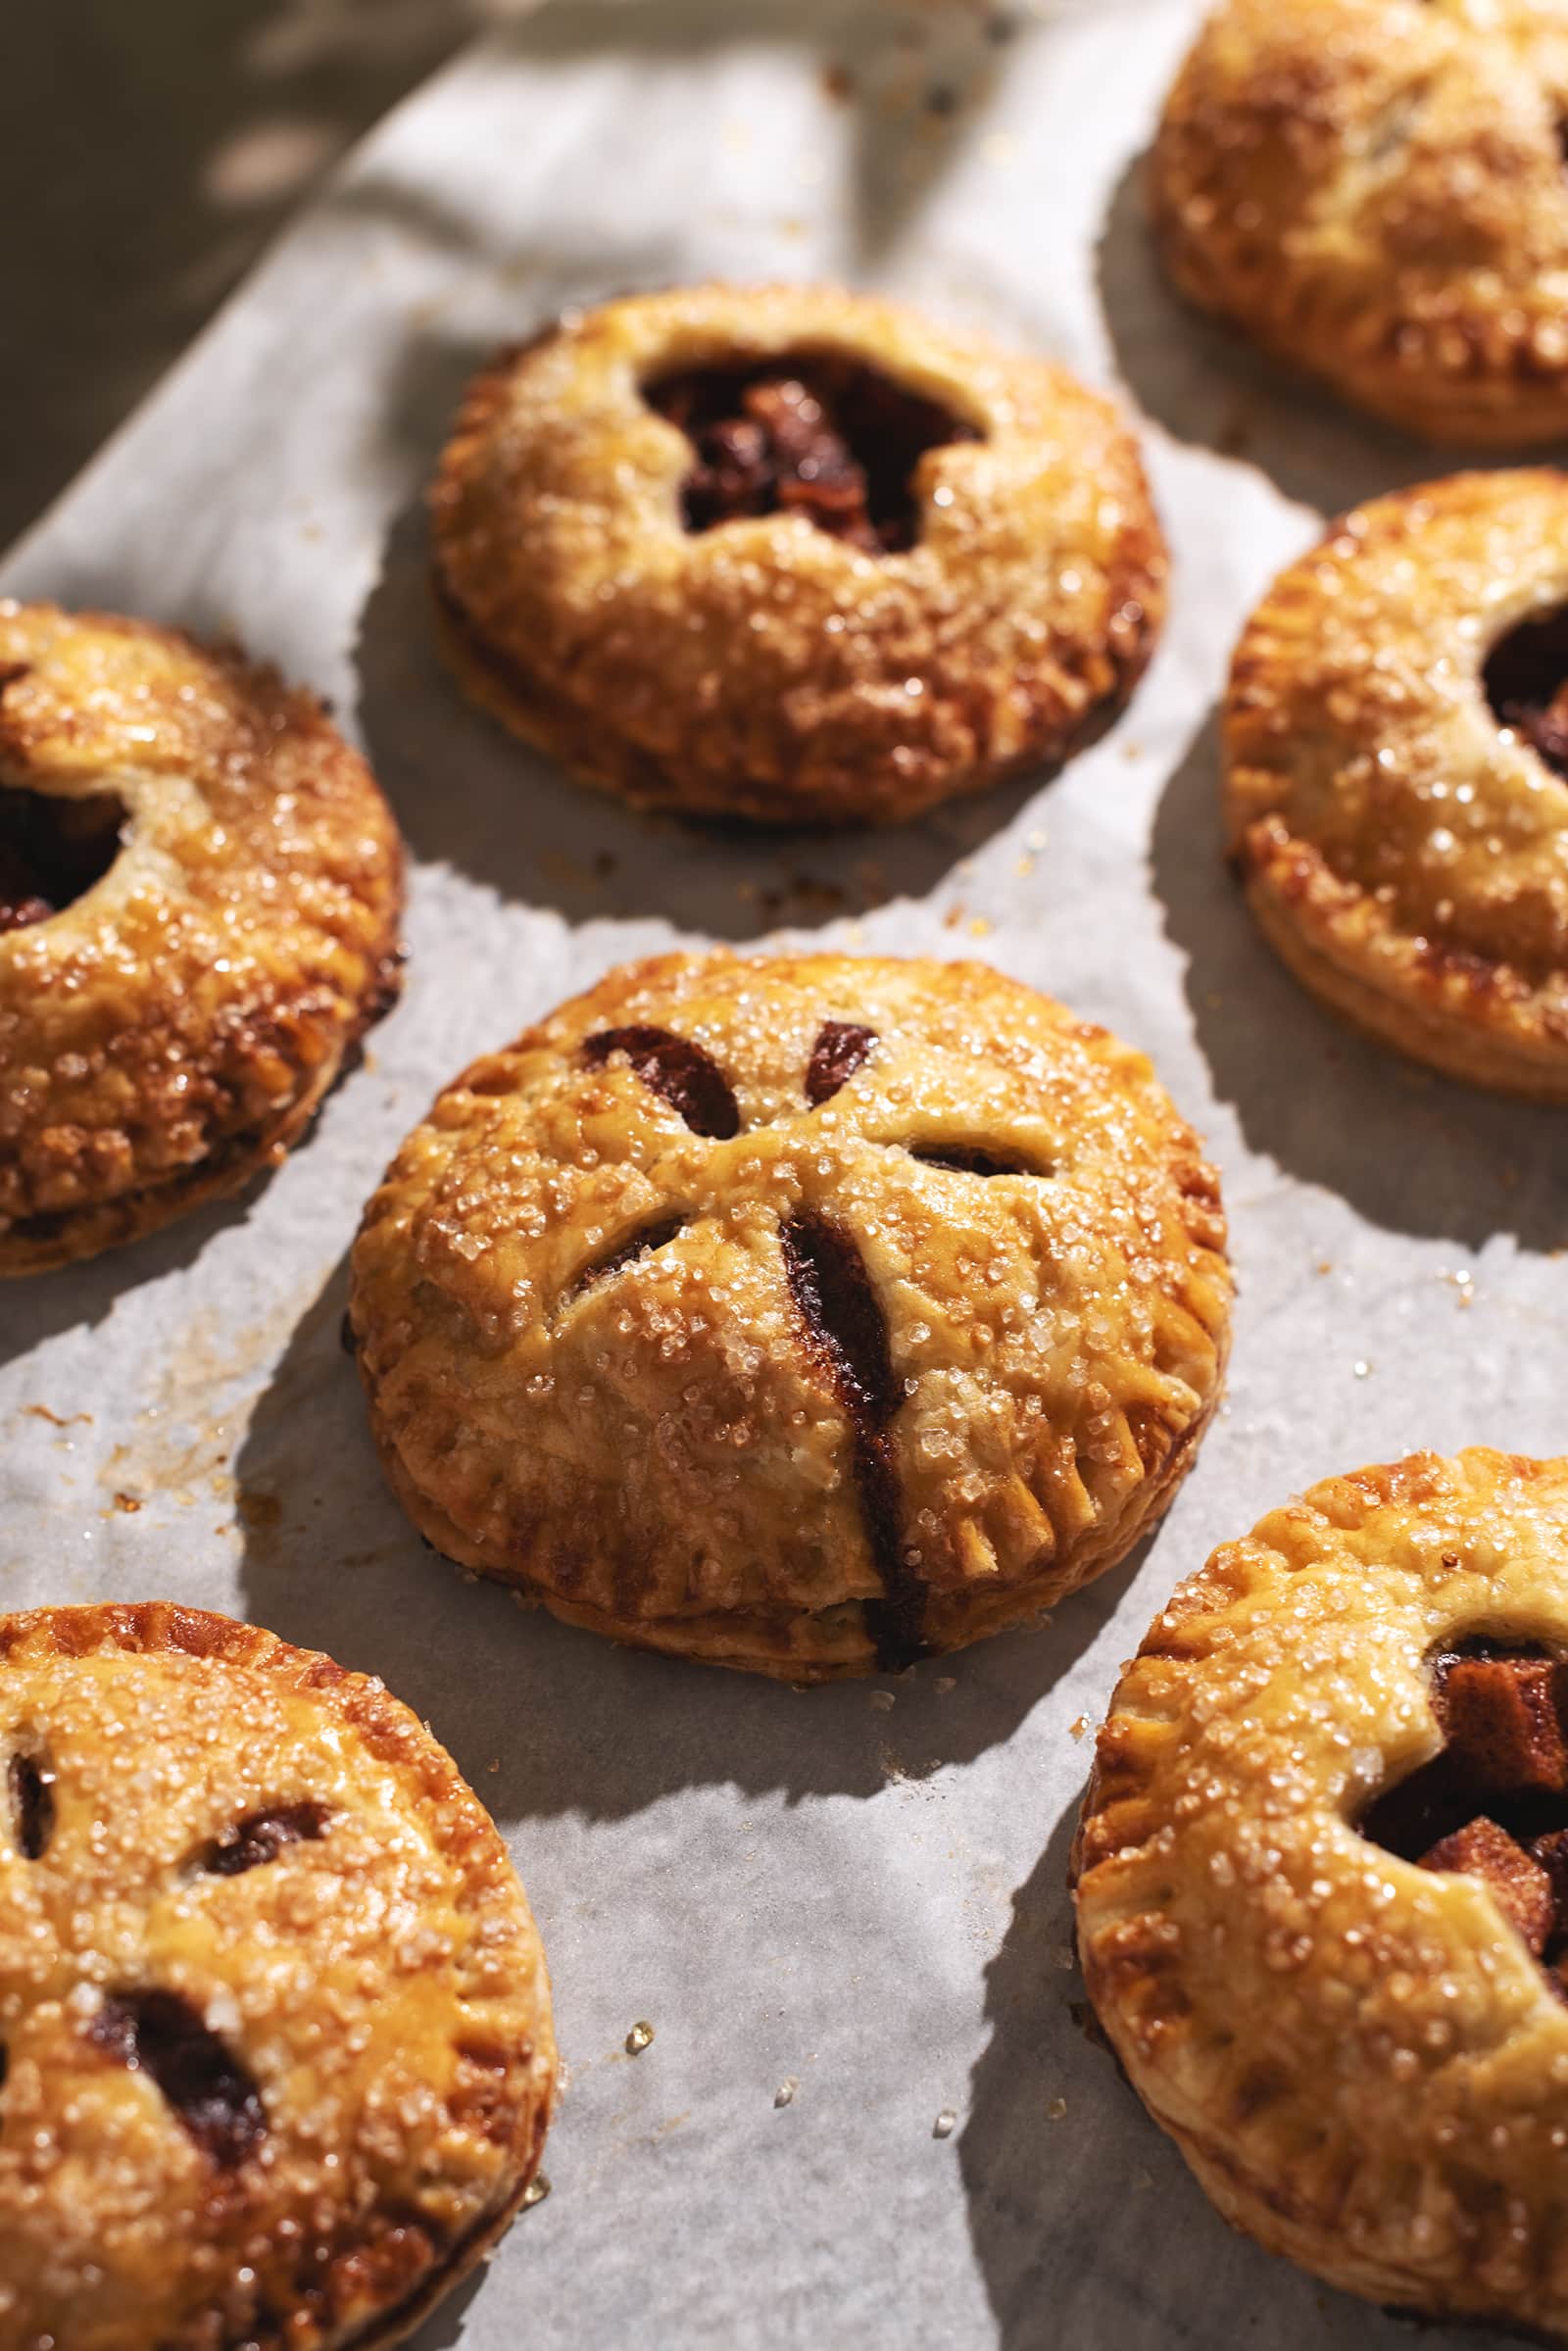
- The pie crust is super crispy, flaky, and buttery.
- The apple filling is perfectly spiced and pre-cooked so that the apples are tender and soft.
- The pie dough freezes well and can be made days or weeks in advance for when the pie craving hits.
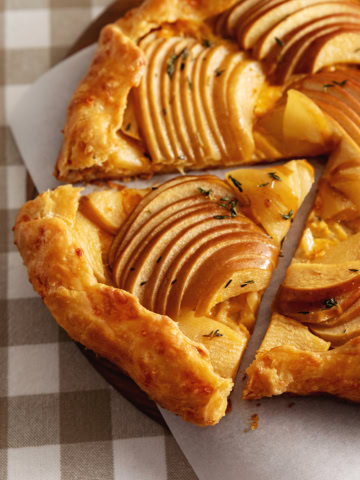
- This recipe is adaptable and customizable for all forms of apple pie treats. Instead of hand pies, this recipe can make two large apple galettes or six medium apple turnovers.
What are hand pies?
Hand pies are just smaller, handheld pies. They're made with the same pie dough and filling as a full-sized pie. They have all the elements and flavour of a regular pie but they're in a mini size.
You can get more creative with the size and shape of hand pies. Experiment with circular hand pies, rectangular pies, half moon pies, or triangular hand pies.
The filling is often pre-cooked on the stovetop before being baked inside the hand pies to ensure the fruit cooks down since hand pies bake for a shorter amount of time than a large pie.
Tools
- Rolling pin - You'll need a rolling pin to roll out the pie dough. Use any kind of rolling pin you have! I love simple wooden rolling pins.
- 4" round cutter - You can make your hand pies in any size or shape. I used a 4" round cutter for mine. If you don't have a cookie cutter, you can also make hand pies by simply cutting the dough with a knife into squares or rectangles and folding them in half after adding the filling.
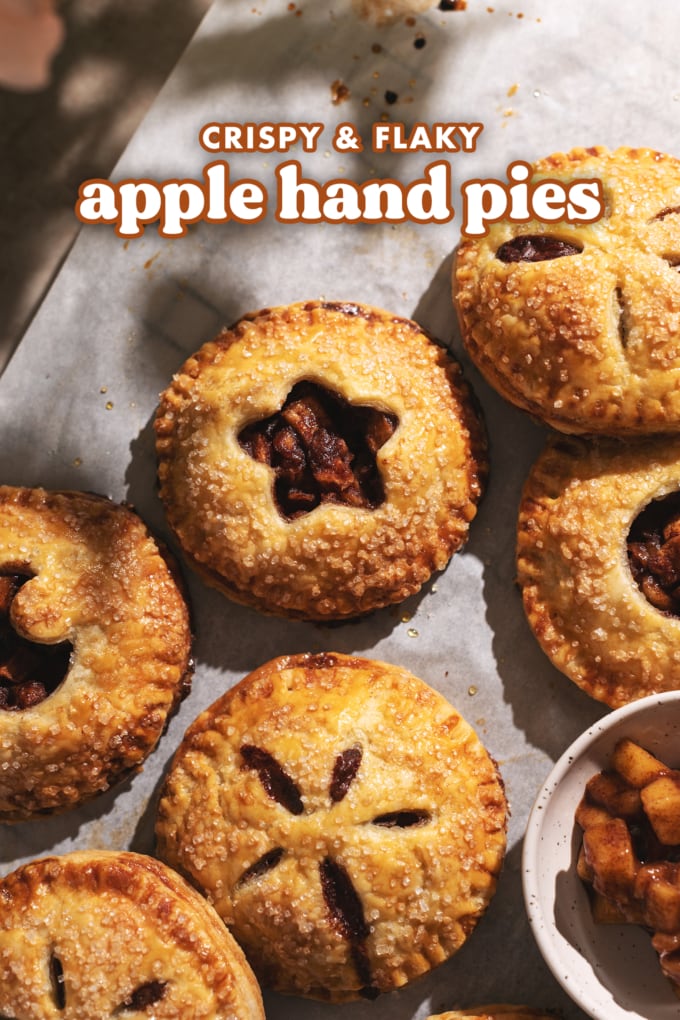
- Mini cookie cutters - You'll need some mini cutters in some fun shapes to make a cut-out in the top crust. If you don't have any, you can also cut a few slits with a knife to allow steam to escape as the hand pies bake.
Ingredients
As always, the full recipe card with ingredient amounts and instructions is at the bottom of this post! Keep reading for more details on each ingredient or skip ahead to the recipe.
- All-purpose flour
- Salt
- Unsalted butter - Your butter should be cold and straight from the fridge. Cut them into rough cubes before adding them to the flour.
- Ice cold water - Leave a cup of water in the fridge or freezer until you’re ready to use it. The water should be very cold so that it doesn’t warm the butter when added to the dough.
- Apples - Use any tart and crisp apple like Granny Smith, Honeycrisp, Elstar, Braeburn, Jonahgold, or Gingergold. Peel, core, and chop them into small chunks.
- Brown sugar - Brown sugar sweetens the filling while giving a warming flavour.
- Ground cinnamon - You can’t have apples without cinnamon for that classic apple pie flavour.
- Cornstarch - This helps soak up the juices released from the apples during cooking and turns it into a jammy filling.
- Vanilla extract
- Egg - For the egg wash to make the crust shiny and golden brown.
- Sugar crystals - Use any coarse sugar with large crystals like turbinado sugar or demerara sugar for extra crunch and shine to the pastry.
How to make apple hand pies
Mix dry ingredients - In a mixing bowl, stir together flour and salt.
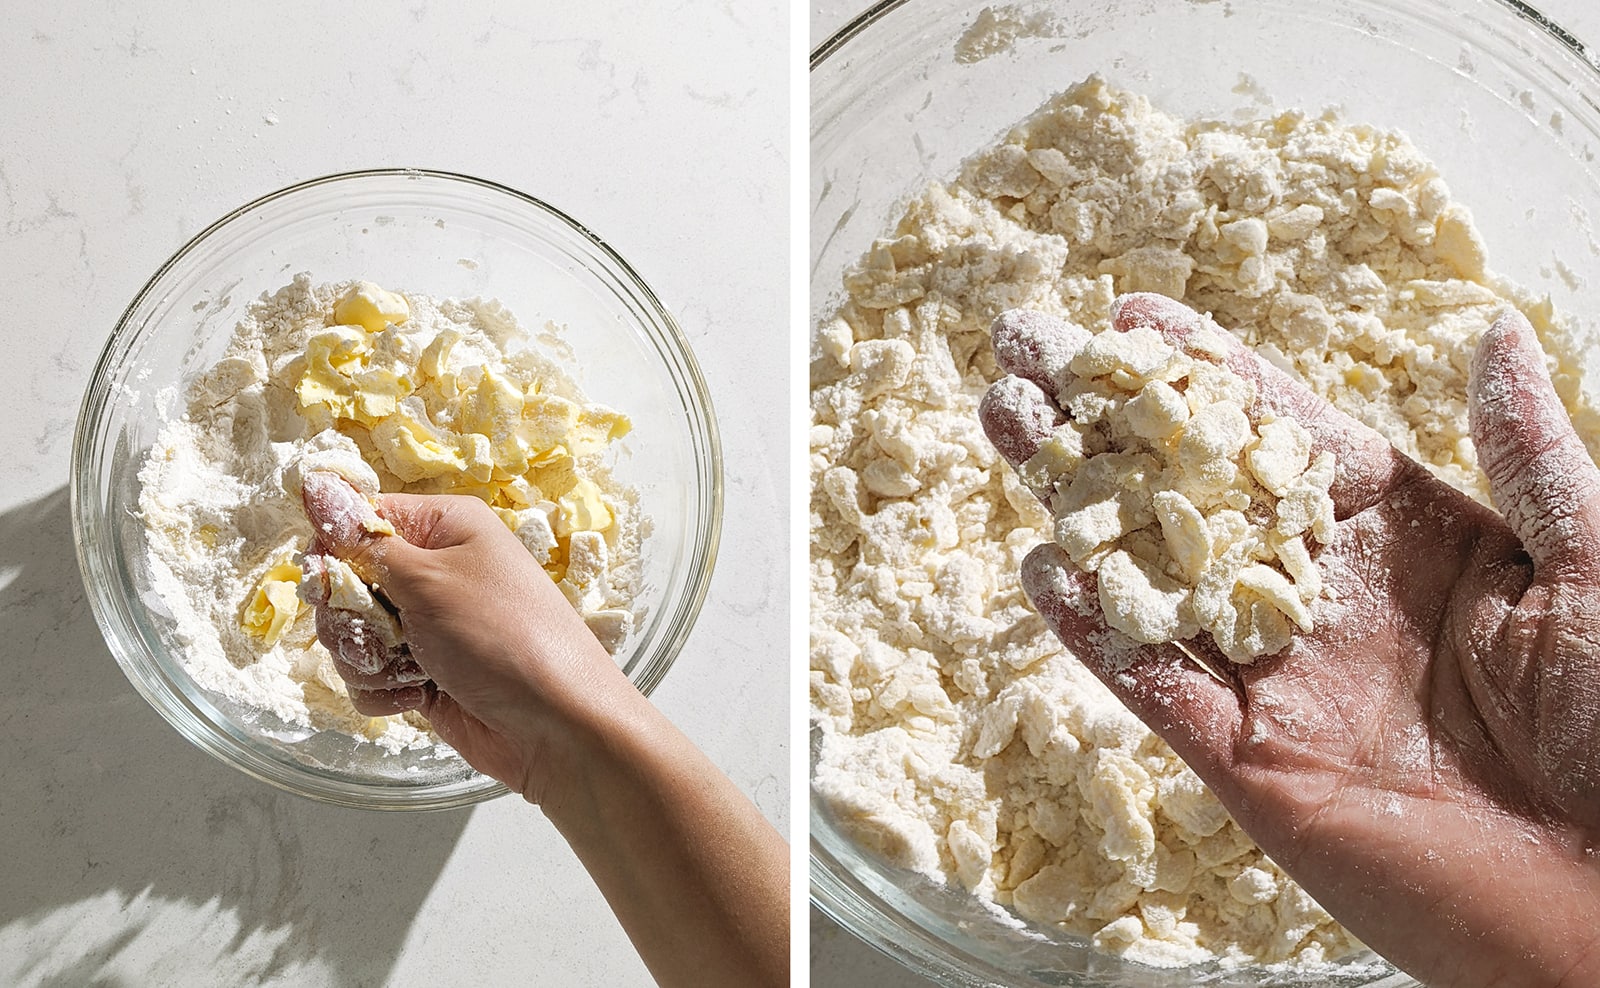
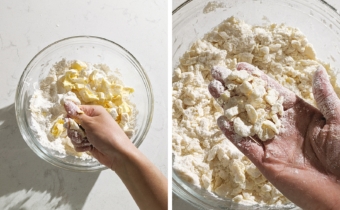
Cut the butter into the flour - Add in cold cubed butter and toss to coat in flour. Press the butter in between your thumb and fingers to break them into smaller pieces, tossing to coat in flour occasionally. Work quickly and continue breaking the butter down into about pea-sized pieces.
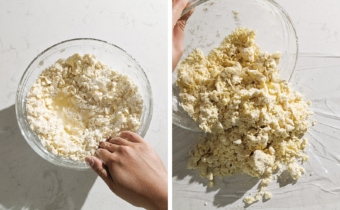
Hydrate the dough - Make a well in the middle of the flour. Pour in ice water and mix with your hand to combine until it forms a shaggy dough.

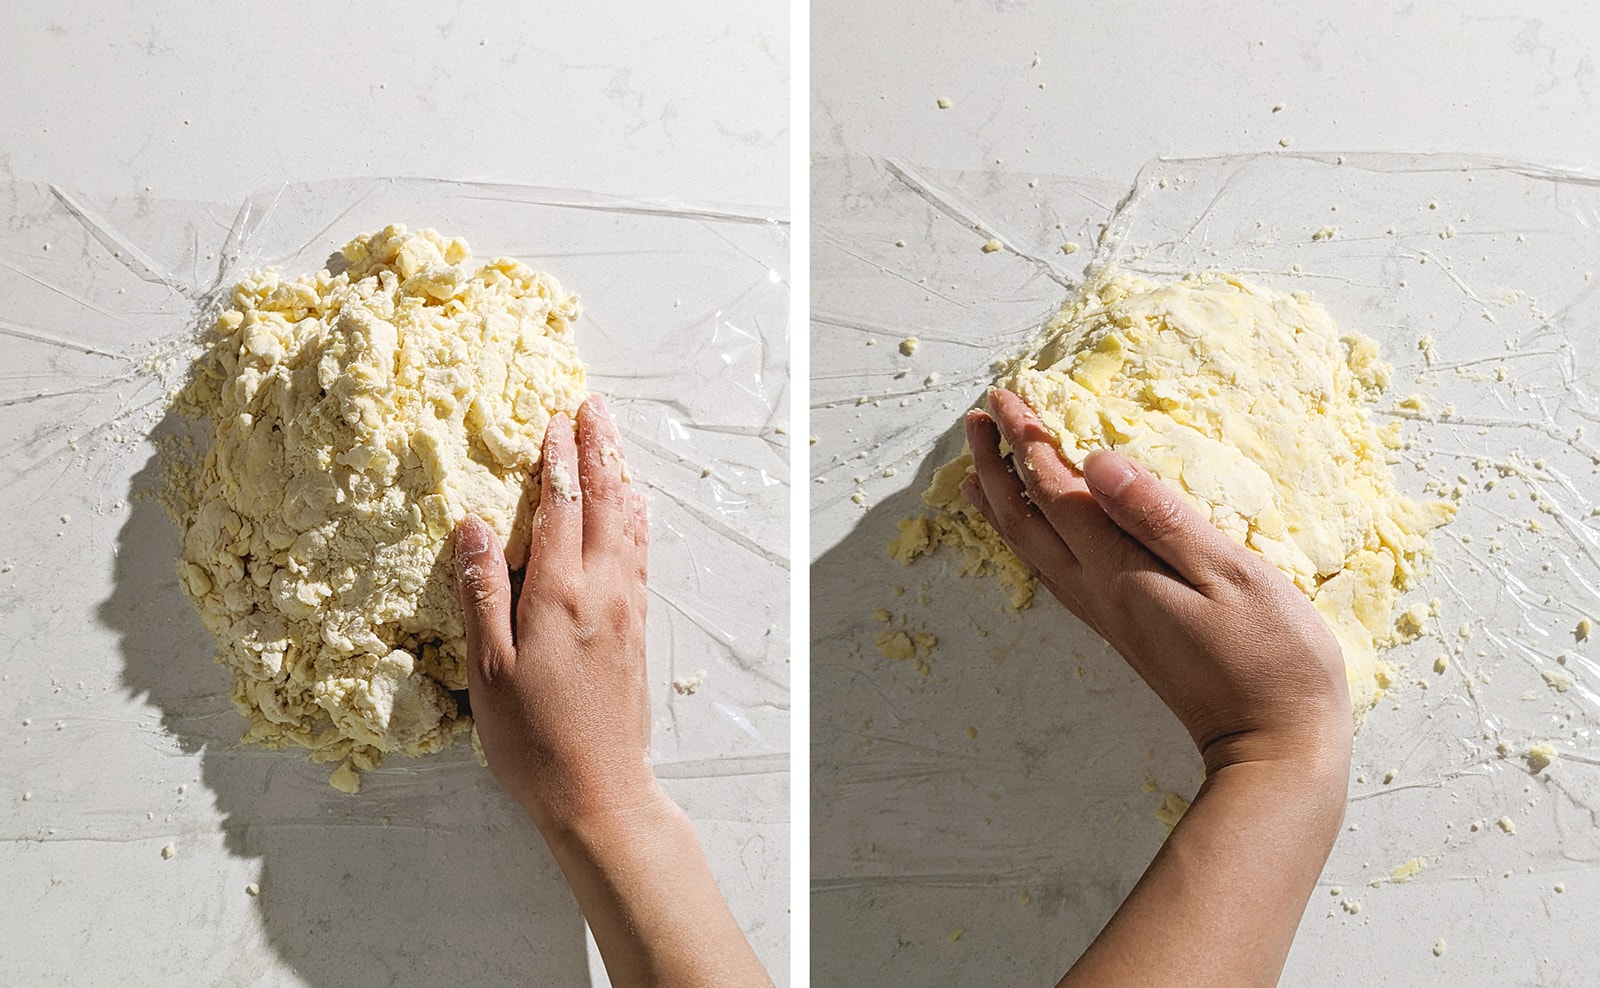
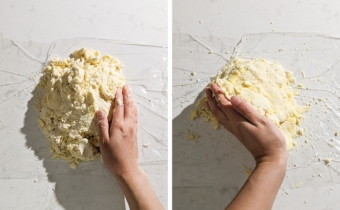
Press, fold, and shape the dough - Turn the dough out onto a sheet of plastic wrap on the counter. Use your hands to press the dough together. Fold the dough over onto itself 2-3 times to create layers of butter but don't overwork the dough. Don't knead the dough.
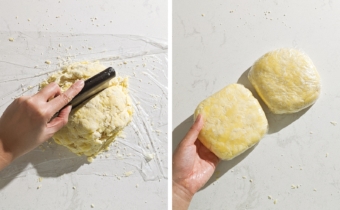
Wrap and chill the dough - Use a bench scraper to cut the dough into two halves. Press and shape each half into a flattened disc shape. Wrap both discs with plastic wrap. Press down on the dough to compact it against the plastic wrap. Chill dough in the fridge for at least 4 hours or preferably overnight.

Note: I divide the dough in half to make it easier to work with. This ensures the dough doesn't get too warm if you're working with it for a long time. It's also easier to roll out thinly if you have limited counter space. You can just make one big disc of dough if you prefer!
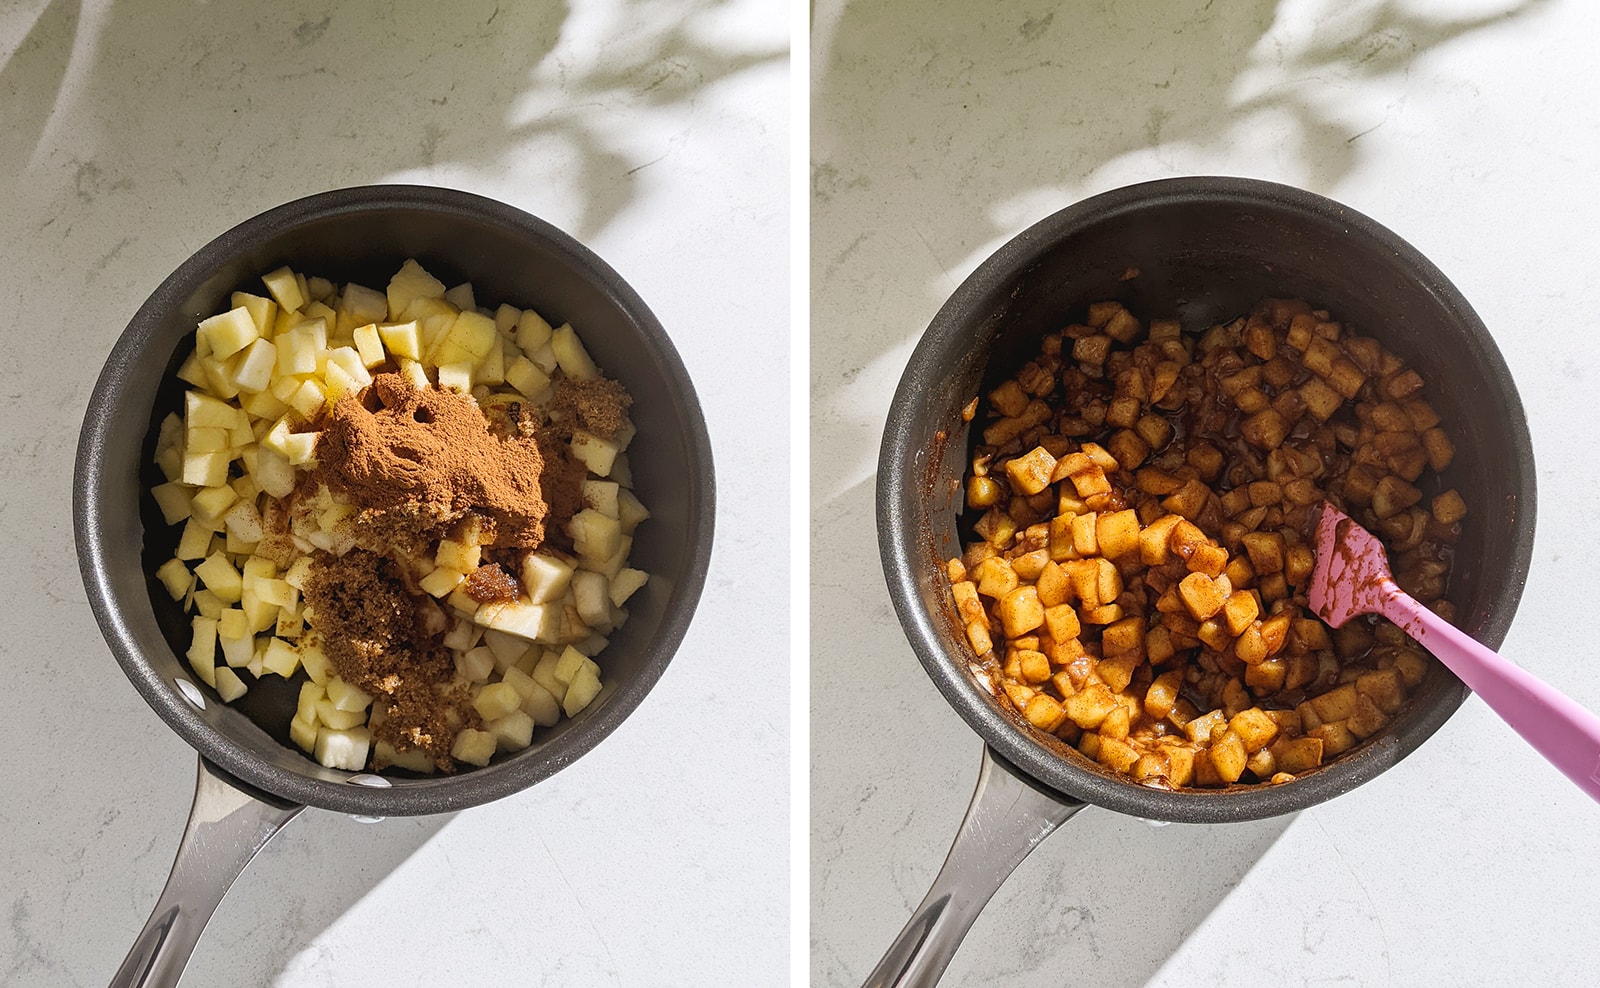
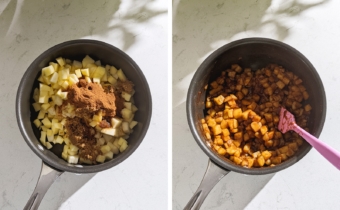
Cook apple filling - In a medium pot, stir together apple chunks, brown sugar, cinnamon, cornstarch, and vanilla extract. Cook on medium-high heat until the juices start to bubble. Continue cooking for about 5 minutes until the apples are tender. Set aside to cool completely before using.
Prep - Line a baking sheet with parchment paper. Set aside.
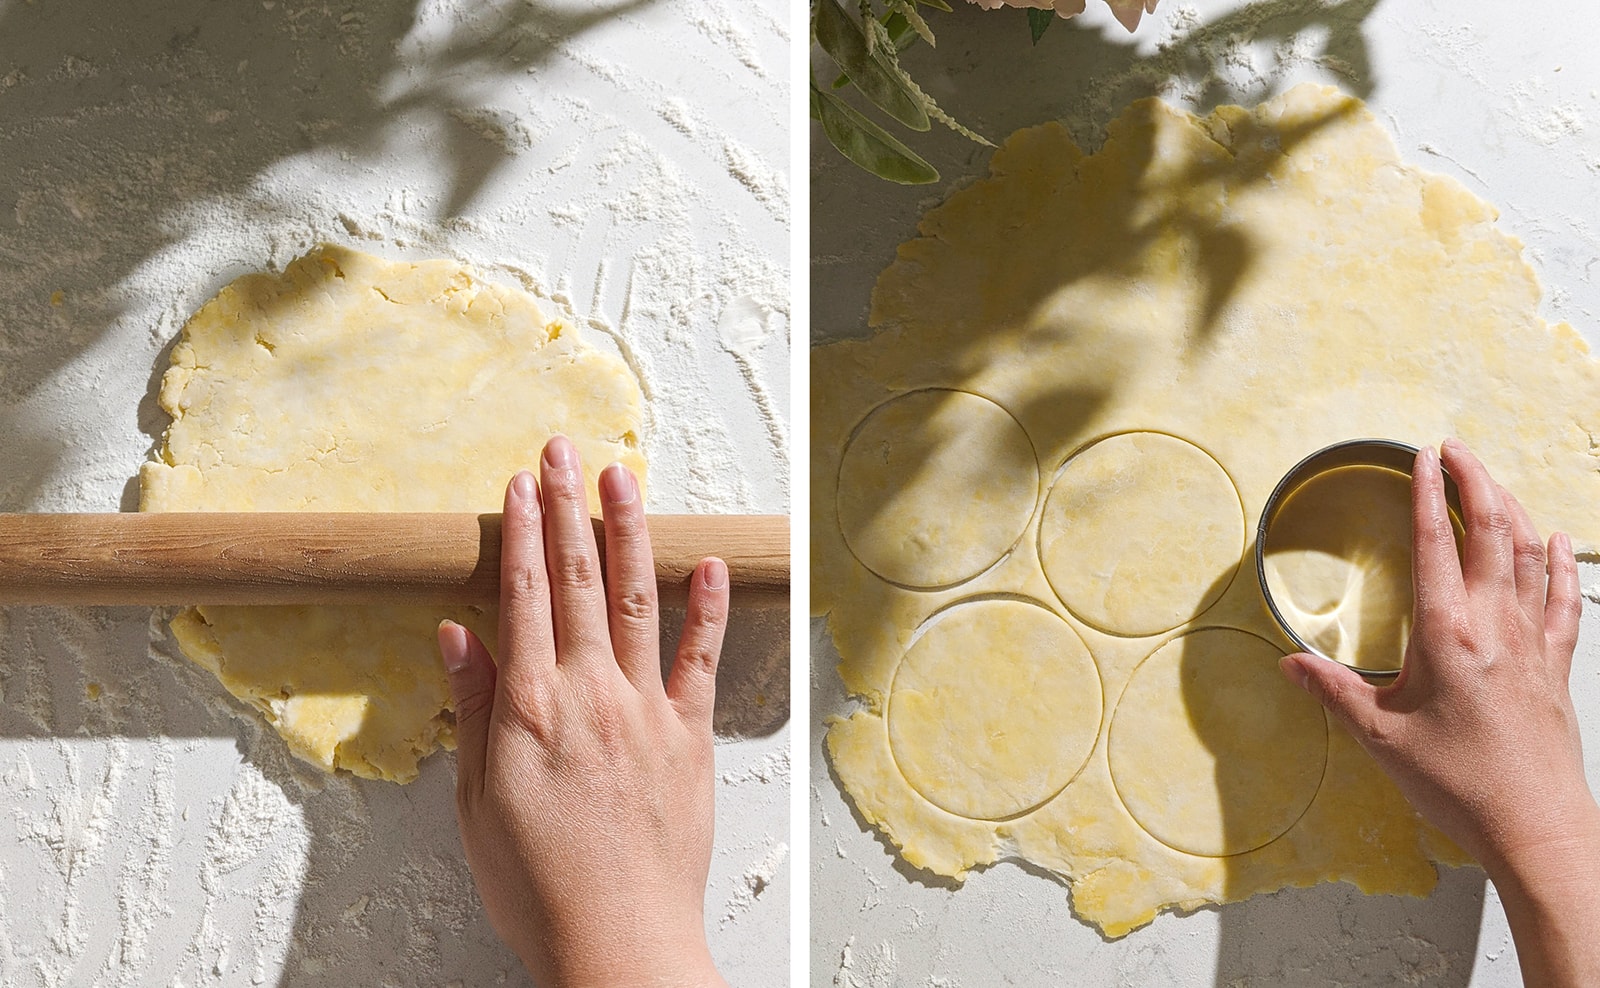
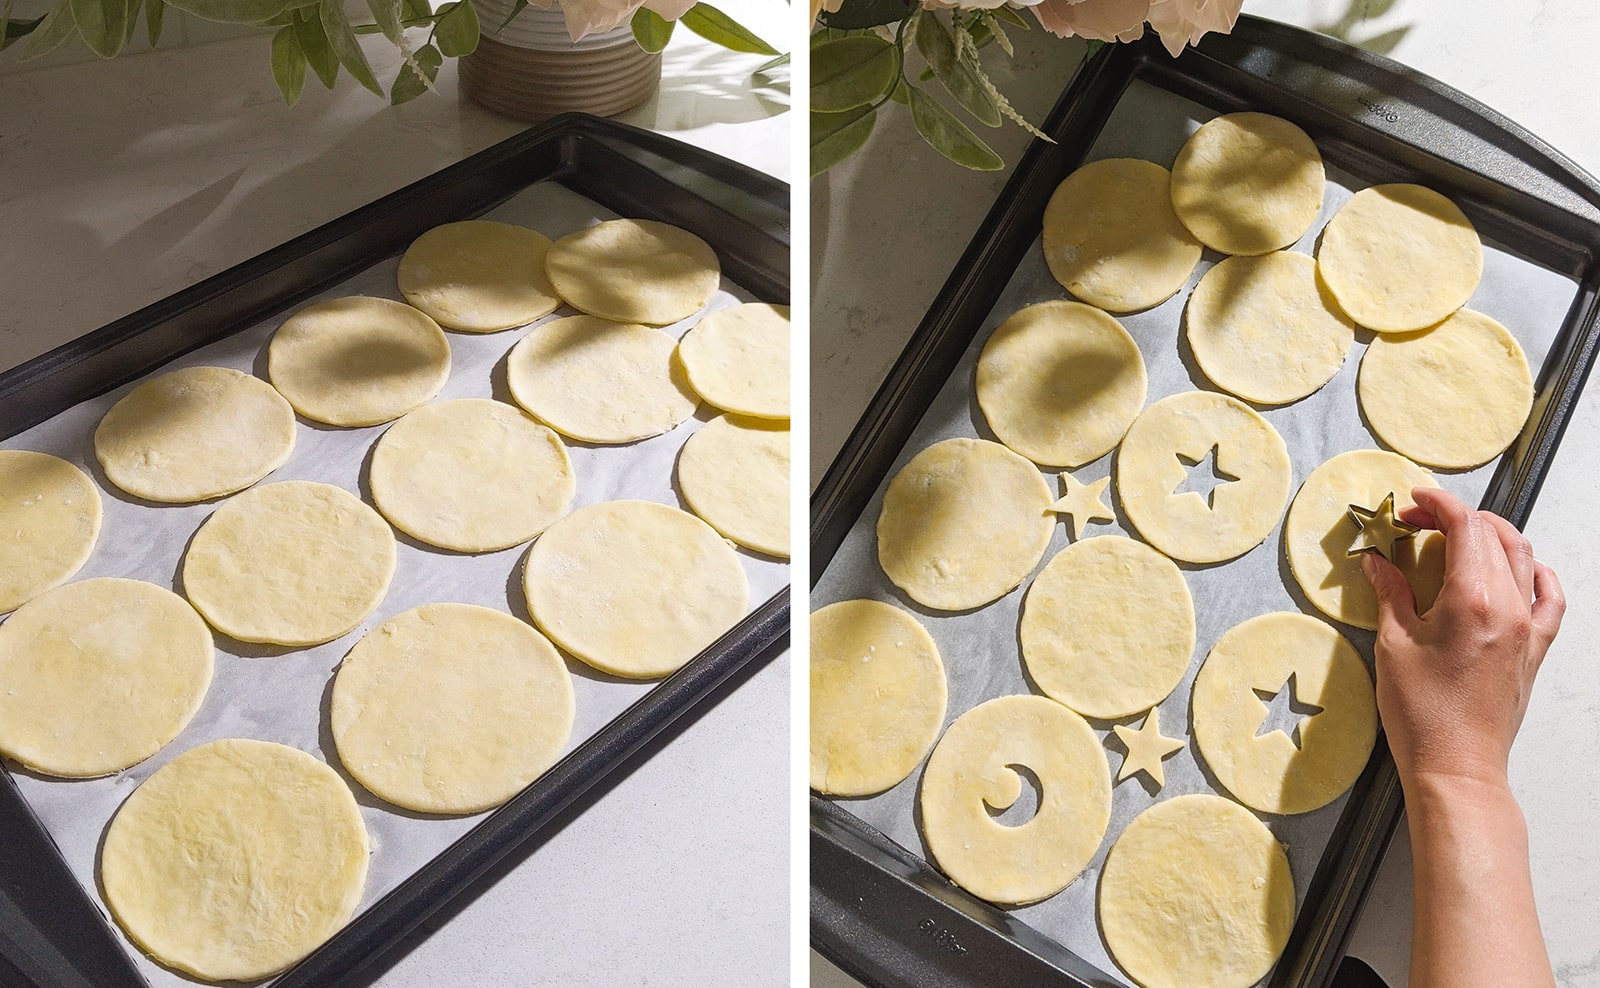
Roll out the dough - On a floured surface, place down one disc of dough. Whack the dough firmly with a rolling pin to soften it without warming it up. Roll it out until about ⅛" thick. Use a 4" round cutter to cut out circles. Transfer the dough rounds to your lined baking sheet. Re-roll the scraps no more than once. Repeat with the second disc of dough.
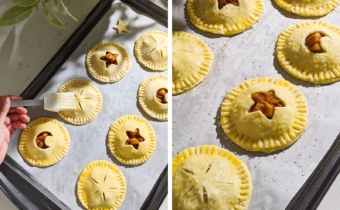
Cut out shapes - Use a smaller cookie cutter to cut out shapes in half of the dough rounds or use a knife to slice a few lines to allow steam to escape when baking.
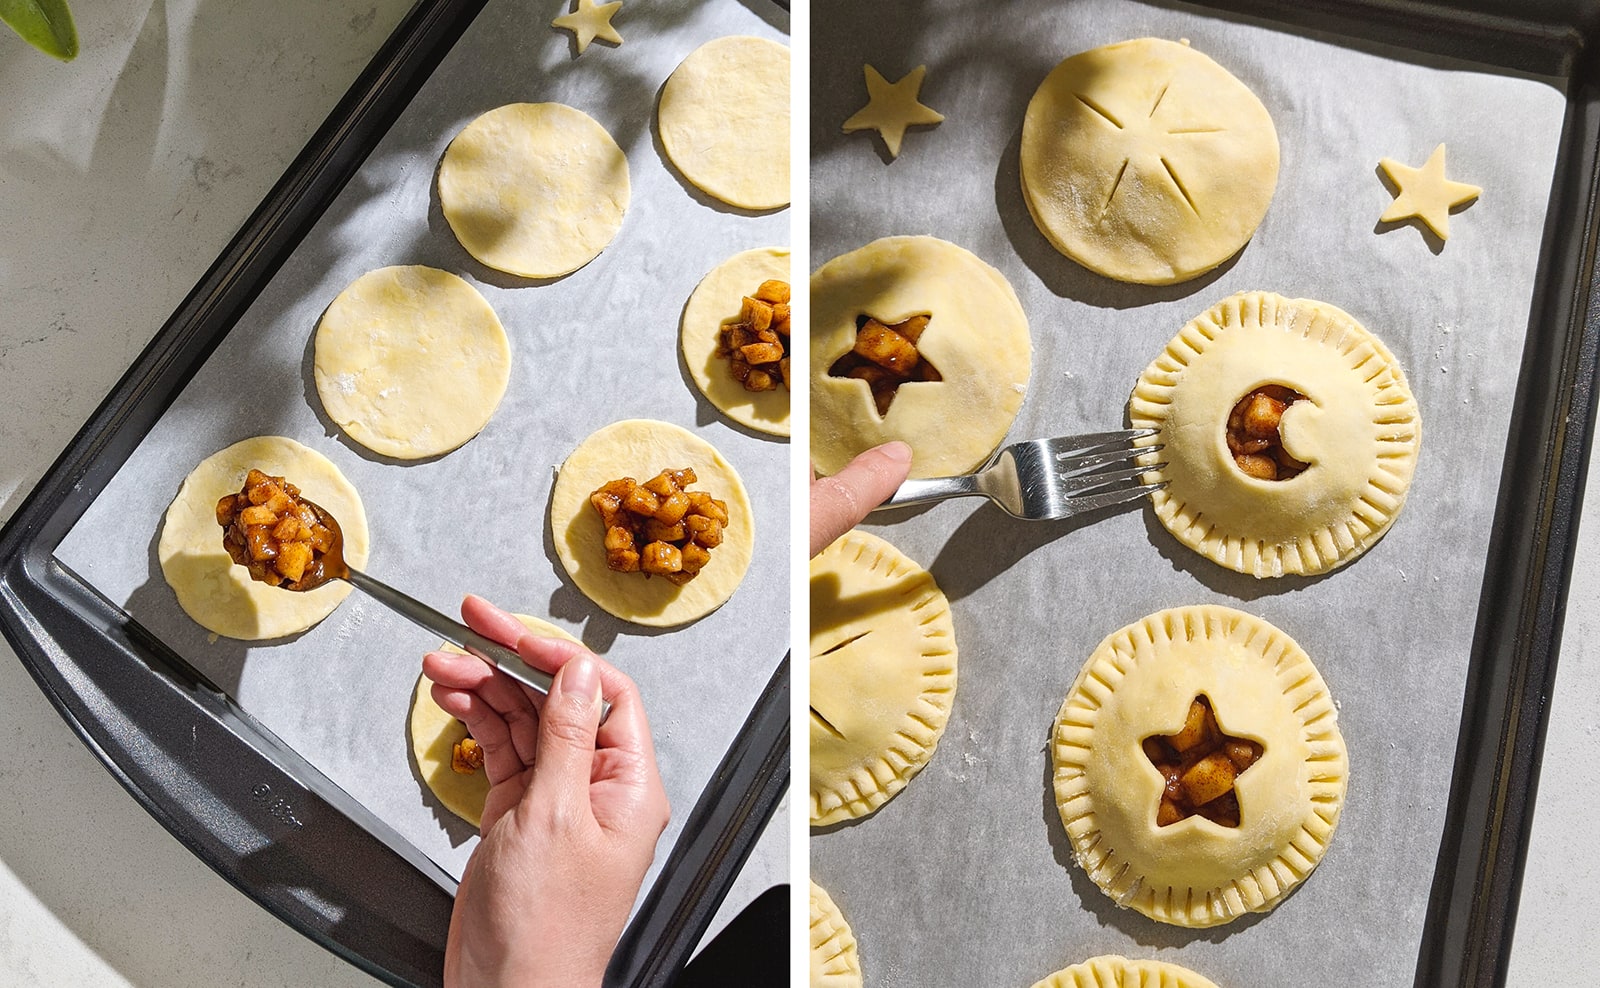
Assemble hand pies - Spoon a generous mound of apple filling onto the middle of each "bottom" round, leaving about ½"-¾" of the edge empty. Gently stretch a matching "top" round and place it on top of each bottom round. Press a floured fork around the edges of each hand pie to seal.
Chill and preheat - Chill the whole baking sheet of hand pies in the fridge while you preheat the oven to 350°F.
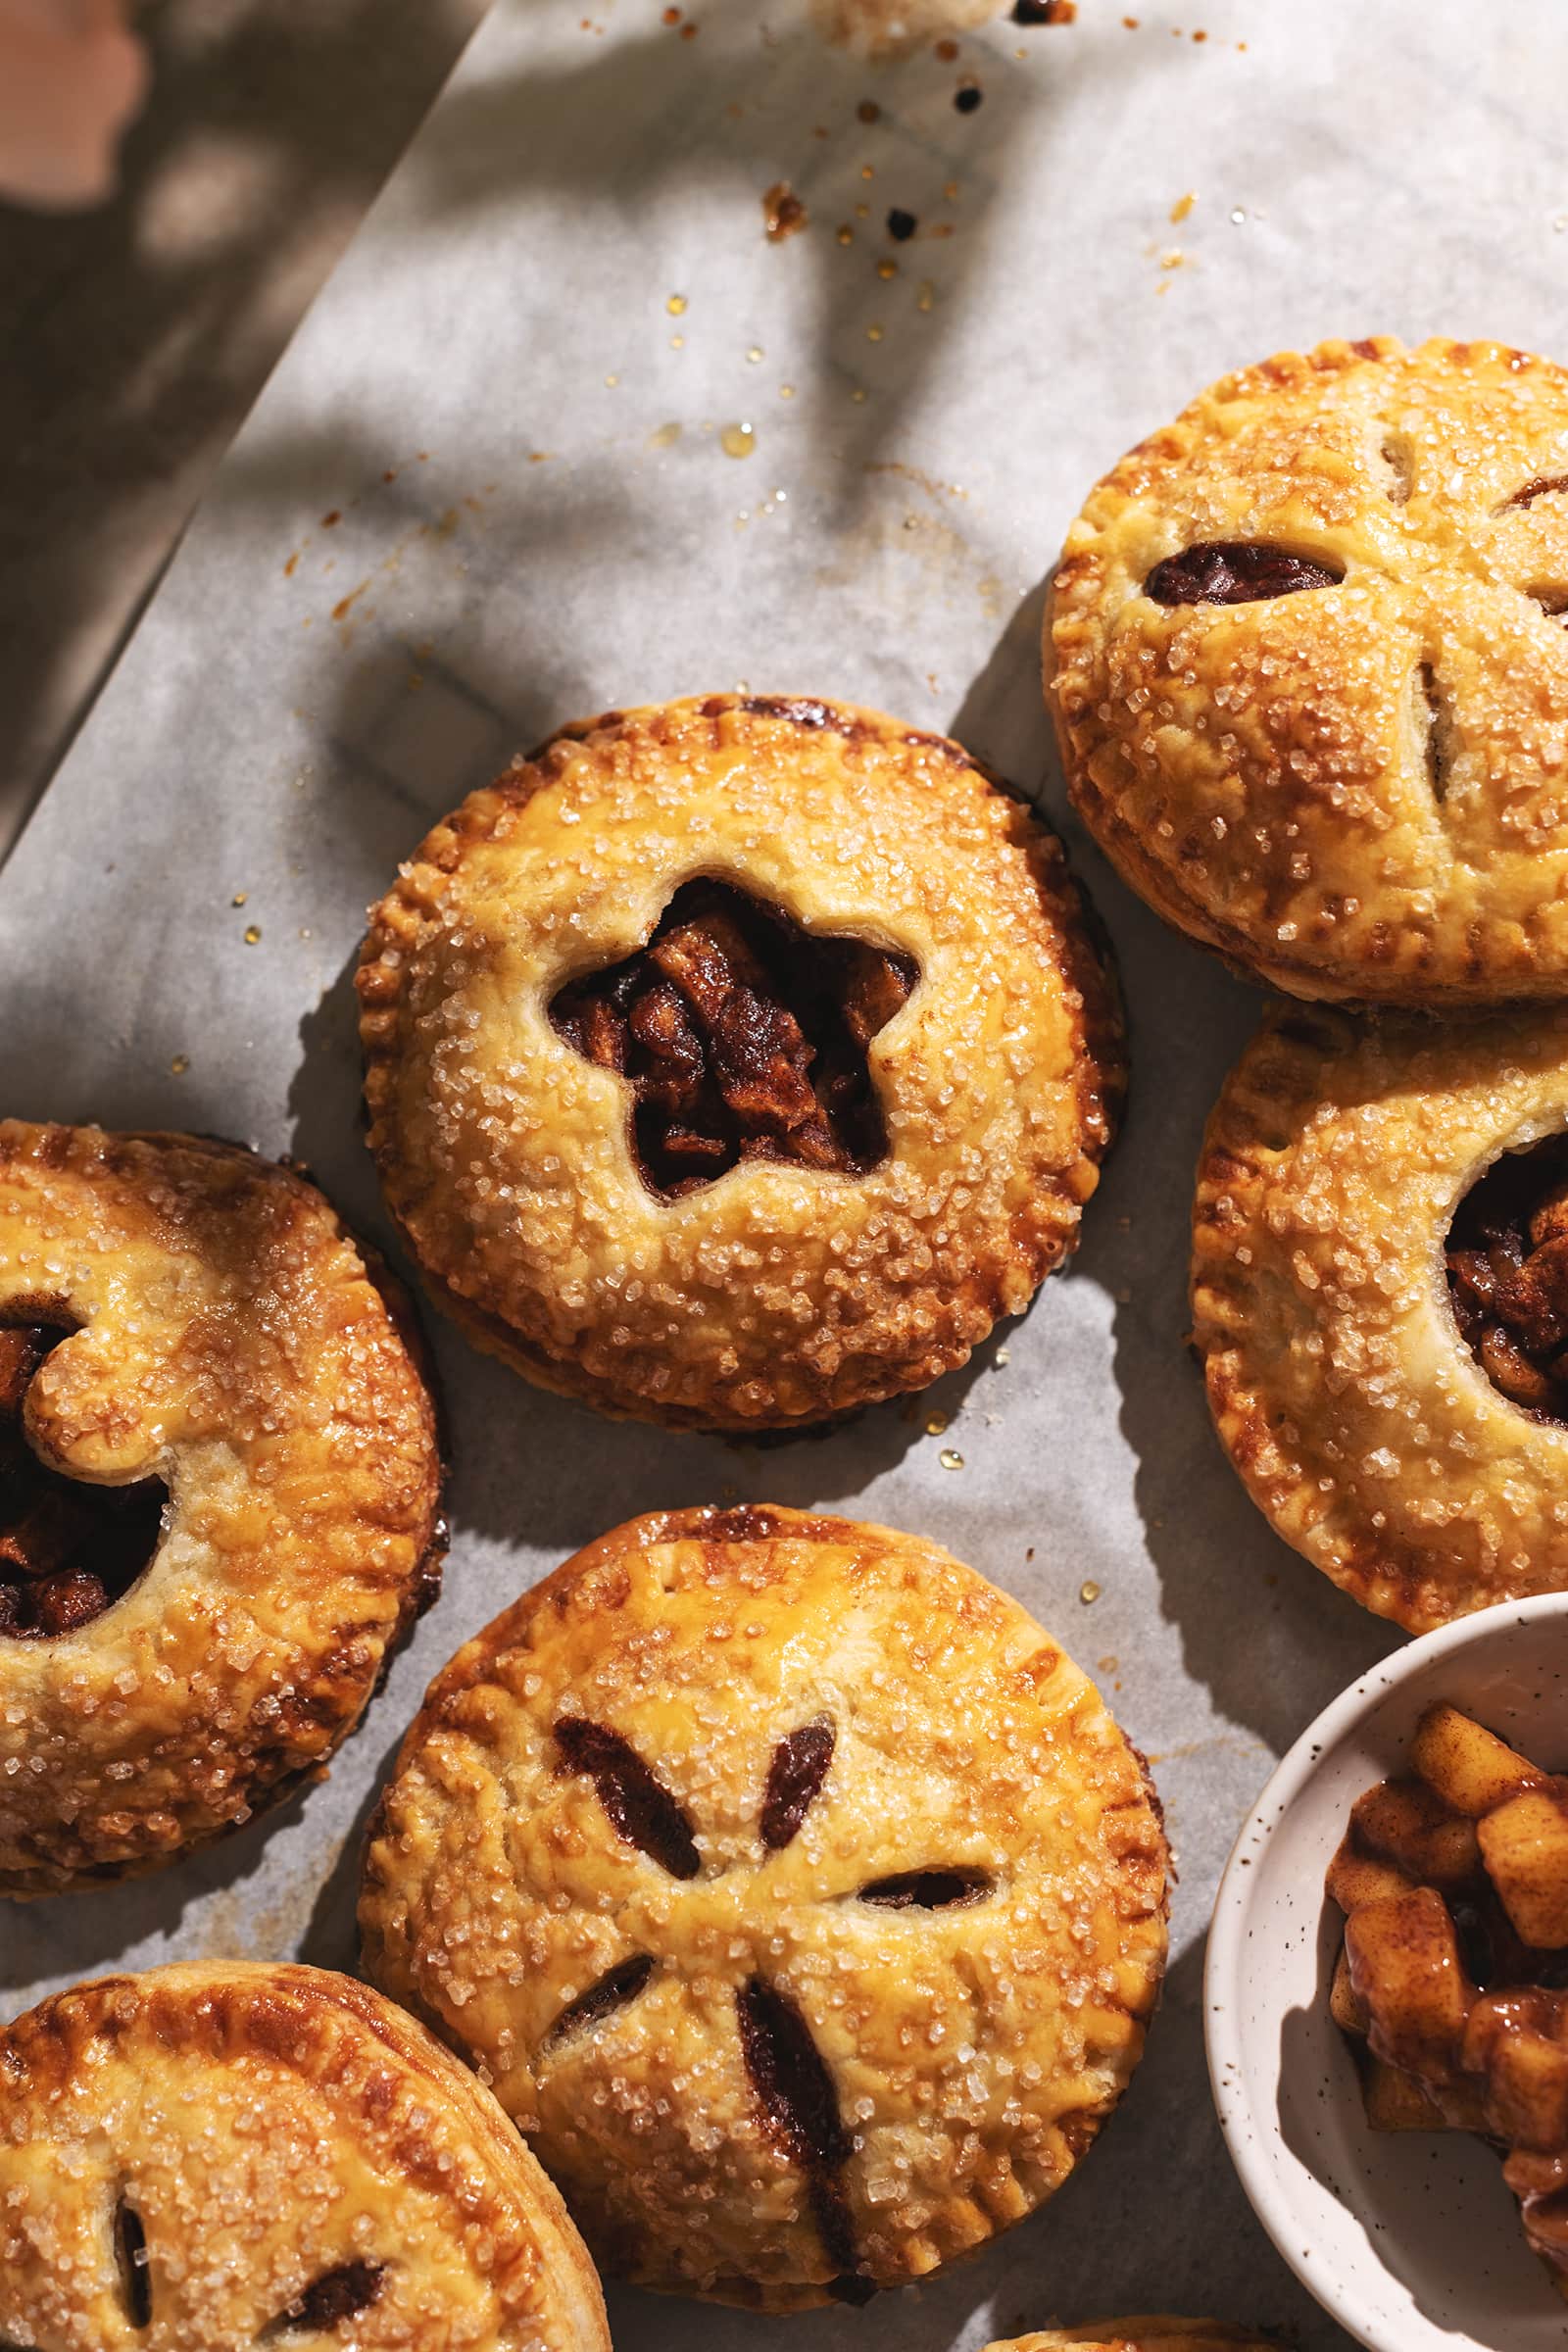
Brush with egg wash - Right before baking, brush each hand pie with a thin layer of beaten egg. Sprinkle with sugar crystals or coarse sugar for extra crunch.

Bake - Bake hand pies for 40-45 minutes or until the crust is golden brown and the juices inside are bubbling. Let cool for at least 15 minutes before serving warm or let cool completely.
Storage
Apple hand pies are best served on the same day they are baked for the best crispiness and texture.
Leftovers can be stored covered at room temperature for up to 3 days. Reheat before serving to crisp up.
Freezing
Both the pie dough and the unbaked hand pies can be frozen.
To freeze pie dough - Wrap well with plastic wrap and/or aluminum foil and freeze for up to 1 month. Thaw in the fridge overnight before rolling out.
To freeze unbaked hand pies - Before adding the egg wash and coarse sugar, put the entire baking sheet of hand pies into the freezer for about 1 hour until the hand pies are solid to the touch. Wrap each pie individually in plastic wrap and/or aluminum foil or place all the hand pies into a freezer bag. Freeze for up to 1 month.
When you’re ready to bake them, arrange the frozen hand pies on a baking sheet and thaw them in the fridge overnight.
Tips & tricks
- Chill the dough overnight. This is important to allow the dough to fully hydrate with the water you added and for the butter to firm up. The dough will be crumbly if you try to roll it out too soon. Plus, you can easily make several batches of dough ahead of time and store it in the fridge for up to a few days or in the freezer until you’re ready to make the hand pies.
- Lift and rotate the pie dough as you roll it. Re-flour the area under the dough often. This helps prevent it from sticking to the counter. If your dough does stick, slide an offset spatula under the area and add more flour to the sticky spot.
- Work quickly with the pie dough and chill it often. Any time you feel that the dough is getting too warm, the butter is starting to melt, or you have downtime where you’re not actively working with the dough, return it to the fridge to chill until it firms up again. Keeping the butter from melting is key to flaky layers in the pie crust.
- Overstuff the hand pies with filling. The filling will lose volume as it bakes so you want to add as much as you can comfortably in each hand pie, as long as you can still seal the edges.
- Enjoy your hand pies on the same day. This pie pastry is the crispiest on the first day you bake them. Although you can store them for a few days, I would recommend only baking off as many as you need.
Frequently asked questions
Yes, the pie dough can be made 1-3 days in advance and stored in the fridge before rolling it out. Unbaked hand pies can be made in advance and stored in the fridge for 1-2 days before baking. Both the dough and the pies can be made ahead of time and frozen to keep for up to 1 month.
Be sure to include cornstarch in your pie filling to soak up the juices that are released from the fruit during baking. Pre-cooking your pie filling can also help to cook out the moisture from the fruit before they are added to your pies.
Pre-cooking apples before using them in pies is not always necessary but it’s recommended. Cooking the apples jumpstarts the process of making them soft and tender. This is especially important if you’re using a lot of apples to your pie or if you’re baking the pies for a shorter amount of time, like hand pies. Pre-cooking also helps pre-shrink the apples so that you can add more apples as needed to the pie to retain the volume after baking.
Tart and firm apples work best in apple pies so that they don’t turn mushy. The best apples to use are Granny Smith, Honeycrisp, Elstar, Braeburn, Jonahgold, and Gingergold. Avoid using Red Delicious, McIntosh, Fuji, Gala.
More pie recipes to try
- Blueberry Apple Pie
- Cherry Apple Pie
- Strawberry Hand Pies
- Cherry Galette
- Peach Plum Galette
- Cranberry Hand Pies
Recipe

Apple Hand Pies
Equipment
Ingredients
- 340 g all-purpose flour
- ½ teaspoon salt
- 230 g unsalted butter, cold and cubed
- 140 g ice cold water
- 3 small tart apples, peeled, cored, chopped into small chunks
- 30 g brown sugar
- 2 teaspoons ground cinnamon
- 1 teaspoon cornstarch
- 1 teaspoon vanilla extract
- 1 egg, beaten
- 3 tablespoons sugar crystals or coarse sugar
Instructions
- Mix dry ingredients: In a mixing bowl, stir together flour and salt.
- Cut the butter into the flour: Add in cold cubed butter and toss to coat in flour. Press the butter in between your thumb and fingers to break them into smaller pieces, tossing to coat in flour occasionally. Work quickly and continue breaking the butter down into about pea-sized pieces.

- Hydrate the dough: Make a well in the middle of the flour. Pour in ice water and mix with your hand to combine until it forms a shaggy dough.
- Press, fold, and shape the dough: Turn the dough out onto a sheet of plastic wrap on the counter. Use your hands to press the dough together. Fold the dough over onto itself 2-3 times to create layers of butter but don't overwork the dough. Don't knead the dough.
- Wrap and chill the dough: Use a bench scraper to cut the dough into two halves. Press and shape each half into a flattened disc shape. Wrap both discs with plastic wrap. Press down on the dough to compact it against the plastic wrap. Chill dough in the fridge for at least 4 hours or preferably overnight.
- Cook apple filling: In a medium pot, stir together apple chunks, brown sugar, cinnamon, cornstarch, and vanilla extract. Cook on medium-high heat until the juices start to bubble. Continue cooking for about 5 minutes until the apples are tender. Set aside to cool completely before using.
- Prep: Line a baking sheet with parchment paper. Set aside.
- Roll out the dough: On a floured surface, place down one disc of dough. Whack the dough firmly with a rolling pin to soften it without warming it up. Roll it out until about ⅛" thick. Use a 4" round cutter to cut out circles. Transfer the dough rounds to your lined baking sheet. Re-roll the scraps no more than once. Repeat with the second disc of dough.
- Cut out shapes: Use a smaller cookie cutter to cut out shapes in half of the dough rounds or use a knife to slice a few lines to allow steam to escape when baking.
- Assemble hand pies: Spoon a generous mound of apple filling onto the middle of each "bottom" round, leaving about ½"-¾" of the edge empty. Gently stretch a matching "top" round and place it on top of each bottom round. Press a floured fork around the edges of each hand pie to seal.
- Chill and preheat: Chill the whole baking sheet of hand pies in the fridge while you preheat the oven to 350°F.
- Brush with egg wash: Right before baking, brush each hand pie with a thin layer of beaten egg. Sprinkle with sugar crystals or coarse sugar for extra crunch.
- Bake: Bake hand pies for 40-45 minutes or until the crust is golden brown and the juices inside are bubbling. Let cool for at least 15 minutes before serving warm or let cool completely.


Matej @ CookWeWill says
My kids love most pies and this recipe scored high with them! Definitely going to make it again, thanks.
Kris says
These were so fun and delicious. The kiddos loved them! Will make again. 🙂
Amanda says
This apple hand pies are wonderful! The crust came out nice and flaky, and the filling had the perfect touch of warm fall spice. Highly recommend!
Lisa says
We had a lot of apples from apple picking so we tried these hand pies. The family loved them! We will definitely make them again.
Relle says
These are so cute. Can't wait to try them. Thank you.